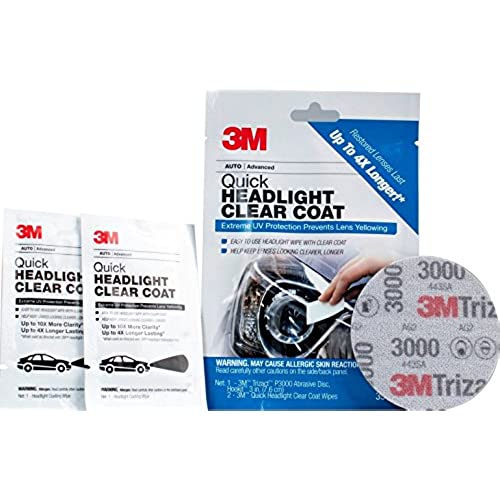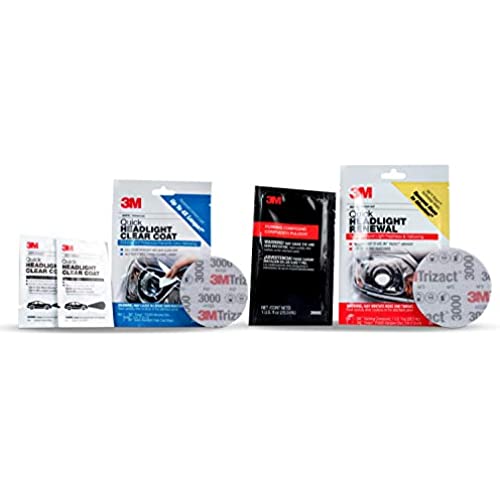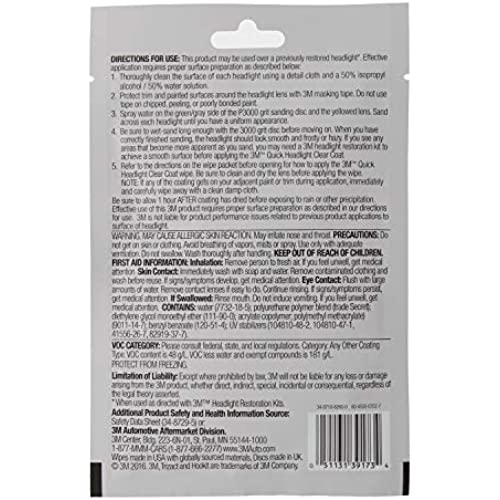


3M Quick Headlight Clear Coat, Cleans and Prevents Lens Yellowing, 39173, 1 Kit
-

KRIS SKILLERN
> 24 hourI didnt think it would work and have paid to have a shop do it in the past. Because it was so cheap I ordered it, and Ill be damned...it worked! Really..this is a no BS review from a guy thats very skeptical about reviews. Really was about 5 minutes of rubbing and still hazy, but then the compound rub on and boom!! Perfect. Couldnt believe it.
-

A. Corson
> 24 hourIve polished so many headlights and tried several different kits but never found much luck for long term results. So far this seems to greatly extend the life of the polish. By at least 10x but I havent had enough time to see if it continues to look good 3 or 5 years later. Anyways, did wifes Toyata Sienna with a wet sanding pack from 800 to 3,000 grit. Wiped twice for each grit, lots of water, paint was taped off. New grit paper for each lamp. Cleaned front end, reapplied masking tape and finished with coating. Wow! Really did look like new, even my son agreed. Biggest trick was to make sure there were no bubbles in the gloss when it was applied. It had a good working time and I was able to fully coat the lens 3 times without running into issue with premature drying. This allowed a thin, even, and ocular coat. Looks like new for now!!
-

TK
> 24 hourI need to clear up some misconception about this product based on reviews I’ve read. First, if you are reading this keep reading you will learn exactly what you need to do from an individual with experience with this stuff. You looking at products like this because your headlights are not looking so hot anymore. So what are your options? Option One If your headlights are lightly oxidized: I know “oxidized” is not the best word, but what I mean is that basically this kit, “3M 39173 1 Pack Quick Headlight Clear Coat” is an extremely light buffing kit that is the equivalent of using a light rubbing-compound before waxing your car. So, if your headlights are lightly oxidized this kit will likely work. However, I am guessing your headlights are much worse and you are nervous about putting sandpaper on a drill and sanding your expensive headlights. I understand, but do not kid yourself, the 3M 39173 1 Pack Quick Headlight Clear Coat kit works, but its not a miracle product. Hence, I urge you to read Option Two. Option Two If your headlights look like my headlights in the “Before” picture attached with this review dull and pitted, the product you need to purchase is “3M 39045 Headlight Renewal Kit with Protectant.” This is a heavy-duty kit that includes the sandpapers to resurface your headlights in three steps using the following sandpapers and wet-sanding pad. • 500-grip sandpaper (heavy duty sanding to smooth out the surface and pits) • 800-grip sandpaper (smooth’s out the scratching from the 500-grit sandpaper) • 3,000-grip wet-sanding pad (smooth’s/removes out the swirls left by the 800- grit sandpaper) • Headlight Clear Coat (final application) The attached picture is my Mini headlight that has 13 years with 165,000+ miles on of wear-and-tear on it, and as a result my headlights were massively dull and pitted. The “Before” picture really does not do it justice to show just how bad they were. Attached Image Break Down • The first image shows the headlight before it was restored. It really does not show how dull and bad the pitting is, but it was really bad. • The second image shows how the headlight looked after sanding with 500-grit sandpaper. There was another sanding step with 800-grip sandpaper, but I do not have an image of that. • The third image shows the headlight after sanding with a 3000-grit wet-sanding pad and then sealing the lens with the protectant. The Restoration Process Is Simple with the kit 3M 39045 Headlight Renewal Kit with Protectant.” 1. Clean the headlights with soap and water. 2. Tape around the headlight with the included green tape. NOTE: I used additional blue tape because I did not want the sanded plastic to get into my headlight pop-up washers. This is why there are two layers of tape. 3. Sand the headlights with 500-grip sandpaper. 4. Sand the headlights with 800-grip sandpaper. 5. Wet Sand the headlights with 3,000-grip sanding pad. 6. Clean the headlights (make sure they are dry), and then seal with the included protectant. There are some good YouTube videos showing you how to use this heavy-duty kit. Just take your time and your headlights will look great again. Tips 1. Separate your sandpapers into two stacks. One for each headlight. 2. As you are sanding down the headlights, occasionally clean off your sandpaper buffing pads; you can do this by patting them on a towel or something. This will unclog the sandpaper, thus allowing you to work more efficiently. After I was done, I put the sandpaper buffing pads away because I can use them again for one more job. Conclusion I am not trying to sway anyone into buying something you do not need, but after reading a bunch of the reviews here, and knowing my personal experience and aptitude with mechanics, it is obvious that many individuals with negative reviews are not being realistic about what this kit does, and do not want to purchase the correct heavy-duty kit that they really need. To Clarify: Bottom Line 1. If your headlights are lightly oxidized use kit “3M 39173 1 Pack Quick Headlight Clear Coat,” and go with Option One. 2. If your headlights are dull and/or pitted use the heavy-duty kit “3M 39045 Headlight Renewal Kit with Protectant,” and follow my instruction in Option Two. ******* Please let me know if this review was helpful by clicking the “Helpful” button below******* THANK YOU!
-

David Franklin
> 24 hourThis product works! It was a little tedious at first as I was not used to repetitive steps. The car was a 2004 Chrysler Crossfire which my wife said night driving was scarry, especially in the rain. She had to use her High Beams to see the road. It took me more time than expected (probably due to the accumulated material on the surface of the headlight covers) but she was very happy with the results. I am buying another kit for my own car.
-

Troy
> 24 hourI havent used any other kits, so I dont have anything to compare with 3M. The 3M works so well that I wont use anything else. It made the dingy yellow headlight look almost new.
-

Chi
> 24 hourItem really works well. Made my headlights as new again. Will recommend
-

Bob Barker
> 24 hourI use this product first on a 2007 Ultima and it worked great. The headlights went from very cloudy to almost perfectly clear. It works so well that I then tried it on a 1999 Subaru and had similar results. It went from pretty cloudy too very clear. Being that happy with it then decided to tackle the headlights on a newer BMW. At the start, these weren’t terribly cloudy, but definitely had some wear on them and I figured why not see if this product improved them. Unfortunately, the product seems to have made them quite a bit worse. Almost as if the rubbing compound didn’t work. They look like they did after I first sanded them, so I’m not sure why the rubbing compound didn’t make them clear as with the other two cars. So I’m not sure what to think, perhaps there are different kinds of plastic on headlights? Anyway, they made the first two cars look great which was really what I bought the product for so I’m not entirely disappointed in it.
-

Anais H.
> 24 hourGreat product, worth buying. My lights were so bad - Tried to show it in pic. Left is before, right is after. I could barely see when I drove. This was a game changer. My car is super old but this did the trick at least to make it last a bit longer! I probably could’ve spent some more time on it and it would be a bit clearer. Not perfect but way better.
-

Jason Tu
> 24 hourmust have power tools
-

dbsaurus
> 24 hourI did a Scion XB, I consider it a medium size headlight. In my opinion you need two headlight kits to do a good job. The clearcoat dries fast so I would do one wipe per headlight instead of two especially if your headlight lens are more vertical than horizontal. The kit’s one disc of sand paper breaks down after sanding the first headlight so you need the sand paper from the second kit to do a good job on the second headlight. Overall wiping the clearcoat on worked better for me than spraying clearcoat on. I thought it was a good product for lightly hazed headlights.
