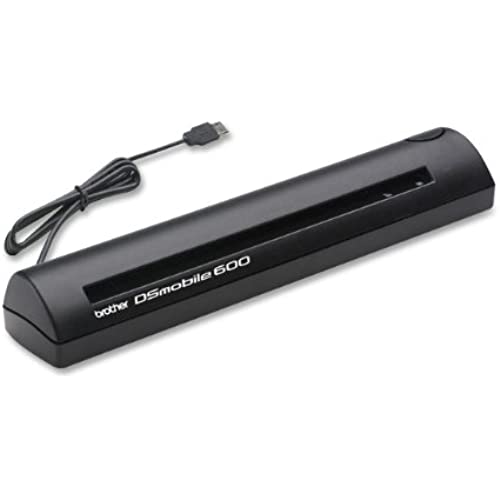
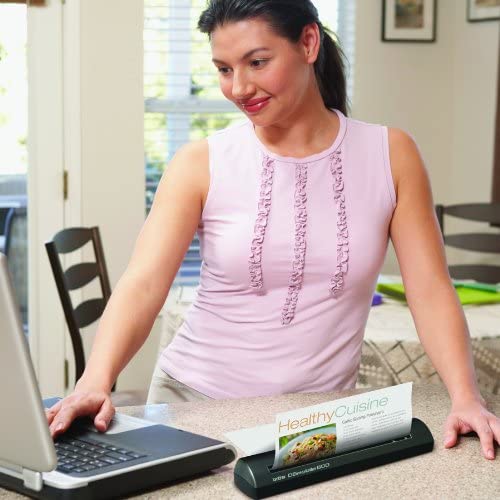
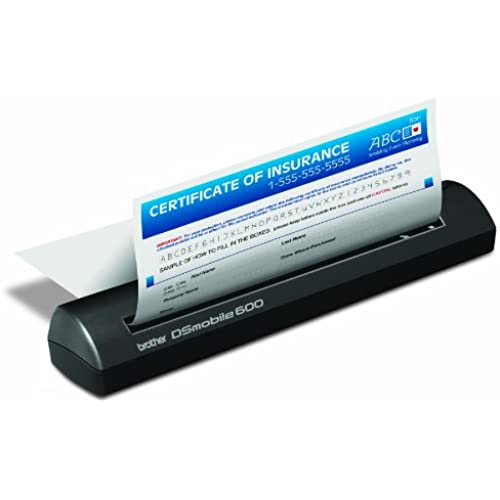
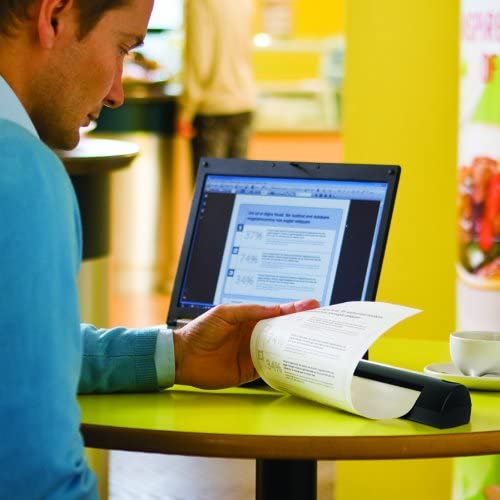
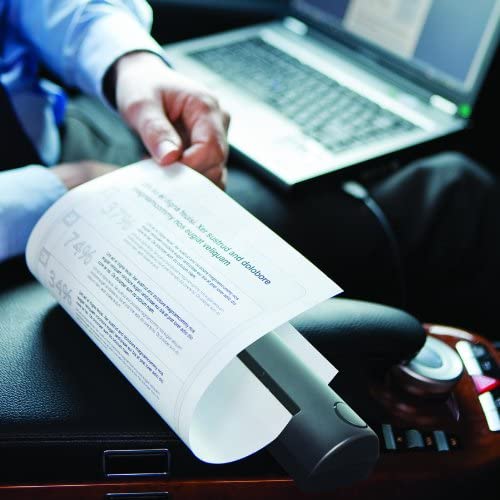


Brother DS-600 DSMobile Scanner - Retail Packaging
-

Gale Lee
> 24 hourIn retrospect, I would likely have been better off purchasing a standard wireless printer and keyboard combination, but I wanted a nimble scanner to digitize my pay stubs. This scanner does a better job than many similar products, but it certainly takes some work! While I would not actively recommend it to anyone, I certainly wouldnt recommend against it-- so long as you know what youre looking for. PROS + Light, sleek design. The included pouch is pretty minimal (and it doesnt even have anywhere to store the included cable), but you can slip it into a backpack with minimal fuss. That being the whole reason youd buy a portable scanner, Id say this has it down in aces. + Relatively simple operation. Its a push button scanner, and when connected to Windows 7 (x64), it launched the Fax & Scan application with minimal fuss. Itll also accept sending the scan command from the computer itself. + High quality scans. The images you get are easy to read and perfect for paystubs. You can use color, but since Im more interested in content I never really bothered with the color mode. + Quick operation. Major caveat; you definitely will need some practice (see CONS below). Once youve got the hang of it though, you can scan at a pretty good clip. CONS - Difficult to use with a Mac. This scanner is TWAIN compatible, but it really doesnt play very nice with OS X 10.7 Lion or OS X 10.8 Mountain Lion. Image capture often does not want to recognize this device, so be aware that it can be a real hassle to use. (I have a background in IT service, so Im very familiar with peripheral trouble; this isnt necessarily hard to use, but its much more annoying than its worth). - Not plug-and-play compatible with Windows 7. This personally drove me a little bit nuts, because I hate having to use manufacturer disks if I can at all avoid it. In this case, however, you do want to install your drivers from Brothers site or the disk before scanning. It will not work otherwise! - Its somewhat difficult to scan documents correctly. You need to line the paper flush against the scanners right side and press forward. If you do this correctly, you will hear a motor whirring and feel the paper feed pulling your sheet in by about a tenth of an inch. If you dont feel this, you will have to keep playing with it until you hear the motor. Otherwise, the scanner will not pull your document after you press the scan button. - Theres no paper guide. This was the biggest failing of the product in my eyes, and one I hope to remedy with a DIY fix later. The lack of a paper guard makes it very difficult to align the document youre scanning and preventing it from skewing during the scan. - The weight of the included cable will cause the scanner to tip over if youre not careful, which will definitely ruin a scan. Use this on a wide flat surface! This also helps because scanned documents exit out the back on a flat angle, so anything behind the scanner will cause the sheets to jam. - Even fully aligned against the scanner, youre going to get annoying black bars along the side of the documents you scan. This is probably my biggest gripe, because this scanner does not work that well with a Mac, yet Image Capture is much, much more useful than Windows Fax & Scan. On the whole, this is a good scanner, but know exactly what youll be using it for before you buy!
-

Carolanne Swift
> 24 hourIts portable and works well in that respect. It is also USB powered and works off your laptop battery, so you will not need batteries or to plug it in when you are traveling, which is a nice plus. But two major drawbacks: 1. Wont scan to PDF. Of course you can scan, then open the image, then save to PDF if you have Acrobat, but its a lot of extra steps and hassle when you are a busy professional. 2. Also, it scans a multi-page document as a bunch of separate images. So, there are my comments. I carry this one with me when I travel, but try to avoid using it unless absolutely necessary for contract signing or something similar. EDIT: So, I am modifying my review based on the fact that I figured how to scan to PDF. Its an option (not the default) and you can do it if you install the additional software CD that comes with the scanner. It will also scan a multi-page document, but you have to scan the first page, and then a little dialogue box comes up and you can choose to scan an additional page. So that is a PRO. However, that being said, for some reason, the PDF file sizes are HUGE, (for example, I scanned an 8 page contract, file size was so large that I couldnt attach the file to Yahoo email (it was well over 20 MB), it kept prompting me to use Dropbox), I solved the problem by reprinting the file to PDF and making it smaller using advanced options in Adobe. Obviously that is not an option if you dont have a full version of Adobe Acrobat on your computer. So, yes, you can print to PDF, and yes, you can scan multi page, but there are issues. In my opinion, its a toss-up-- its still a great option for a bare-bones, USB-powered scanner that you can throw in a laptop bag and take with you. But for use in an office or something like that, its just not convenient at all.
-

Kelly.V
> 24 hourI bought this item for scaning bills and receipts, insead of having to file away so much paper each month. We are using this more as a tool for doccumentation, rather than technical features so the image file or document doesnt have to look perfect-- it just needs to scan perfectly so we can reference the information in the future. The best parts are that it is so small and easy to use. You can scan in black & white, or color (the color seems to be pretty true to life) and having the ability to save the information in several formats (.pdf, .jpg, .gif) is a definite plus. Another plus, the scanner is not powered by an electrical outlet-- its powered through the USB port, so it is really simple to use when youre travelling or dont have access to a plug. I highly recommend this product to anyone who need to quickly scan receipts, bills, and other items of doccumentation.
-

Inita Baer
> 24 hourPurchased this scanner based upon all the rave reviews from others, but theres not much comment on the Mac side. The retail box only says it works for Windows, but dont stress Mac zealots. This scanner works on Mac OSX 10.3 to 10.8. I paid $140 and some change and got the scanner within a week. I have a weigh scale thats super accurate, so I can tell you that the scanner is fairly light for travel purposes. Scanner weight is 10.8 ozs and total weight with USB cord is a svelte 13.8 ozs. Installation was a bitch, because theres no written documentation. Companies are putting the instructions on the discs or online to save on paper costs now a days. Ill walk you through the install on the Mac side in case you dont feel like searching for the exact document online or reading all that bloat ware on the disc. First, DO NOT plug the thing into your laptop when you get it, because your Mac wont recognize it without the software driver. Second, DO NOT bother with installing the included disc as the software driver for the Mac is outdated. Third, go on line and copy and paste this address: [..] For some reason, Amazon deletes my link addresses. So, if you dont see the link address above- Go to Google and type in Brother DSmobile 600 Mac drivers in the search field and press enter. You should select the top or second selection when Google returns the results. The latest software driver for Mountain Lion is 1.3.8 Download the DMG file onto your desktop and then double left click to open the DMG folder. Then follow the instructions and they will prompt you to restart the computer after everything is installed. Now click on finder at the bottom of the screen and type Image Capture in the search field. Left click on the camera icon that says image capture and drag it down to your dock. Now you can start the calibration scanning: Plug the USB cord into the scanner and into your laptop. Click on Finder, Applications folder, Utilities folder, and scroll down and double left click on DS 600 Mobile Calibrator to open it. Then use 1 of the Calibration Direction papers and make sure you fully insert it into the scanner. You will have to play with the paper and insert it in the middle, since there are no paper guides. The document wont take if you insert it all the way to the left or right edge or dont push it in far enough. Now click on calibrate and let the scanner do its thing. A message box will say its done calibrating when you do it correctly. Open the Image Capture program that you placed down by the dock. For regular black & white docs you select: Document Feeder, Text, 1 bit, 600 dpi so the text can be read easier, US letter, Scan to Folder is where you want the file to be saved, Name the scan whatever you like, select PDF for ease of compatibility when sending docs via e-mail, automatic task is selected for preview, and none for image correction since your scanning text. Now insert your paper and click scan. The black button on the right of the scanner only works for PCs, so dont bother pushing it or you will look stupid when nothing happens. If your scanning receipts in PDF and dont like the black border wasting all your ink when you print. Heres what you do after the document is saved in PDF. Go to where the document is on your computer and open it using the Mac app Preview. 1) Choose Tools > Select Tool. 2) A + symbol will replace the black arrow and you will left click and drag the portion of the page you want to keep. 3)Choose Tools > Inspector, and click Crop to crop just that page 4)To crop every page in the document to the selection, click Crop All Pages. 5) You can also select rotate page in case you scanned the page upside down 6) Now save the document you just cropped by pressing command S or when you close the document the computer will ask if you want to save your changes. If you want to group multiple pages together into one document. Heres what you do- Open up the document you want using the Mac app Preview, left click view at the top header, then make sure side bar is checked for show sidebar. Now drag the other PDF docs you want into the sidebar to group them with your first doc. Now just save the document and Shazaaaam!!! All your docs are grouped into one document. Now arent you glad I walked you through this set up? 2011 Update: I have since sold this scanner and purchased a Fujitsu Scansnap S1100. The Fujitsu is slightly more than the Brother, but well worth it, since its more Mac friendly and the button on the Fujitsu actually does something when you press it.
-

jzilla80
> 24 hourI have mostly good things to say about this unit... The one issue I wish to inform everyone of is the constant issue of having to rescan because the document was not inserted perfectly straight into the feeder. (there is no alignment tool or otherwise consistently accurate way to insert document straight) This may not be an issue to some, but I like my scans to be decent enough to be reprinted and used as originals and with a solid black space on either side where the scanned document was absent (offset to either side) during the scan, that screams copy. Since an add on clip is not likely to be made for this no longer new model, I tried something simple of my own design: - I used 3 small strips of dark tape on a piece of lite paper, in order to have a reference for consistently straight scans. 1) First, I added two strips of tape to show where to place 2 corners (one on each end). This kept the scanner in the same position every use. (This only works if you will be using the scanner at home in the same location OR if you choose to add this tape outline to a piece of paper and roll it up to take with you wherever the scanner goes!) 2) THEN, I used the last piece of tape to show where you must align each documents right side - place it about 6 out in front of the scanner and thats about it... Like I said, simple!!! (but effective) (Obviously, You must calibrate this yourself before placing the tape permanently.) It has worked pretty well for me, but I dont travel with it, so ??? * Besides that issue - All is well: Quality of scans are great and very adjustable in case your more concerned with scan time, in which Black n White, lower Qaulity (200-300 dpi) scans are best, versus color, high quality (400-600 dpi) scans, ideal for photos even... Hope this helps someone!!! Good day to all, Josh D
-

Manuela Schinner
> 24 hourI have bought three of these for my business, to scan documents from the road and send them in to clients. I only use black and white at 300dpi, which creates a very small file but a very clear image for documents. This scanner does the job well, and none of my three scanners has broken down yet, after 6 months of light use. There are several drawbacks: 1) Almost every page gets scanned in a little crooked. Im thinking that there is a knack to getting it to go through perfectly straight but I havent figured it out yet, one of my employees does pretty well though. Anyway, it is good enough, but still annoying 2) The whole process is tedious with multiple pages, hand-feeding one at a time, going through the program to tell it to scan each page. I shouldnt complain because this is a portable scanner, but one day maybe someone can make a portable scanner that can handle multiple pages by itself. 3) Occasionally it has trouble identifying that a piece of paper has been put into the scanner. The easiest solution for me has been to unplug the USB connection, plug it in again and try again. 4) You can only scan individual sheets, you cant scan out of books, newspapers, etc., like the HP Capshare 920. (The Capshare is unique in that it was made in the 1990s and is still better than anything on the market today. Unfortunately they stopped making it, you have to find it on Ebay.) Everything else is great, it gets its power from the USB connection and does its job. Update 2/24/2011: It has now been a year, and all three scanners are still running strong, no problems. Problem #3 that I mentioned above has ceased to be a problem, I think I was somehow putting the paper in wrong. You have to slide the paper in far enough to trip a tiny switch, and then allow the scanner to automatically pull the paper in about an inch before you start the scan.
-

Doug C
> 24 hourI purchased my first DSmobile 600 in 2007 when it was under the Pentax brand, and I picked up two more last year for my sons schoolwork and for my office. I continue to be impressed with the quality, support, and ease of use of these scanners. The Windows 7 calibration problems mentioned elsewhere in these reviews appear to be gone in more recent drivers, and the TWAIN drivers also (at some point) added auto-crop and deskew, which makes receipt scanning a breeze. Brother continues to support and improve on the software behind this product to a level I dont often see from other similar companies. For reference, I run both 32-bit and 64-bit Windows 7, and I havent had any problems recently on either version. Note that many receipts use a thermal paper which tends to overexpose with heat/sunlight. Either scan these receipts quickly, before that happens, or clean and calibrate the scanner regularly. Ive found that a simple calibration can often improve the image quality quite a bit without the need for a full cleaning. Calibration has even helped with (but not solved) a problem on one of my scanners which was slightly damaged due to a staple I didnt see.
-

Tony D. Baker
> 24 hourI bought this to scan expense receipts and other assorted information needed by my company. Since I am on the road constantly, I needed something like this instead of constantly looking for scanners and digital senders everywhere I go. PAY ATTENTION to the instructions and load the software BEFORE you plug this into your computer. Make sure even little receipts are snuggly against the right side of the in-feed, and don’t stuff them in past the stop. The little feed rollers work as designed and will grab your items and feed them through. If you try and feed little receipts into the middle of the in-feed, they will turn and not go through straight and your image will be skewed, but that’s not the machine’s fault. I was hoping for a carrying “case” to protect this a little better (it is getting stuffed into a back pack) but what you get is a carrying “bag” with a draw string closure. Better than nothing I suppose. I’m waiting for the Afghanistan moon dust to kill it like it does every other piece of IT you bring out here, but this is holding up well under some pretty harsh conditions. Highly recommend.
-

Clevelander83
> 24 hourI returned this scanner after one use, and I believe that the one I received had some defects. Installation was fairly easy. The very brief instructions make it clear that you have to install the software FIRST before connecting the scanner. The software disc has a more detailed PDF guide. Pros: - Its slim, good for travel, and the carrying pouch is included - The power source is your computer through a USB cord (included) - The scanner is very quiet and barely makes any noise when working Cons: - The power button has no light or indicator of any sort to let you know when the scanner is on. My scanner was slow to power up and sometimes the button did not seem to respond, but I believe thats due to a defect. - You can only feed ONE page at a time. If youre trying to scan multiple receipts or pages into one PDF document, you feed one through, wait for a screen to pop up, click continue and feed the 2nd page, and so on. All in all, pretty time consuming. - The scanner does a terrible job at detecting an inserted document, especially if its a receipt. With almost every receipt, I had two error screens pop up, one telling me the scanner could not detect a page, and the other one asking me if I wanted to proceed. When I clicked yes, it would actually scan the receipt, but it was very annoying to have to click through the pop up screens all the time. - Other times, the scanner seems to think its scanning something when theres no document being fed through...and it does not stop until it scans for a pre-set amount of time. - With folded and bent receipts, it took me 2-3 tries to get a semi-decent scan, and even then, the image in the PDF file was crooked and not 100% clear. The scanner seems to have an especially difficult time with folds and starts pulling through one side of the page quicker than the other. - Most documents do not feed through straight since there is nothing guiding them - Anything you scan has to be clearly printed with dark ink. This scanner does not really detect lighter ink, faded lettering, etc.
-

b7
> 24 hourThis will be a bit of a lengthy review, as I will describe how I personally use the scanner in my digital office. I will also address some complaints other reviewers mentioned and some easy tips to address them. Some reviewers mentioned the scanner doesnt always grab their documents. To fix this, just make sure you align the document properly along the right-hand side of the scanner. The scanner will not grab receipts that are inserted aligned to the left, or even the middle of the scanner. But if you insert them along the right-hand guide, the scanner will grab them every time. Another reviewer mentioned that their files are frequently skewed a bit. I found a great solution to this as well. If you go into Windows control panel and open the scanner settings, you can adjust how long it waits before prefeeding. I doubled the time (from about 1 sec to about 2 sec), and now I have plenty of time to properly line up my document before it prefeeds. Another handy thing you can adjust here is the prefeed distance. I changed it to the smallest settings, because the default setting was sometimes cutting off text on pages that text at the very top of the page with no margin. How I use the scanner for my digital office: 1. Optional: Set up free Dropbox account. This is a good place to store your documents because its seemlessly backed-up to the cloud. 2. In control panel, edit the scanner settings and change the prefeed delay and distance to your preferred settings. I increased the delay and decreased the prefeed distance. 3. Set default scan type to .jpg (much better quality scans the PDF setting). Set default folder to Scanned Documents under My Documents. I like to use resolution of 200dpi. It results in pretty small file sizes, that can be reprinted nicely. DS Mobile automatically deskews, and detects end of page. Set page size to 14 - that way you can scan anything up to that length. 4. When DS Mobile is opened change settings to Open Program after scanning. Using the program called wfs.exe. This is the Windows 7 Scanner software. It works much better in my opinion than the included Pagemaster software or whatever. Using the Windows Scanner software, its easy to rename and sort your files into subfolders. Use vendor names for your subfolders. To name the actual scans, I always do 2011-07-20 Gas Bill or something like that. That sorts them by date nicely which makes it easy to find files later. 5. Optional: Adobe Acrobat Professional is a good program to use to later arrange your files into searchable pdfs. I dont normally need this feature so I usually skip it. I put this together briefly, so feel free to ask if you have any other questions, or good tips you discovered. -Pinny

