
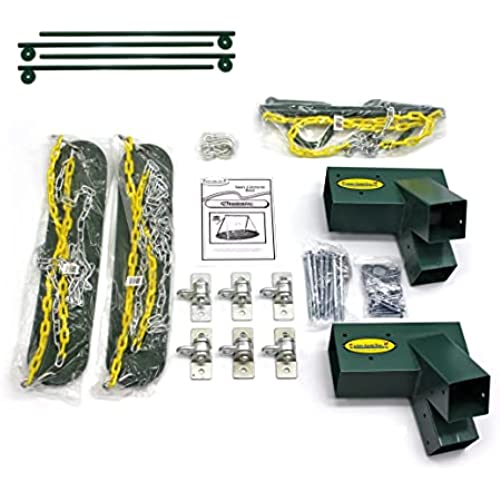
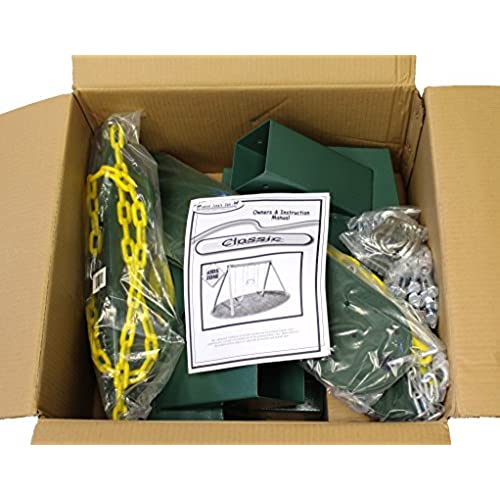
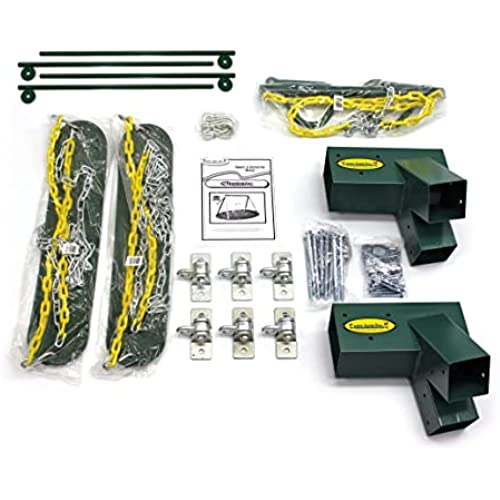
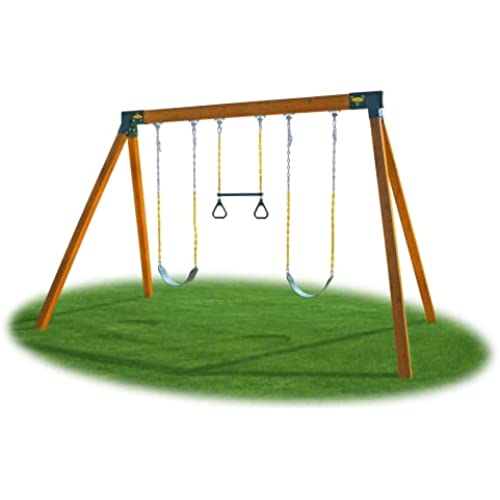
Eastern Jungle Gym DIY Swing Set Hardware Kit with Easy 1-2-3 A-Frame Brackets, Swing Seats, Ring Trapeze Bar and All Assembly Hardware and Instructions - Wood Not Included
-

clint droll
Greater than one weekBe prepared to sand every single post that is supposed to fit into these “easy” brackets. It’s an absolute joke that it takes so much personal labor to get these to work. I have an idea, make the bracket openings a little larger and provide a pack of shims. Dang.
-
Bear
Greater than one weekGreat kit! My dad and I were able to put this together in maybe 3 hours or so. We used 10 4x4s for the legs and a roughly 14 4x6 for the top. A 3/8 bit did the trick for drilling the beam to run the hardware through. As a lot of reviews have mentioned, be prepared to do some sanding to get the 4x6 through the brackets. The little screws that attach the logo to the bracket stick out on the inside which was kind of annoying for trying to get it through. We set ours up so that we had the legs on one side, a swing, the swingy bar thing, another swing, then slid the beam all the way through the bracket so it stuck out about 4 feet, then bought another baby swing and hardware to mount on the part that hung off past the 2nd bracket. We also augured out some holes and set the leg posts in concrete. The kids love it, it seems incredibly heavy duty and will serve us for years to come. Altogether, even including the extra stuff we bought, the wood, the concrete, and some extra hardware we picked up, it came out to about $450, compared to $600 for the version available with the cedar included, and ours has an extra swing.
-
sl333
Greater than one weekMy boys swing high, and my previous swing set moved so much that I was worried it would fall apart while they were swinging. This is a really sturdy, heavy-duty swing set. The wood required to build this is twice as thick as the wood that came with my previous swing set kit, and the hardware is no joke. I love the fact that adults can swing on this now. When I read the reviews, I was worried about my brackets not going on easily. But after a little sanding, they went on without any problems using a rubber mallet and wood block to hammer it in. The hardest part for me was drilling 12 holes straight through the 4x6 beam since I dont have a drill press. I had to buy an extra long drill bit and watch a youtube video to figure out how to do that! But everything else was fairly easy. Im definitely glad I upgraded with this kit.
-
Scott robertson
> 3 dayNice and easy set up. However I need to figure out something else with the bolts. Might have to drill completely through and use nuts and bolts. The screws/bolts that come with it keep coming loose. Not very happy with that. I know it’s probably too much. But I think instead of using a 4x6 they could have made the brackets to hold something a little bigger. Just for added stability. Watching my 12 year old daughter swing and watching the 4x6 twist as she’s swinging kind of nerve-racking
-
Alex D.
> 3 dayI bought this swing set for my daughter since her old metal one was starting to fall apart. I originally was looking at fancier units but she said all she wanted was some swings and a trapeze so she could hang off of it. This kit caught my eye because it looked pretty beefy. Anyway, the kit arrived and I was not disappointed. The brackets are beefy and especially the hinges. They look like something off of a commercial grade swing set. I went with treated lumber and the total cost was around $80 for all the pieces of wood. Assembly took about 2 hours and I did it by myself (NOTE: Im a fairly tall and somewhat well built person and struggled a little so 2 people would make this go a lot smoother when inserting the legs into the top beam.) My advice, assemble the top beam with the brackets and hinges first inside a garage, or on the bed of a pickup truck as I did, then move it into place and assemble the legs. For drilling the bolt holes I just used a small framing square to make sure the bit went in straight. The only gripe I have is that I wish the vinyl/rubber coating on the trapeze chains didnt go up so high. I have it on the closest chain link to the coating and it is still too low to the ground for my daughter. Ill try cutting it away so I can raise it higher. In the end, this was well worth the money.
-
WV Knife Life
> 3 dayBrackets worked exactly as I hoped they would. Great quality and theyre very sturdy. The swings are great too!
-
Wisconsin Reader
> 3 dayOur kids are getting older and we wanted to down grade from our massive, yard stealing play structure. Our kids no longer used the climbing wall, clubhouse and slide that we had. But they still enjoy swings. So I purchased this kit. The hardware and fittings are sturdy. We purchased the wood locally on our own. The set looks great and doesnt take up an obnoxious amount of space. With that said, it wasnt as easy to put together as we thought it would be. No complaints with the finished product though.
-
captusa
> 3 dayThis kit built one strong swing set! I used 10 legs and a 12 beam. Assembly was pretty easy with the right tools. I used treated pine. I laid out my hardware pieces on the beam to get a basic sense of spacing. Then, I corrected for uniformity. Basically, the swings are 18 apart from each other and 12 away from the brackets. Because of the lean of the legs, you could get them closer to the brackets without issue, but I liked the look of the spacing. I also left 6 inches of the beam sticking out of one side to install a climbing rope. Then, I chalked out my spacing and started drilling some pilot holes. When using my 3/8s auger bit, I drilled from the bottom, but turned it over to countersink the top. I really recommend doing that. It makes the holes clean and keeps the tops of the bolts flush with the wood. That way, if anyone gets on top, they wont have to deal with metal sticking up. After the bolts were installed, I slid on the brackets. Ive heard others complain about this, but my wood was dry enough. They made a snug fit, but it didnt require any planing or sanding - just a few taps with a rubber mallet. When assembling the legs, I added one side and rested the other side on a ladder. (I did need some help guiding the second set of legs into the brackets, but that was the only time I needed an extra set of hands.) I adjusted the legs, drilled some pilot holes and bolted it all together. Finally, I took a hand planer to the edges to round them out a little and voila! All-in-all, it probably took 3 hours or so. Its so heavy, I didnt feel the need to stake it down. I tested it out with 2 heavy adults and it easily held 500 lbs - even with the longer beam. And because of the weight, there was no risk of tipping it over. Really great product!
-
Benjamin Levi
> 3 dayThis kit was an excellent value and what a great way to cut the cost of a solid swing set at least by half!! You get everything that you need except for the lumber. Really simple to put together.
-
Michael Moore
> 3 dayThe hardware kit appears very heavy duty and proved fairly easy to assemble. I did it by myself but would recommend 2 people, particularly to move to the final location, upright, and level. I used large furniture sliders to move it around on the grass fully assembled. The only thing I might do different is to make the legs using 9 ft. - 4x4s. I bought 8 boards as recommended by Eastern and now wish it were a tad taller. I had to sand the 4 x 6 top beam quite a bit on one end to get it to fit (used random orbital sander). I ended up using a 3 lb. sledge and a large block of wood (to prevent bracket damage) to get that end on. The second end required a bit of sanding but went on much easier. I also recommend a drill with a built in bubble level (mine is a Dewalt) to drill the bolt holes through the top beam for the hangers. I would have given it 5 stars but for the cost.