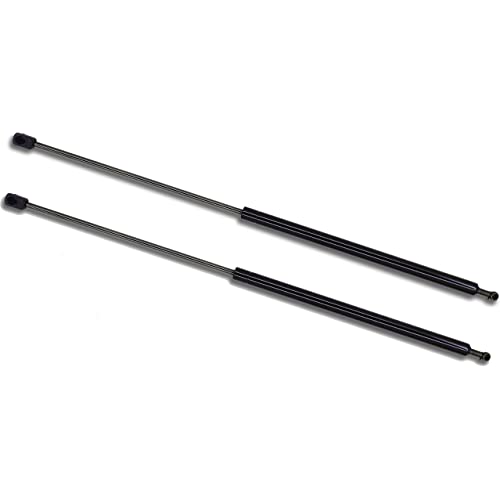
Lift Supports Depot Qty (2) Fits Ford F250, F350,F450, F550 Super Duty 11 To 16 Hood 7C3Z16C826AA 7C3Z-16C826-AA 8C3416C826AB BC3416C826AA BC34-16C826-AA BC3Z16C826A PM3730L-R SG204080

(1349 reviews)

Price
$29.95

Quantity
(10000 available )

Total Price
Share
14 Ratings
13
0
0
1
0
Reviews
  • Jeremy Copeland

    > 24 hour

    Not hard whatsoever. Easy step-by-step!

  • Ethan

    > 24 hour

    Half the price and just as good!

  • Melanie E.

    > 24 hour

    Don’t know the longevity since we just got them, but they are working

  • Tay Gonzalez

    > 24 hour

    No customization required fits like OEM and works like OEM definitely apply some so it can open faster and smoother

  • Philip

    > 24 hour

    Easy to install. No Issues

  • BTB Innovations

    > 24 hour

    These were an exact fit and went on very easily. They work perfectly. I have a 2012 f250. If your old ones have completely gone bad, you can use a 2x4 or a broom handle to hold up the hood while youre installing them, It is actually pretty heavy.

  • John Smith

    > 24 hour

    Easy to install and worked great! Make sure you do both sides at the same time. I used a board to prop up the hood and used a flathead screwdriver to pop off the old clips they came right off. Then just pop on the bottom first I did not even have to pull the clip out it just popped right on. While lifting the hood to the full open position ( so you do not have to compress the cylinder ) push the top one on you might have to twist the top of the cylinder to get it to line up but it was easy to twist. Both sides went smoothly and I am very happy with them. Oh and yes there is a left and a right side they are not the same.

  • Jaime C.

    > 24 hour

    Easy install, holds up well

  • Paul Fugitt

    > 24 hour

    Exact fit

  • C&A Auto

    > 24 hour

    Good job

Why Purchase from Lift Supports Depot?

Lift Supports Depot PictureLift Supports Depot Picture

QC StationQC Station

RemoveBallStudZoomRemoveBallStudZoom

Premium Quality Supports

Lift Supports Depot supports undergo a vigorous QC process to help ensure dependability. Lift supports internal components get assembled and mechanically tested to ensure internal parts are not installed incorrectly or missing. OE quality seals are incorporated to prevent low friction losses and oil seepage. Airline hydraulic oil helps to avoid crystallization and blockage during cold weather.

After painting and curing, lift supports are tested again for pressure and printed with final product information and lot numbers for traceability.

Vigorous Quality Control Process

The supports are pressure-filled and tested one by one for forces to be within accepted tolerances. Pressurized lift supports go through a pre-paint phosphate treating process, which helps the paint adhere properly to the body of the lift support and gives a long paint life.

Most importantly, an automated paint cabin is used for painting and curing in one place. Our lift supports never have premature rusting at the extremities due to the capillary effect of paint in bent areas.

Easy to Install

Most applications are quick and easy to install. Often times requiring nothing more then a flat headed tool to remove and replace. The hardest part is often finding someone to hold the Hatch or Hood while you swap them out.

Remove Ball socket from VehicleRemove Ball socket from Vehicle

Easy 4 Step Installation Process

Lift Supports Depot Supports are designed to be easy to install and maintain OEM design. Most install simply with the use of a Flat Head tool, and an assistant to hold the hatch or hood open. We do not recommend doing this alone, many hatches are very heavy and can result in injury if done without help.

Remove Ball socket from VehicleRemove Ball socket from Vehicle

Insert a Flat Headed tool behind the U-Band.

Pull back and remove ball Socket from StudPull back and remove ball Socket from Stud

Slightly Pull Back on the U-Band, allowing the claw to release the ball stud. Careful that you do not remove the U-band from the Support.

Press Ball Socket over Ball StudPress Ball Socket over Ball Stud

Place new support over the ball stud and press the ball socket over the ball stud.

Carefully Tug to Ensure SecureCarefully Tug to Ensure Secure

Once this has been completed for all mounting points, carefully tug to ensure all ball sockets are secure on ball Stud.

Related products

Shop
( 1667 reviews )
Top Selling Products