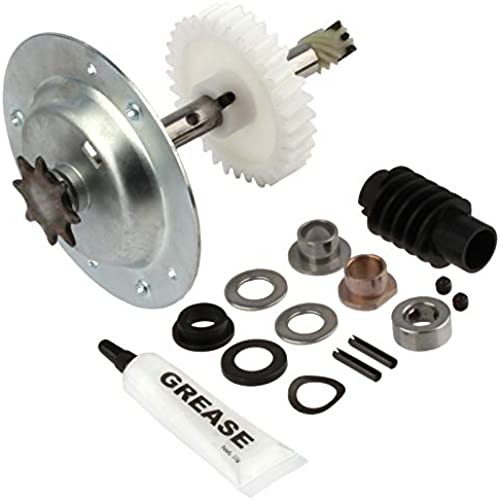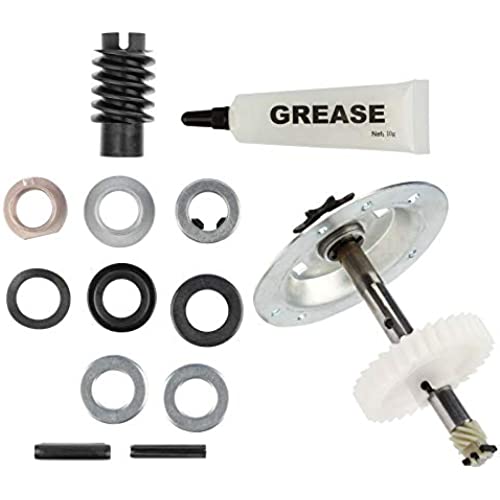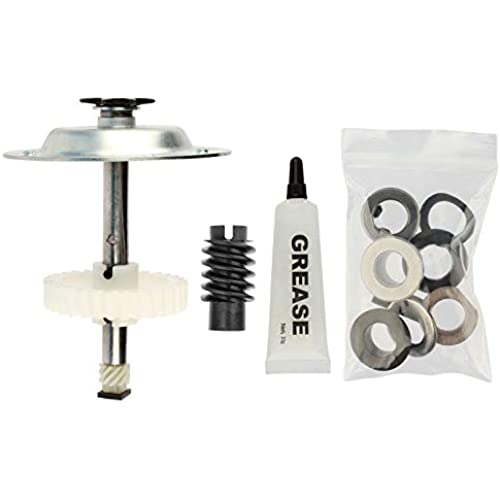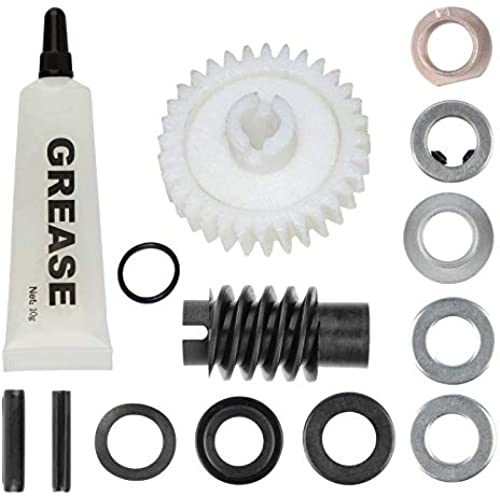


Replacement for Liftmaster 41c4220a Gear and Sprocket Kit fits Chamberlain, Sears, Craftsman 1/3 and 1/2 HP Chain Drive Models
-

J. Powell
> 24 hourNot much to say except it did exactly what I needed it to do. My 20yo Chamberlain Pro 1/2HP garage opener finally failed with the upper chain sprocket breaking off the shaft, which seems to be a somewhat common failure for these after a lot of years. This part was less than $20 at the time of my writing; it exactly replaced the part which broke. The installation is a bit of a chore, but isnt specifically hard. Plenty of online videos and writeups on how to do it... So long as you have a few basic tools, some level of handiness, a 6ft ladder and some good soap to clean up your hands when done, youll have no real problems with this DIY repair. Far less expensive and far easier than a replacement garage door opener.
-

ZMan
> 24 hourThe screws are “upside down” in the box holding the cap for this part in the box - making it a lil difficult to get them out & put them back in - so I used self tapping screws from the top of box down - way easier Some videos list those screws as 5/16 they’re not it’s either 8 or 10 mm The gears fit perfect & the lift master electric garage door opener is back to working perfect - all for less than $16 & about 1/2 an hour of work!
-

F. Kerby
> 24 hourI purchased this to replace what appeared to be a worn assembly on one of my garage door openers. Fortunately, Id saved the instructions from an earlier replacement on another door. There were no instructions provided. The instructions Id saved were helpful, but I discovered a few things that werent mentioned. I discovered that the interrupter cup assembly can be removed by sliding it off the shaft. That makes it MUCH easier to remove the RPM Sensor. As I was attempting to reinstall the chain separator on the top of the opener housing, I discovered that the gear and sprocket kit must be installed such that the tapped hole for the chain separator screw will pass through the corresponding hole in the mounting bracket for the sprocket assembly. As Murphy would have it, I could reach only two of the three mounting screws with a socket on an impact driver. Fortunately, I was able to remove and replace the third screw using a 1/4 drive ratchet and socket. The door opener works as hoped. A successful replacement despite help from Murphy...
-

Meg Darling
> 24 hourI have a Craftsman ½ HP opener that was installed 9/1993. Hit the button to close the door when I got home on Friday and it only went part of the way down and stopped. It hummed but wouldn’t go up or down. Did some research and found that the chain might be off the sprocket but that seemed fine. Further research suggested opening up the unit and inspecting the gear for wear and tear. Opened the unit and tons of white dust went flying everywhere. The white dust was what was left of the teeth of the gear I was inspecting. Ordered this kit and installed it and ta da, good as new. It took a bit for me to figure out several things so I can offer a couple of tips for anyone who also finds themselves on the struggle bus with this install. They may save you some time. This kit comes with a worm gear, I figured I have it open why not replace everything. When I was putting the bearing fittings on the motor shaft after installing the new worm gear, they simply would not slide down into place. I took some wise advice from someone who knew what they were doing on the internet and used some sand paper to gently smooth the shaft surface and the inside of the bearing until I was able to slide it on. This is apparently not uncommon when putting a new bearing on a used motor shaft. The next tip is you must drive a screw through the 3 screw holes on the sprocket casing before you go to attach the new gear assembly to the box because they are not pre threaded. Just screw the screw through and then unscrew it and it should be good to go when you screw through the housing to attach it. Make sure you line the screws up taking into account where the sprocket cover goes. My last tip may or may not be relevant for your situation but if it is I hope it helps. Like I said at the beginning my garage door simply stopped closing midway through after I hit the button to close it and then the motor hummed but the door wouldn’t move. Because of hitting the button several times I lost track of where the door cycle was. That caused me problems after everything was all done with the repair. The door was barely opening and then crashing into the ground and bouncing back up. I was at a loss and the door was making me cringe every time I had to press the button to check what I had just adjusted. The solution to getting the door back on track no matter where it gets stopped when the gear finally stops working: while the chain is off of the sprocket, grab your remote opener and get up on your ladder behind the opener facing the door, then hit the remote opener button while watching the sprockets movement from a safe distance. Once the sprocket is moving clockwise allow it to finish a full cycle and stop on its own. Reattach the chain to the sprocket. The door opener will now be in the full down limit position. Now just make sure your door is physically in the full down position. Reattach or tighten the trolley bolt. Finally, make sure the trolley is attached to the chain with emergency release locked into place. This makes it so much easier for the door to run a complete open and close cycle allowing the Force and Limit thresholds to be adjusted to preference. Good Luck with your repair.
-

Rob S.
> 24 hourThis kit worked perfectly for an old Sears Craftsman 1/2 hp 41A4315-7A model opener. I think the counterweight spring gets looser over 20+ years! And this wears on the nylon gear because the motor and gear are constantly doing more work. My opener was also adjusted to try to push the door too far into the concrete floor! (which always caused the track to bow upward at the end of closing), and the opening and closing FORCE was set higher than needed. All these must have combined to finally cause that nylon gear to fail. > I loved ACVOCEs video here on Amazon 10:21 showing many items to consider while replacing the gear. One additional thing: The tiny gears at the bottom: the one that stays on the opener- if it gets turned it changes the door stop locations, both top and bottom, so I marked it with a pen. Like his video shows how to thread the 3 holes on the new part! Luckily the opener had self tapping screws. TIP: put a drop of wd40 on each of the 3 new holes, then drive an old screw into the hole with a drill just like the video and you have 3 tapped screw holes in 3 minutes or less. > My wide garage door has 2 coil springs that you rotate to tighten. I learned a lot of youtube and carefully tightened each spring 1/2-3/4 turns so that the door would stay open half way up and not fall down. (When you disconnect the carriage from the opener by pulling the red handle) > I lubed my track and chain- why not. (took 5 min) > I reduced my up and down FORCE adjustments 1/2-1 turn, and it works great while protecting the opener from wear. > I adjusted end points to fully open the door, and fully close but not push forcefully into the floor. (just takes 1-2 min)
-

Carla Sanger
> 24 hourthe upper bearing for the sprocket on our older Liftmaster had worn out, causing the chain to come off, During troubleshooting, found the bearing was totally gone, the shaft wobbled 1/2 inch in any direction. Got the kit in two days, opened up, found all the hardware, grease, and more. since it had the worm gear as well, changed everything, lubed up the drive, then connected the chain. since the chain was off, had to make adjustment in door travel, and also went through the door as well, lubed tracks, lubed the wheels, oiled the coil spring, and also shot chain lube on the drive. the adjustments went better than I thought, the whole operation was completed in 3 hours. the drive was much smoother, and much quieter. Granted, I did extra preventative maintenance, but, the door is running as new, and saved anywhere from 150-300 dollars, not including 150 for installation fees, using this rebuild. I suggest if you have the time, do the extra check and maintenance on the door as well, the difference is worth it Bill
-

Sharon Reinger
> 24 hourThe gear assembly fit perfectly in my 30 year-old opener. However, the replacement needs 2 additional holes pre-drilled on the top plate to accept the old chain guide roller assembly. Not difficult to drill if you have the right bit. As others have previously stated, pre-thread the holes in the new assembly before installing.
-

Zale
> 24 hourPerfect fit for my garage motor. Originally the fix garage guy say I have to replace the whole motor for 500. I do it by myself. Cost 20 to fix it. LOL. This is very easy to install. Just making sure watch YouTube video to install and also when you put the chain back. You have to be careful where is the chain original spot at. Not just put the chain anywhere.
-

deb
> 24 hourParts are a perfect fit for Chamberlain LiftMaster Professional 1/2hp (model number 1265LM) garage door opener. Everything you need is included and then some. Would purchase again!
-

Bernardo
> 24 houri bought this after a youtube video, i needed to get certified before buying and installing. so i as able to install this my self, i saved myself $125. it easy pretty easy to install. it took me like 45 min to an hour just because i took my time to get it right. my door is as good as new. recommend this if your chain is dragging and the sprocket looks damaged
