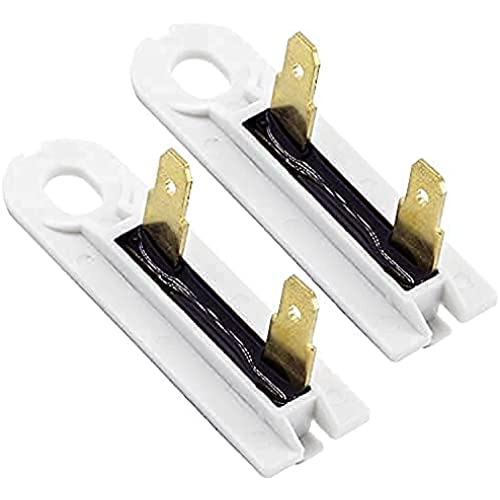


WP3392519 3392519 Dryer Thermal Fuse G4AP0500 TF091C Whirlpool Maytag Kenmore AP6008325 PS11741460 Thermofuse Thermo Part GEW9200LW1 WED4800XQ1 WED7300DW1 WED4815EW1 MEDC465HW0 WED5000DW2 WED49STBW1
-

Chris Mouradian
> 24 hourThis was the exact part needed. Description and part number were provided in the description, which made finding it simple.
-

Jesse A
> 24 hourExcellent time delivery and price
-

Linz mack
> 24 hourQuick fix
-

Aaron Ximm
> 24 hourElectric dryer spun and lit but stopped heating. Did some research, watched a YouTube how-to video suggesting I troubleshoot by hand-shorting wires to bypass this fuse, to see if it had gone. E-yup! Cleaned out a modest amount of lint in the vent, replaced the fuse with one of these and taped the other to the inside of the top control panel for the next time we blow one. 15 minute repair including waddling the dryer around. God bless the internet and contemporary logistics and Chinese firms who see a modest but well-deserved revenue stream in backlist parts like this. What a time to be alive.
-

Stephanie Huang
> 24 hourIm just glad that this worked great with the dryer. Thought I had to replace it. Took a chance on You-T*be and got it working with this fuse.
-

Marco
> 24 hourMy Maytag electric front-load dryer (purchased approx. 2011) stopped working: the control panel lit up, it would accept settings, and the drum light all worked, but when you pressed start, the dryer would not turn and would not tumble or heat. My vent had clogged and the dryer overheated, melting the original fuse. Confirming the diagnosis required removing the old one and running a multimeter across it. If it shows 0 (or close to zero) ohms of resistance, your part is GOOD, and do not buy this part---you dont need it. If it shows 1 / infinity / no current going across the old part, your part is BAD, and you should consider buying this one (double check that it fits your model first.). This thermal fuse was moderately easy to replace -- a little tight to find unscrew it, but I ignored videos that showed a guy removing the drum -- that was overkill. This thing could be reached just by removing the panel below the door, and it was just below the bottom of the drum -- slightly obscured from view, but with a flashlight I could see it up and to the left. Hard to see, but easy to reach by hand. Whole thing requires only three screws to repair: two screws removed the exterior panel below the door, and one screw held this part into the blower housing. From there, disconnect two wires, and it came right out. (Dont worry about crossing the wires...they can be installed on either of the two posts....not polarized; it will work either way). I will reiterate that it was tight quarters getting up in there, but even with my huge grand-dad hands I could get in there and remove it. A quarter-inch socket wrapped with grippy electrical tape allowed me to turn the screw by hand in a place where a wrench would not fit. SAFETY NOTE: When you replace this part, it is **ESSENTIAL** that you clean out the entire air exhaust pathway, from the lint screen all the way to the outdoors vent. Lint will cake-up in the vent and cause this part to fail. That is dangerous. Thankfully, this part is an inexpensive and quick repair, and it protects you from a possible fire. And as a bonus: cleaning out the air exhaust path made the dryer work a lot faster, saving energy and time. And (duh!) always unplug it before you work on it.
-

Dale Maddox
> 24 hourIt was the correct fit for my Maytag dryer. It was delivered extremely fast. I rate this seller all A+. Thank you very much.
-

Vickie L Rogers
> 24 hourFixed my dryer for a couple of bucks and quick to replace!
-

J. Siebern
> 24 hour$5 and my Dryer is working again.
-

N. Tides
> 24 hourWhile this part didnt fix the dryer, it fit perfectly to replace the older one. I gambled thinking this was the problem, but it was a good gamble for a couple of bucks rather than $300 repair bill. Ill save this for potential future needs.
