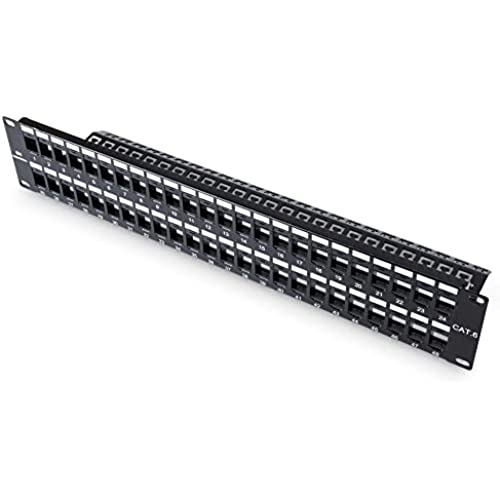
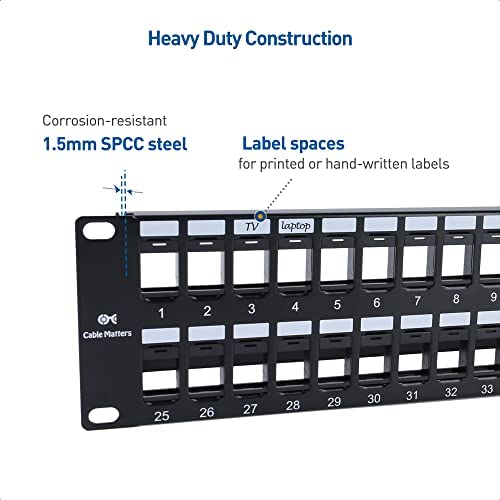
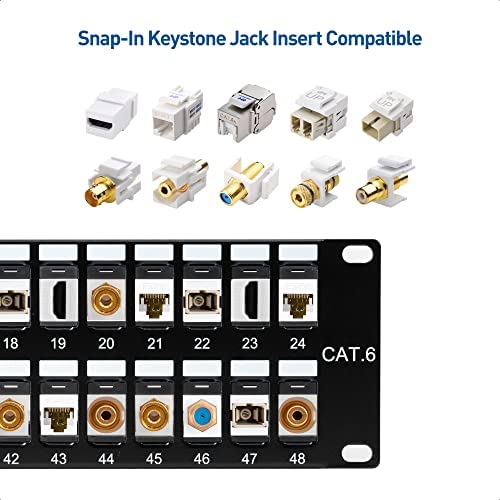
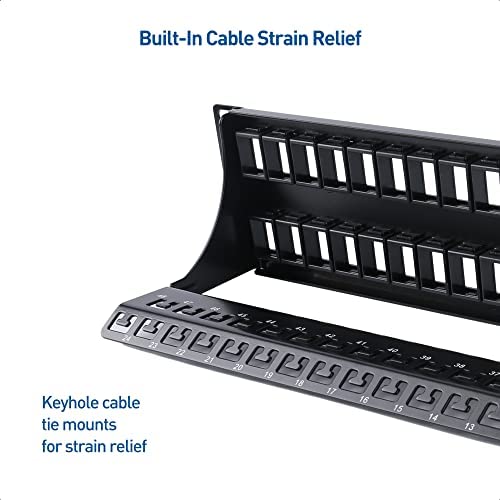
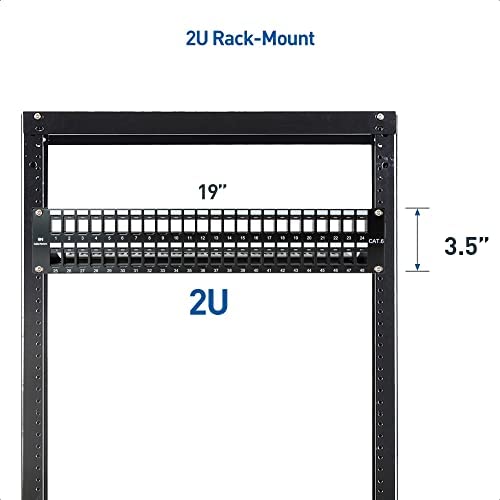
Cable Matters Rackmount or Wall Mount 2U 48 Port Keystone Patch Panel with Cable Management and Support Bar (19-inch Blank Patch Panel for Keystone Jacks/Keystone Panel)

(847 reviews)

Price
$21.59

Length
Quantity
(20000 available )

Total Price
Share
204 Ratings
157
29
5
2
11
Reviews
  • R

    > 3 day

    It might cost a few bucks more than a punch panel, but totally worth it. You can rearrange, install a mix of connectors, and easily pull one for repair if needed. I used Trucable cat6 keystones and they fit great. I had a few coax ports too (Leviton) and those fit just fine as well. Some reviewers complained about keystones not fitting but I can see why that would be. There’s very little wiggle room, they are snug, but they fit just fine. The zip tie bracket is great for securing them and keeping the cabling runs clean. I bought several more after installing the first.

  • shaba

    > 3 day

    Surprised with the quality of the build for the price. Works as expected.

  • Brian

    Greater than one week

    The panel is great. I used the Monoprice keystone jacks and they fit perfectly.

  • DjH61

    > 3 day

    Ordered this to go with VCE 5-PACK CAT6 RJ45 Keystone Jack Inline. They worked well together I didnt need to do the whole punch down deal with the connectors just crimped Cat6 ends on Cat6 cable and plunged them in

  • Jim Nadeau

    > 3 day

    What I was looking for

  • Kirk Steinklauber

    > 3 day

    I decided to re-organize my home network and I installed a new rack and I want clean cables organization. This patch panel was key to organize my home network and worked as expected. All the required screws were included so no issues assembling it into the rack.

  • Camylle Brown

    Greater than one week

    Installation went well in my rack. Terminated 18 drops of cat6 using cable matters keystones, cut the extra wire flush using flush cutters. The keystones set too close to each other to where the bare ends on the sides of the keystones short out against each other.

  • Lac

    > 3 day

    Sturdy panel works well with Cable Matters (5 Pack) Cat6 RJ45 Keystone Jack In-Line couplers.

  • R1200RT

    > 3 day

    Greatly simplify and and eases the install of a patch panel mounted on the wall using a vertical wall mount bracket. Allows one to punch down each drop separately and out in the open.

  • JBDragon

    > 3 day

    I really like these Patch Panels. They look nice and are easy to use and flexible. They also have a really nice cable support on the back side. If you look in the first picture at the red cables, you can see how each one is zip tied into place. Nice!!! You can see in the first and second picture Im using 23 Normal Cable Matters Keystones. Plus 1 Blank Plug in the 24th spot. The nice thing about this is you can install the cables onto all your cables FIRST and then pop them into place after. This makes the job so much easier. I got a different one where you would have had to mount all the wires onto the patch panel at once, really making a bulky mess and really hard to do in my small closet. So I ended up going this route instead. On the Second Patch Panel, you see in the 3rd picture, There are 2 Keystones on the right side. These are 2 of the 9 NEW Cat6 cables I ran and those 2 go to the garage for future Security cameras. Then theres a number of blanks in the middle and on the left side are passthrough Keystones. This allows me to run cables from the other devices on this rack, from the Router, the Tivo Stream, HD HomeRun, etc to plug in behind the Patch Panel, where the cable can be hidden, and then the short cable into the Router like all the others making for a better looking professional job. Instead of just running a cable out from whatever hole and into the Switch. That 3rd picture shows a nice clean setup with all the same cables out front. I have empty slots for future expansion. I dont think thats likely. But then I figured I wouldnt have to crawl around on my belly ever again 5 years ago when I first ran all the Cat6 wires. Here I am running another 9. 3 in one room, 4 in another room, and 2 into the garage. By the way, I threw in a 4th picture. This was How it was just before I changed it all. This was my 5 year old setup so you can see the Before and After. Really how much Ive learned over the years and what I could afford and had time to do back then. I did that job right after I got this house 5 years ago. But you can see all the different color cat6 wires, and theyre just all over the place. So Im a big fan of these Cable Matters Patch Panels. I did have a few Keystones that didnt install how they are supposed to go in. The bottom wasnt quite is and then it makes them hard to get out. I found that you can push up on the bottom and in on the Keystone and itll pop fully into place and all is good. I like that it makes the job easy when youre not trying to install all the wires onto a single board on the back of a Patch Panel like many others out there. You also get the flexibility of using any number of different Keystones to fit your own needs. You dont even have to use Black to match as I did. Maybe you use different colors. Like Red for one room, and Blue for another and so on and so on. You can use HDMI Keystones and Audio keystones and on and on. Thats whats so great with this design. The final results is it looks really nice. The options on what you can do is almost unlimited. But what takes it over the top, is the excellent cable support in the back of this Patch panel. Its solid!!! You dont want future issues with your cables. You want a setup thats going to last you for many years to come. Using my label printer, and double line printing, I was able to make small labels to label what every port went to. Theres a spot to label each port on this thing. I also have every port labeled around my house. So I know Port 3 in the Master Bedroom is this one exactly. I also tested each and every wire to make sure they were all perfect as I did booboo a few times. I used a Fluke Networks MS2-100 Cable Tester. So, what do you think? You cant go wrong with this Cable Matters 24-Port Cat6 Keystone Patch Panel. Im a big fan and would recommend it to anyone that is going to take on a job like this. All this stuff is really not that hard. The hardest part? sliding around on my belly all around under my house in the dirt, and the spiders and so forth to run the cables. Cut the needed holes in the walls, and down under the house to run up the wires, fill holes up when done with expanding foam. Did it ALL by myself. There was no one else here. All this other stuff, other than time, not that hard. My Dad is completely clueless about it. But its something you can learn to do. Its pretty straightforward. A little planning on what YOU want and the pieces fall into place. 11-17-2019 update I added another picture close up to see how I labeled my ports. As you can see there is not a lot of room. I used a normal brothers labeler. Then I used 2 line printing which makes the text a lot smaller. I would make sure to add a few spaces in between each work for more space to carefully cut out. You can only fit 3 to 4 letters or numbers or a combo. So MB1 would be Master Bedroom 1. DR1 would be Dad’s Room 1 since he lives at my house. RMC would be Remote Management Control which is for my UPS, etc. at the Keystones in the wall at all my locations, they have the same markings. So it makes it easy to figure things out if there is ever a issue. I am using Cable Matters Keystones with these, the normal ones, along with their pass though keystones, which allows me to plug things like my router or NAS cables that are sitting on those shelf’s to plug in on the back side of the keystone, then just add a short patch cables line everything else for a clean look. I’m also using some blanks from Cable Matters to fill in some holes I didn’t need to use for keystones at this time to clean my rack up better. Keystones like this is the way to go.

Related products

Shop
( 1082 reviews )
Top Selling Products