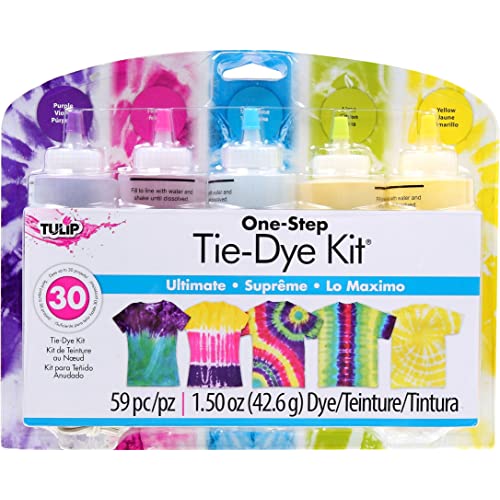
Tulip One-Step 5 Color Tie-Dye Kits Ultimate, 1.5oz
-
VINCE MCCORMICK
Greater than one weekEasy to use and did a great job.
-
Chella
> 3 dayI cannot tell you how pleased I am with this Tie-Dye kit!!!! I am going to give you the full experience here, so buckle up, get ready, and everything you need to know about this kit. Bottom Line, for those who dont want to read my whole review: This is an EXCELLENT beginners kit for those that want to get into tie-dying. The directions are clear, it comes with everything you need, and there are a ton of resources online. I am a first-time tie-dyer and the results were wonderful. Just take not of wet vs. dry designs (more on that later - see pictures) and I suggest buying one more kit for a full range of rainbow colors. (I got this one called the Ultimate Kit and the Rainbow Kit from a local craft store. Believe it or not, Amazons prices are cheaper than Michaels.) I would also invest in some extras to help make your experience easier. such as: A shower curtain liner from the dollar store - this ensured everything was covered. Color catcher dryer sheets, for when you need to rinse the shirts in the dryer (Ill explain later on in the review Lots of old plastic bags The whole experience - get ready for a very in depth review! Alright, as mentioned, I am totally new to tie-dying. I knew of the concept just by seeing it happen at day camps and Girl Scouts, but never did it solo or independently. The kit claims there is enough dye for 30 projects - that is an exaggeration to me, unless you are dying small projects like socks. I would say one kit will safely color 20 adult shirts. The bottles come pre-filled with powder dye, and then there is an extra packet of each color. As I mentioned, I also bought the Rainbow kit to get a nice range of colors. Between the ultimate kits and the rainbow kit, you should be go to go, but Tulip has so many kits with complimentary colors, it is definitely worth taking a look at their selection. Orange did not come in either of these two kits, but I did have two yellows, so I mixed a touch of the red dye into one of the yellow bottles to make orange. Full disclosure here: this project IS MESSY and TAKES TIME. I high recommend you do it outside, but if you cant, be sure that everything is covered. This dye is specifically made so it sticks to fabric and not skin or plastic, but there is a chance it will stain, so of course cover your bases and use caution. I dyed six t-shirts - four adults, two youths (or youuuts, for My Cousin Vinny fans) - and four onesies, and had enough dye to complete another couple of shirts. I ended up dumping the excess dye, as Tulip says the concentration will weaken within 24-72 hours. After using half of each kit, I have 10 packets of color left for another day. All together, the project took two days. It doesnt have to take two days, you can do it faster, but I took my time to get it right. I started by picking an area outside and covering everything with an old shower curtain liner. I used a metal dish rack to help dye the shirts so that the color could drip below and not contaminate whatever shirt I was coloring. Also, I dampened the t-shirts before I started the project, as the instruction says - PLEASE take note of this, because my first two shirts were not damp enough (they were on the drier side) and the designs came out looking nice, but not as cool or classic as the wet shirts. For that classic tie-dye swirl, you need to have your shirt wet. The booklet says to pre-wash them in the machine but I just wet them under the sink. In my pictures, two youth shirts were done dry, and the design came out more like shattered glass, while the wet designs are more ombred, and have a true swirl. The designs came out great! The ultimate kit came with a booklet of handy design tips, but the sky is really the limit here and your design can vary based on your choices. Keep complimentary colors in mind and how colors will mix - i.e, blue next to yellow will make green, and so on. The kit came with plenty of rubber bands to hold shirts together and several pairs of disposable gloves so your hands will not get dirty - wearing gloves is a MUST! Impressively, I have UV gel nails on and I did stain the tips of my fingers a bit, but my nails are fine - the dye did not permanently stain them, which I was super happy about. The basics of tie-dye are: wet the shirt, pick a design, scrunch the shirt up into the desired pattern, secure with rubber bands, dye to your hearts content, put it in a plastic bag for at least 6 hours, and then rinse and wash. I put the shirts in old plastic bags from the supermarket and left them outside for 24 hours. I meant to rinse them that night, but didnt have the time. No matter - the dye came out very saturated on the finished project and I am quite happy. It took me around two hours to dye the 10 items, and another hour and a half to rinse them outside. When it came time to rinse them, I used a hose and a bucket to really get the color out. The directions say rinse until clear, but no matter how many times I rinsed them, there was still a bit of color. Again, this dye did not stain the pavement, which I was super pleased about. Then I ran them on a cold water cycle with color-grabber sheets - these are a MUST! Youre suppose to run these shirts in the wash one at a time, but that is wasteful to me. These color grabber sheets made life SO much easier. They grab excess color in the wash so that the shirts will not bleed into one another. I was a little cautious and used 24 color-grabber sheets (an entire small box), but it was worth it, because the water was initially VERY dark in the wash and the sheets instantly lightened the water up. The color does fad a bit once everything is washed and dried, but dang, they came out cool as HELL and I cant wait to do this again. Like I said, look up some videos online to really hone your skill. This is such a fun way to spend a summer afternoon and these make great gifts!
-
Dog Mom of 3
> 3 dayMy bonus daughters and I loved this! We made these shirts and they turned out so awesome! We are going to definitely use this again!
-
Ada Apple
> 3 dayI order this for myself. I had been wanting to try this for a while. Its great fun, its only messy if you are not careful. I had such a good time making some t-shirts that I ordered 3 more.
-
Taylor Sisson
Greater than one weekThese colors together are awesome!
-
christopher gilmore
> 3 daya lot of fun
-
Kindle Customer
> 3 dayLove these dyes and having them in the squeeze bottles. The colors turn out so well on the (100% cotton) shirts. Just make sure to shake it REALLY well so that everything gets dissolved. I bought two of these packages to make 15 shirts (about half adult sizes and half kid sizes). We did end up with more dye than we needed, though one or two colors ran out just depending on usage. The number of projects you can complete varies so widely depending on how saturated your colors are. But two of these packages were definitely enough to have 15 pretty heavily saturated t-shirts.
-
Rachel
> 3 dayI was getting ready to do tie-dye, and had everything mixed up except for these. I mixed them according to the instructions, then saw that they need to be FULLY-DRIED on the fabric before washing. Since most tie-dye stays wet until you wash it, I couldnt use this on any of the shirts that I had ready. And it also says to use WITHIN 24 HOURS of mixing. Obviously, I couldnt do this, and I ended up with clumps of color on certain shirts. I will say, that I think it probably works well if you use it right away. But dont buy this thinking you will use it with any other tie-dye products...
-
Bridget Auch
> 3 dayThese colors look great together
-
Holly A.
Greater than one weekI dyed a bunch of 100% cotton onesies with these, the batch in the bottles worked great but the second batch didnt come out as vibrant from the packets they include for more dye. Since there are so many factors when it comes to tie dye I cant say for sure if it was the dye packets or something I did. Still a great fun project and the bottles make it really easy for kids!