
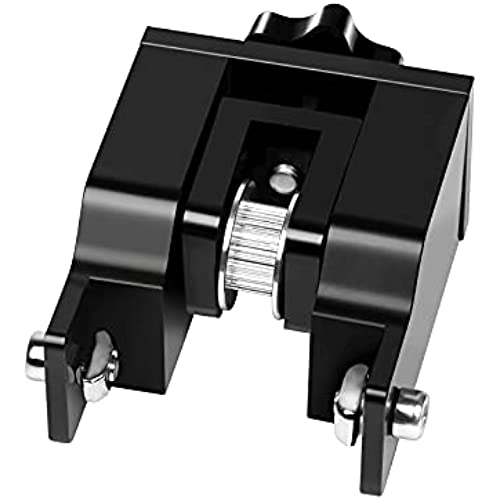
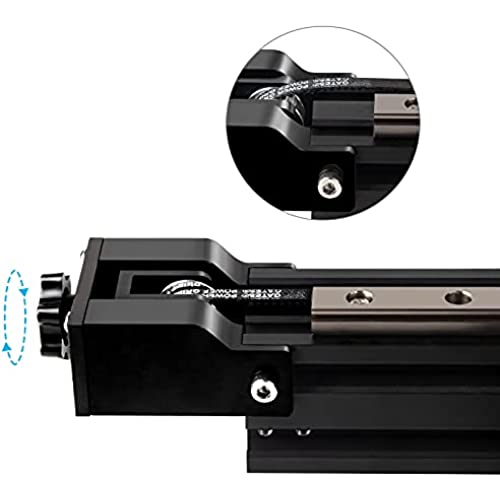


UniTak3D Ender 3 V2 Y-axis Belt Tensioner Upgrade for Creality Ender 3 V2 Ender 3 Pro CR10 Mega Zero 2.0 Flashforge-Aquila AURORA-A5X 3D Printer 2040 Profile
-

Jay DM
Greater than one weekHigh quality aluminum construction, belt can be perfectly hand tensioned. Super easy install. Must have upgrade for creality machines.
-
Steven
> 3 dayThis has made getting the belt on my Ender 3 super easy and fast. For my ender 3 I did not have to re use any of the standard hardware which many people said they had to. I did not and I did not have to take the belt off to install this... I did have to take apart the entire part but it is straight forward and easy to understand.
-
mike pilley
> 3 dayPerfection took 3-5minutes for me to install and I’m a not an expert it 3 bolts to remove and install its thickness is just right reliability the amount of play or stretch u get is just right u get both ends of the spectrum loose to tight makes the sheerness of the line perfectly tont took the dip out of the middle I had on mine before upgrade my printer is a cr10s 400mm clone
-
Adam Anderson
Greater than one weekI had a belt starting to sag a bit so I decided to pick one of these up and its went right one easy and has made keeping the belts tight SOOO much easier.
-
Christy L. Smith
Greater than one weekNot really sure if I can find a better one. The only problem is that they get loose over LONG periods of time (like I have to tighten once a month of continuous use). Otherwise, its helped my prints dramatically. Just wish I could lock it in once I got the tightness correct.
-
Trogdor
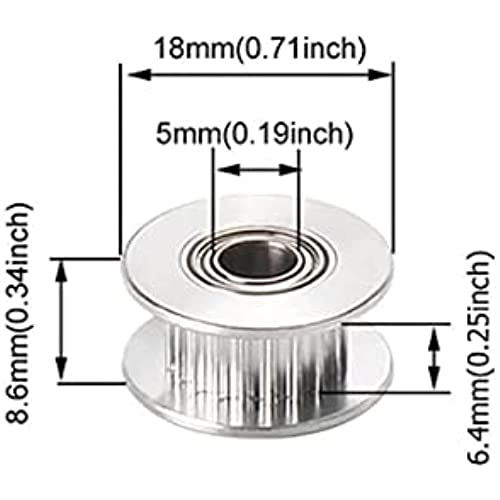
Greater than one weekThe toothed idlers wheels wobbled from the time it was opened. Everything else about this tensioner would be great if the idler was good.
-
Spencer
> 3 dayIt was a breeze to install and made tightening the x belt super easy. 10/10 would recommend.
-
B. Fohlmeister
> 3 dayThis was necessary for my Ender 3 Pro; I was having stair-stepping issues after a whole year of printing and discovered that my X-axis cable kept jumping due to the slack it developed. However, after I installed this along with a fresh cable, the stair-stepping problem disappeared! I am fully aware that you can 3d print these, but metal lasts longer and it gives a more finished appearance; as if it were a part of the machine when I got it.
-
Luis Brooks
Greater than one weekThis works great on my CR10s and should be a 5 star product but wrong size bolts were provided. I had enough spare shorter bolts that I was able to quickly and easily install it. I bought the x-axis tensioner along with this item and that installed quickly easily, no need for additional hardware/parts.
-
Devin
> 3 dayI have 3 Standard Ender3s and this is a much needed upgrade. The price is low enough I am not sure why anyone wouldnt pick this up. It does not come with wrenches but the kit you got with your printer has everything you need. Once I found the sizes I need I uninstalled previous tension-er and had this upgrade installed in a little under 3 minutes for each of the 3 printers. All metal design gives a good quality feel. The knob lets me decide how tight I need to belt to be.


