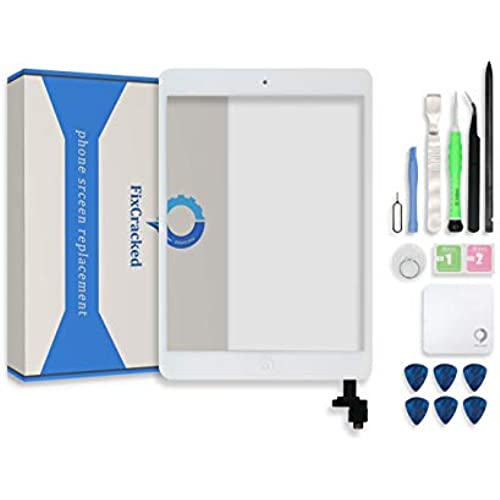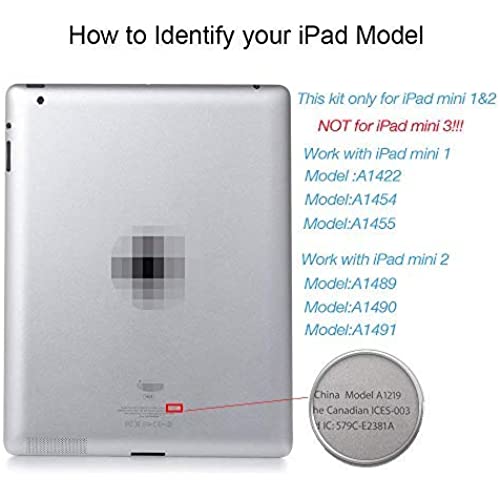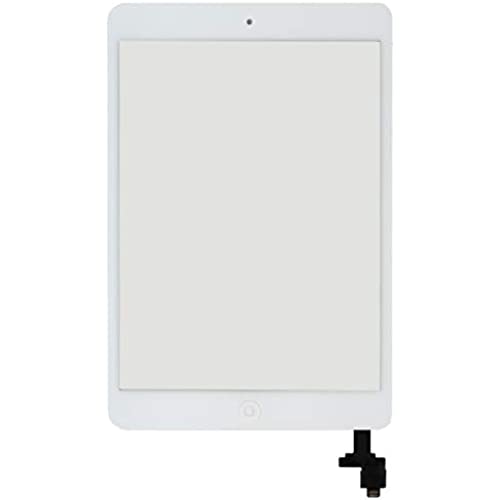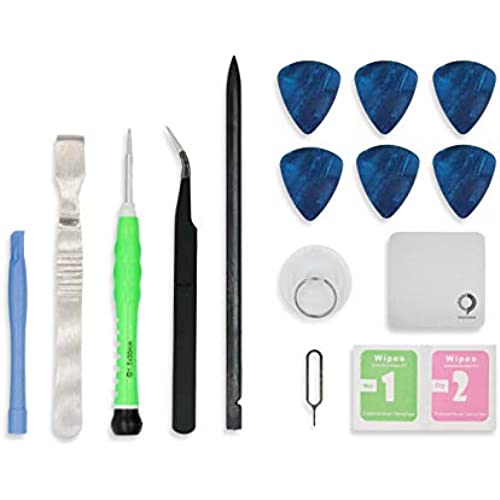


Fixcracked Touch Screen Replacement Parts Digitizer Glass Assembly for Ipad mini 2012 (A1432 A1454 A1455)& mini 2 2013 (A1489 A1490 A1491) 9.7 inch+ Professional Tool Kit (white)
-

S
> 3 dayPhotos are before, during the repair and afterwards. The included tools were useful and of good enough quality to get the job done. The included instructions are not useful. There are plenty of YouTube videos that show the process step-by-step to get you through this. I watched about four instructional videos and picked up some tips from each that proved useful. I used a hairdryer to soften the adhesive instead of a heat gun and it worked well. I think the best tip that I found was to thoroughly remove every speck of residual factory adhesive form the iPad with a soft cloth and acetone. Then clean with 91% or high concentration isopropyl alcohol. Obviously dont over saturate the cloth you dont want this on internal components. Once completely cleaned the adhesive on the replacement glass can then fully adhere to the aluminum iPad frame. After seating it well, reheat the periphery of the iPad to set the adhesive and apply firm pressure around the edges. I took my time and it took 90 minute to complete the job. The iPad Mini looks like it did prior to damage and there are no noticeable difference from a brand new iPad Mini. And it operates without problems. I would fully recommend this product. Only time will tell if the adhesive fails, but so far so good.
-

Jason
> 3 dayremoval was long and tedious (3 hours) because I never did this before and was afraid of breaking the ipad lcd screen under the glass. after watching and rewatching a few youtube videos and then continually rewatching the videos it was a breeze. the only hiccup was my daughter dented one of the corners and I forced the new glass in and the new glass has small crack in the white part only now but the touchscreen works! and its not shattered anymore. the tools were good especially the guitar picks. the magnetic screwdriver worked great but mysteriously broke on the last screw I screwing in. I served its purpose but I now want a new screwdriver. It was a learning experience and is definitely doable especially when it costs $100+ to pay someone to do it for you almost the same price as buying a new ipad. Tools I used in addition to this set: eye protection rubber gloves, an x-acto knife, heat gun on low, and a cutting board. one last thing this screen has a new home button and pre-installed adhesive. Did I mention look for installation videos? Well look for installation videos! for your model
-

Andrew P.K.
> 3 dayThe instructions say you may use a hair dryer but it doesn’t get hot enough to soften the adhesive. So if you can use a heat gun, do so. My screen was totally smash so the suction cup didn’t help much. For that to work it needs a preferably uncracked part of the screen. Otherwise, use the nice selection of tools provided Ed to dig it out. All in all you have to have a half a brain to complete this repair. I wore latex gloves to protect from shards of glass. Also use containers such as an egg carton when you remove the screws and label where they go. The only disappointment which is one of the most important things is the adhesive. After you transfer the magnets and pull your adhesive protectors off you would think it should be set it and forget it. I tried weighing it down over night and the glass still is popping up. Everything works fine but the original glass has much more adhesive to hold the glass in place.
-

Joe Martone
> 3 dayI just completed the repair of my iPad mini2 digitizer screen. all appears to have gone well. It took a couple of hours and required exceptional patience and care. I used a heat gun rather than a blow dryer. I recommend watching several videos on youtube first as the directions provided suggest a full tear-down that may not be required. product was good but be warned, not for most consumers. best of luck.
-

Christen
> 3 dayGreat product. Ive tried two other sellers for the exact same product and this one comes closest to the original. I feel that the adhesive is not strong enough like many other reviewers, but I just added my own super strong adhesive and there have been no problems. I also feel that this seller provides the best tools for the replacement. The guitar picks help a lot to keep you from scratching the LCD screen. Best advice I can give... 1. Watch a Youtube video that uses a magnified view of the process, where the person in the video is actually talking to you, and you dont have to read captions. 2. The connectors inside the ipad are weak and break easily if you dont go very slowly and disconnect them just right. Trust me, if this happens, unless you know how to solder, youll have to take it to a repair shop anyway. 3. Watch the video all the way through first, and dont do anything until they tell you to. 4. If they skip any steps, find a different video. 5. Find an old, soft-bristled paint brush or clean make-up brush. Use this instead of blowing on the ipad to remove dust or broken glass. 6. Stick a strip of double-sided tape to a sheet of paper. As you take out screws, line them up on the tape strip and write on the paper below where they came from. Draw pictures and label each set of screws. Youll be glad you did it when youre trying to put it all back together! 7.Above all, take your time and be patient! Hope this helps! Happy Replacing!
-

kpdrumswritessings
> 3 dayThe digitizer and screen seem to be of good quality, and is complete. Works fine. The reason that I gave it only 4 stars is that it did not come with the tools and instructions as stated. I have tools, luckily. However if someone doesnt then this could be a problem, as well as the missing instructions, Update: I am not sure if 4stars is an appropriate rating or not, but here are my experiences.. First screen I bought was decent quality but didnt come with the tools as mentioned above which wasnt a big deal for me. I ordered another screen for a different unit and received the screen with tools and instructions this time. However- the home button was physically defective. It either would push out completely or not physically move. I tried repositioning it and re-adhering it to no avail. I finally got iota exchanged. Now the last one that I received was fine- except this one required different tape. It appears that they source the screens from different vendors, as there are subtle differences between the 3 that I have gotten, so you need to pay attention as you may need to do something different with one than the other. So- the problems- missing the tools in one , and a bad home button on another. Neutral-that they use different sources so you need to pay attention to your little pieces of insulating tape and bare circuitry. The good- the screens seem to be decent quality once you get past the bugs, they are inexpensive compared top OEM and if you have problems Amazon does do good returns.
-

Long Time Boater
> 3 dayI fix things. If you dont, its best to leave this alone and send it to a repair shop. I bought 2 of these, the first to fix my wifes ipad mini 2, the second to fix my daughters. It worked, but took me a full day for each. One thing that is not apparent is the plastic film you need to remove from the gasket in order to seal the new digitizer. Its very difficult to see, but its there and you need to remove it. It would be nice if this company had a youtube video of their own to help you, but you have to rely on other suppliers videos to get the job done. No instructions included and the instructions provided in the ad are minimal. But it works.
-

Gaby C.
04-04-2025I purchased this screen replacement for my ipad mini2 hoping to bring my tablet back to its original state before one of my kids broke it (although none of them are willing to fess up who dropped it.) I watched a few YouTube videos and it look fairly easy so I gave it a go. Some hour or so later, I had a brand new looking tablet for a very inexpensive price. It shouldnt take that long but I was having a really hard time separating the old screen. It kept breaking into tinier pieces and tiny glass shards kept flying everywhere plus I was being extra careful not to breakthe LCD screen when I got to it. The first 2 pictures are the before...obviously! And the second 2 are after. The last picture shows a teeny tiny gap between the edge of the screen and the frame. Thats because the adhesive that comes attached to the screen is not that great and pulls apart on the sides only. If I had to do it again, I would buy additional adhesive strips to put down. I am not concerned because I am planning on putting a hefty case on now that will push/hold down the screen. Other than that, I think it is a great product and I would definitely buy it again!
-

Victor
> 3 dayLove the product 3 rd time using it
-

Phillip M Forde
> 3 dayI really would have preferred to contact Fix Cracked directly but I couldnt find any means of doing that except by filing a complaint. I ordered a total of 4 iPad Mini digitizers, the last two were ordered in December so they are past the return date.I had to replace a customers digitizer because of phantom key presses so I used the fourth one today. I taped up the flex cable and the contacts at the bottom of the digitizer with Kapton. The ghosting appears to have stopped but on removing the front protective film there is an almost impossible to remove film of adhesive or fused plastic on the screen. Attempts to remove it just makes it appear worse. It may come off by rubbing just with my fingers but I think I made that even harder to do by using the solvents. Yes I went ahead and ordered two more because they function well as far as can tell but I want the manufacturer to be aware of this film left after the removal of the front protective film.
