

Mounting Dream UL Listed TV Wall Mount Bracket for Most 42-90 Inch TVs, Full Motion TV Mount with Articulating Arms, Max VESA 600x400mm and 132 lbs, Fits 16, 18, 24 Studs, MD2298
-

Michael
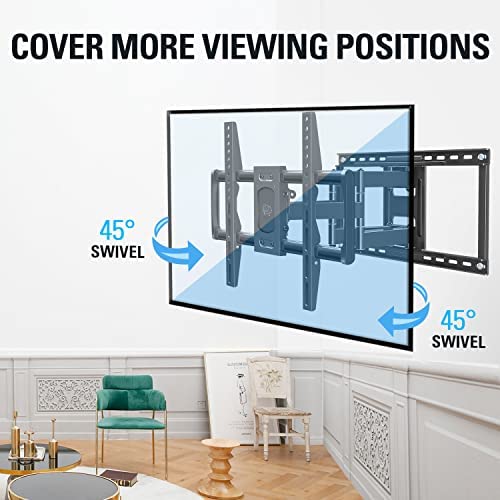
> 3 dayI have a 65 LG that I purchased this TV mount for. It fits well, holds the TV with no issue, and has the full range of motion advertised. In fact, it has much more motion than Ill ever need, and can hold the TV out from the wall further than I am comfortable with. It does make back-of-TV access (power cords, HDMI, etc.) much easier. During unboxing/mounting, the pivot arm is still connected to the back plate. It would be much simpler for install if the arm was shipped separate. There are only a few bolts to take this assembly loose and will make the install much easier. General installation note unrelated to the product itself: ensure you have the correct anchoring hardware for installation. We found out we have metal studs, not wood, so we had to go buy different hardware for mounting. Its important to get hardware that will work. If you have to change hardware, also make sure you have the correct washers. Measure 3 times, drill once to avoid extra holes in the apartment walls.
-

the bear
> 3 dayJust installed for my 65in. TV. Build quality is excellent. Just mounting wall bracket takes two people. I did it myself put it was some work. One person to hold bracket and the other to screw bolt into stud. Very well designed. I would go with a lighter weight model if you have a 55 in TV. The wall will come down before this puppy will. This model is overkill for a 55in. TV. I like the design as you can slide the TV left or right several inches for centering. Finding the studs can limit how well you can center the TV. Some brackets fold back against the wall but move the TV left or right when TV is against the wall. This brand pulls the TV straight out and back. The instructions need improvement, mostly pictures, some verbage is needed on how to use the template. Biggest problem for me was making sure i was in the center of the stud. Be sure you measure carefully several times as there is not much room for error. I would also recommend that the slot holes be enlarged slightly as the bolt just fits into the slot. A small level is supplied that attaches to the template. Be sure it is precisely centered. A little bit off and the template with not be exactly level. I had to shift the bracket all the way to one side for centering in my application. Doing so caused the mounting bolt head to just clear a metal lip that is located on the top and bottom of bracket. I had difficulty getting my socket wrench onto the bolt head. A socket wrench is supplied but there is no way it will get the bolt into the stud more than a half inch or so. A socket wrench is needed for more leverage. They need to give another 1/8 clearance or so between the lip and bolt head.
-

ODIOFYL
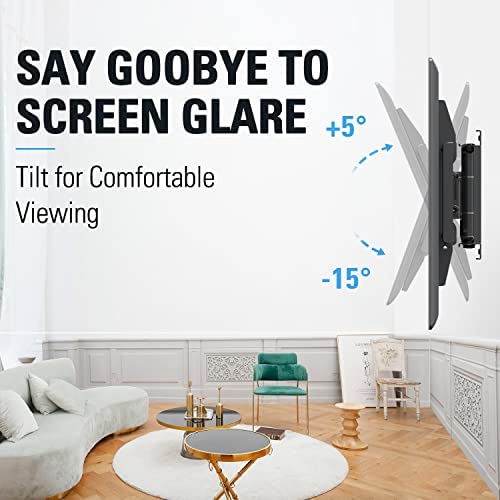
> 3 dayThe product is well made. Tilting adjustments and leveling are simple after TV mounted. Instructions are easy to follow with accurate images and step by step procedures. Hardware was well labeled. Happy with purchase!
-

ImageH
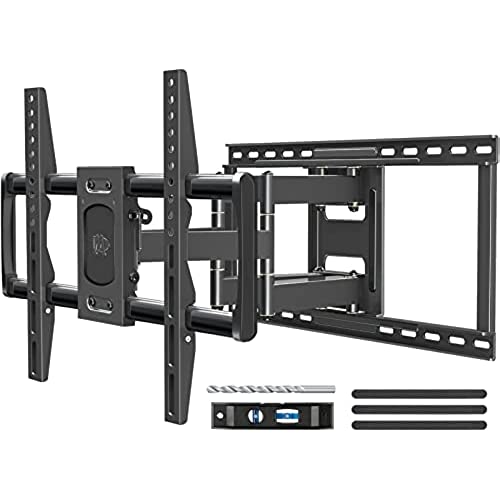
> 3 dayI have always purchased Sanus brand TV wall mounts from Costco thinking they were the best/most robust. Boy was I wrong! Unfortunately I didn’t discover these Mounting Dream mounts sooner. These are much better than the Costco Sanus brand mounts in all areas: from ease of installation, to included items in the box, to overall build quality (I must admit the Sanus are pretty heavy duty mounts too). To begin with... the installation was FAR better than all the previous wall mounts I’ve ever purchased. Yes you still need to work some to install it, but it not only comes with a cardboard wall template to drill holes into the wood studs, but it actually comes with the correct size drill bit included in the box! It also comes with two bubble levels: one to adhere to the cardboard template to level it (ingenious!), and another one to insure the mount is level when attaching to the wall. I’ve NEVER seen this included before in a wall mount! It made installation A LOT easier! They also include a bolt “wrench” to screw the bolts into the wall. Not only that, but it also comes with an included HDMI cable in the box. And the build quality is very robust. This is definitely a heavy duty wall mount! As a result it weighs quite a bit (so make sure to secure it to wood studs). I’m never going to buy a Sanus brand wall mount from Costco again. I understand now why it’s called “Mounting Dream”!
-

Jack Beery
29-11-2024I have now installed eight of these mounts on 55” and 65” inch TV’s I am at a loss to know what more I would want in a TV mount The key features are: One-piece long wall plate is all assembled and can be placed on the wall without the TV Includes a cardboard template that makes it easy to predetermine approximately were and what holes you will use to mount the one-piece long wall plate Screws to mount the One-piece long wall plate to studs are included. Two brackets with the necessary screws included attach to your TV and then once attached you can pick up the TV and hang the brackets onto One-piece long wall plate easily. Two tube clips with screws lock those brackets with TV onto wall plate. A lot of extra hardware so you have the right screws and spacers. Things to watch out for: The One-piece long wall plate as delivered is too tight for moving TV once assembled. It is better to loosen the six (6) pivot bolts before mounting the long wall plate on wall (not too much about a turn and a half each. For this you will need a Hex Key Wrench Set and an open end wrench set (strange but true I found two different size nuts). Check the feel of opening the plate before installation. To mount first install the two brackets on your TV then measure from bottom of TV to top of hook on bracket . With that measurement establishing the height of the One-piece long wall plate is easy. I have observed that many people want the TV too high in a living room this will strain the neck. I position the bottom of the TV 46 inches above the floor. A bedroom is different because for two reasons you are lying in bed and occasionally one must look over a too tall belly. I position the bottom of the TV 56 inches above the floor (check for overhead clearance before mounting. Find the wood studs you plan to mount wall plate to. Use the cardboard template to determine the position of the upper left lag screw and which two elongated holes work correctly for your studs. Drill a pilot hole for the first lag screw, then with a washer on the lag screw fasten the upper left side of the wall plate about one turn loose. Use a level to position the wall plate and drill the upper right hole and use a second lag screw with washer. Recheck level; recheck distance from floor to bottom of TV (as planned). Install lag screws three and four. Tighten all lag screws. Then Hang TV then connect TV If for some reason the set is not level this can be adjusted at this point. Remember you may have exposed wires you don’t like. Please see my review of the Datacomm 50-3338-WH-KIT Easy Mount Cable Organizer Kit and PORTER-CABLE 43218 3/16-Inch Piloted Down Spiral Drywall Cutout Bit to help you with that problem Good Luck Mounting to wood studs is easy. I have mounted some to metal studs using 1/4 X 3-1/4 T-Anchors - For Hollow Cavity Applications when you use this part you will need to add a lot of spacers or chase the threads further as the threads have not been chased far enough to tighten the screw. Also after you tighten screw you will probably want to cut off the excess thread.
-

Bill M.
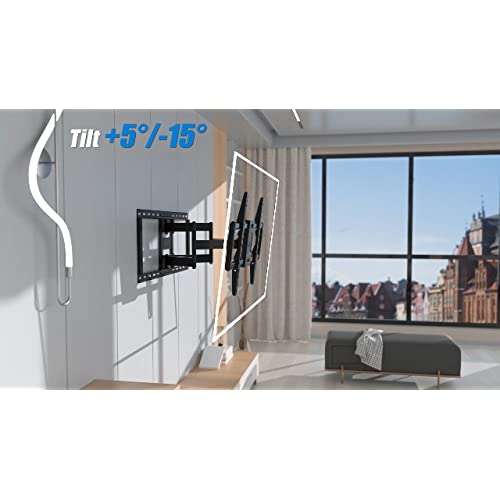
> 3 dayI have to say, this was one of the most well-thought-out products Ive ever purchased. The item arrived well packaged in a sturdy box (inside another Amazon box) with everything well laid out inside. All of the fasteners were individually packaged so theres no fishing around for the right part. For the record, I used this to mount a 65 TV that weighs about 50 lbs. It is definitely sturdy and can hold much more. Additional tools you will need: Tape measure, stud-finder, drill w/drill and screwdriver bits, wrench & socket set (SAE). Mounting on the wall was a breeze. My advice to other buyers that you will need to locate the wall studs accurately and you will need drill the pilot holes as close to the center of the studs as possible - particularly if youre mounting a heavy TV. Theres just no getting around that. Use the stud-finder to mark the edges of the studs, then use those marks to determine the mid-point. Make a couple of passes to be absolutely sure. Included in the package is a peal-and-stick cardboard template and two bubble levels. Dont bother with the one that youre supposed to stick on the template, just use the big plastic one. Youre going to want to do some measuring here to make sure you place the mount exactly where you want it. I was lucky that the center of the TV was almost dead-center between two studs. Youll also want to measure the height of the mount by test-fitting the part that goes on the TV and doing a little figuring on how much to move the mount up or down so that the TV is where you want it. Once youve drilled the holes, screw the bracket to the wall and use a wrench to snug the screws tight. Dont over-tighten or youll strip out the holes. Make sure you put the mount right side up (Yes, I made this mistake). Next, attach the brackets to the TV. The kit comes with an assortment of screws, washers and bushings to accommodate any TV. Each TV is different and youre just going to have to use common sense. Dont over-tighten these screws either, but the brackets need to be snug. Before hanging the TV on the wall mount, ensure that the side-to-side and front-to-back tilt adjustment screws are tight and relatively level. You can adjust them later to get them perfect, but you should have them close to where they need to be now and tightened down so the mount doesnt move when youre trying to hang the TV on it. Have someone help you lift the TV onto the wall mount. It just hangs on there (at first), but its much easier if you have someone to help guide it into place. Attach the locking brackets to the bottom of the TV brackets and youre done!!! Operation of the mount is very smooth, though it takes just a little bit more effort than Id like. I attribute that to the fact that its brand new and Im certain a few drops of oil strategically placed will resolve that. BY NO MEANS would I suggest getting a different mount based on that purely-subjective opinion. This mount is perfect for a big TV. Its a little pricier than most, but worth every penny.
-

mdh
> 3 dayOverall, I am very pleased with the product and extremely pleased with their support. They took something that is rather complex and made it DIY. These mounts have to accommodate different TVs and wall positions. I purchased the 2298 model because it has the maximum flexibility as my wall outlet and stud positioning are not ideal. This mount was able to compensate horizontally and vertically by about 4 inches which made it perfect. Likely the most confusing part is picking the right spacers to go with the TV bracket screws and this required me to contact their support team as Samsung is not very clear in their manual, in my book. Their Mounting Dream support team was very patient and responsive with me and you can tell they know their stuff. The arms are a bit stiff and I will hit it with some WD40 (recommenced by their support team and manual) as this bracket is by no means flimsy. Net-net: I like this system, and their support, so much that I just ordered another one for the living room. Now I need to figure out which TV to buy for that room LOL.
-

R. Teale
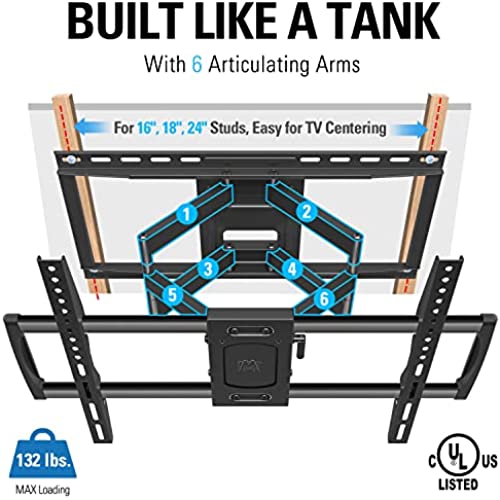
> 3 dayI thought this mount would be overkill for the Samsung 55” UHD TV Series 6, since its VESA hole spacing is 200mm x 200mm. But it turned out to be the perfect combination of solid and flexible. The 2 wall studs I ended up attaching to were 13” spacing, due to two walls coming together at that point. But this worked just fine for that. I used the provided M8 x 50mm bolts and 2 plastic and 1 metal washer for each bolt. Of course I also used the plastic sleeves provided by Samsung as well. That combination of washers was just right to keep the bolts from murdering the innards of the TV. The only issue I ran into was that the provided 7/32” drill bit provided was too small in diameter to properly drill the holes for the lag bolts. I needed to go up one size to a 15/64” bit. Then it was perfect. I think this is why I keep reading reviews complaining about the lag bolts shearing off upon installation. Do yourself a favor and use a 15/64” bit for this install. I am impressed with the solid nature of this mount and am glad I went with this more expensive version.
-

William F Blake Jr
> 3 dayThis is a great TV wall mount option. Good Quality. Easy Installation
-

Gary R
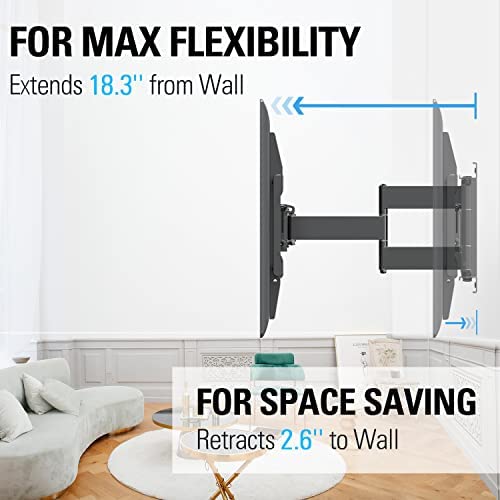
> 3 dayThe mount is very sturdy and has a great range of motion. It feels solid fully extended and tilted at several angles. There is no wobble or sway at all. It will also collapse completely and only pushes the TV out an inch or so from the wall when fully retracted. After using 3 other types of mounting arms/brackets with different TVs, this was by far the easiest Ive ever installed. Actually hanging the TV on the installed mount instead of wrestling with the TV while attempting to fasten it to the mount is simple enough to be brilliant. The mount comes with everything you need except a drill, screwdriver, measuring tape (you do want it centered on the wall dont you?), and stud finder. My installation was a 65 TV over a fireplace, so I just substituted masonry bolts and anchors I already had in place of the ones they supplied. Warranty violation? Maybe, but this thing is a rock, so Im not concerned. Please note that they offer to send you free masonry anchors if you need them, but they are not included. The included lag bolts are definitely adequate and I suspect the mount can probably support more weight than they tell you. (I seriously doubt you would want a or need a TV heavier then the recommended limit.) My assumption is that most people will be installing into drywall and studs, and for that the kit is complete. It has several screw sizes and spacers that will fit just about any TV out there. Directions are clear and easy to follow. They even include a template for mounting the base as well as 2 levels - one to stick on the template and another to use with the mount. While I did find that the stick on level was not completely accurate, it is a clever idea and definitely helps to make sure the template is level while you find studs and mark and drill pilot holes. The template itself has adhesive strips to keep it in place during the process. I had no issues removing it from the wall when I was ready to install the mount. The installation took @ 20 minutes from opening the box to securing the last brackets. The worst part was lifting and hanging the TV. I did that myself, which I would not necessarily recommend unless you are super confident you can handle the weight and awkwardness of the TV. Most TVs (as they show you in the directions) are a 2 person job for at least the hanging. Would definitely recommend this mount. If/when I need to do this again, I will get another one.


