
3D Printer Kit with Aluminum Ender 3 Extruder Upgraded, Compression Die Springs for Bed Leveling, Metal Hand Twist Leveling Nut Suit for Ender 3 Pro/5/5 Pro, CR-10 Series/10V2/20/20 Pro
-

Pete
> 3 dayWorks great, this is a good upgrade when the plastic extruder arm finally breaks. The springs not that useful with buildtek, but if you have a heavier bed with glass they might be useful
-
george o.
> 3 dayCrap
-
John S. Bright
> 3 dayParts were well made, and fit and performed well
-
Jeff C.
> 3 dayI was really pleased with this purchase. These leveling nuts are not a cheap plastic rather, a nice aluminum. The extruder kit is also a nice hard all metal, came with all the mounting pieces, including an extrusion gear and bearing. Overall quality is great and amazing value.
-
Trouble_Man
> 3 dayAlready unimpressed. Just got the package, opened it up and everything looks the part, minus the springs...because theyre not there.
-
Nick Goodman
> 3 dayInstantly solved all leveling problems i was having.
-
Chris
Greater than one weekThe metal wheels are designed so the edges of the wheel are further up then extruded center pin. So the edges scrape and its difficult to spin. Terrible design. But I put all the other things on it already so I wont bother taking the rest apart to return it
-
Jacob Harman
> 3 dayThese work much better than the stock pieces. But they still come loose on their own sometimes.
-
Daren P Lim
Greater than one weekThe metal extruder is to replace the plastic one that the arm cracked. Warning the z will need to be adjusted as the springs are taller, making the bed higher. Failing to account for that the nozzle will drive into the bed and damage one or both. The bed remains level better after, but be aware to check first.
-
Tiny Lens
Greater than one weekThis set is a must have for any Ender series printer. The original springs that come with your printer are not that strong which leads the bed to be become unlevel very easy, sometimes even during a single print. I used to have an adjustment wheel left on the counter under my printer because it worked itself loose during the print. This set of springs will take care of mist of the leveling concerns you may face. The wheels themselves arent bad that come toil the printer but the red ones look and feel a lot better. The all metal extruder is well worth the money and time it takes to replace. The original one is plastic with a metal tube for the filament to travel thru. After 6 weeks of daily printing of PPE, the filament, even with a filament guide cut thru the tube and started to cut thru the plastic feeder. This will eliminate that problem all together. You have to be aware that the gasket/screw that holds the boded tube to the extruder is NOT the same one/size as the original plastic one. You will need to use the same size that is attached to your hot end (the other side of the boden tube) Get extras of that as well...... Overall, this is a first paid for upgrade that you should do on your machine. While you are at it, get some extra boded tubes form Capricorn.

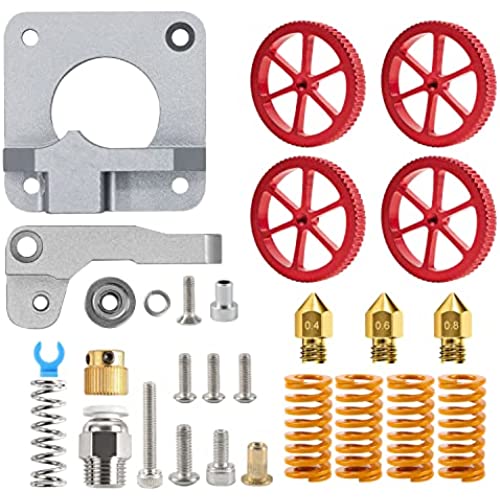
Creality 3D Printer All Metal MK-8 Extruder Feeder Drive, 4PCS Aluminum Hand Twist Leveling Nut with 4PCS Hot Bed Die Springs, and 3PCS MK8 M6 Brass Nozzle.
Installation position of all accessories

It is an update for the printer, and can resolve the under extrusion and uneven platform problem. Through smooth extrusion and controllable printing speed, the printing product has higher operability and stability.
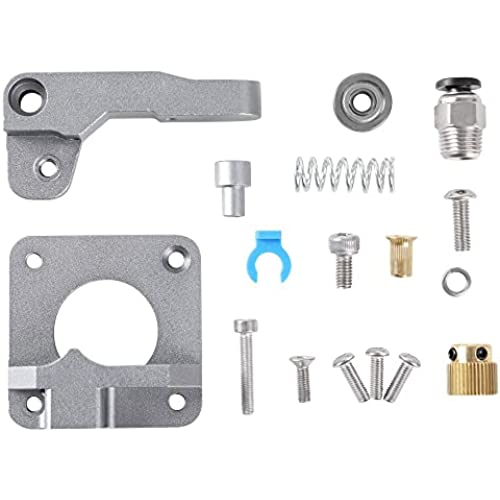
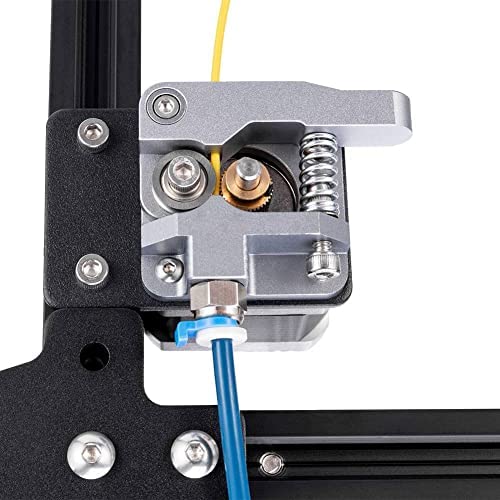
Extruder installation steps

Update for the plastic extruder, and the silver exturder has smoother feeding than the red metal extruder, more stable and durable. Compatible with PLA/ABS/Wood/TPU/PTEG, 40 Teeth drive gear feeds the 1.75mm filament very smoothly. No need to change stepper motors or other mounting hardware.
Extruder part details


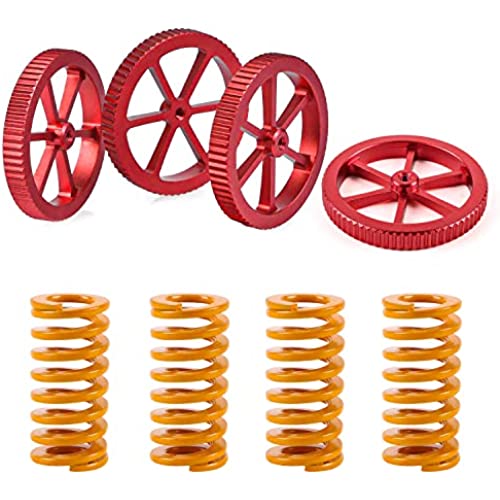
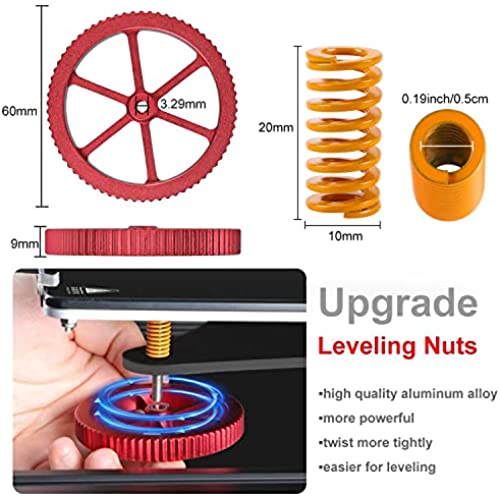
Upgraded Aluminum Hand Twist Level Nut
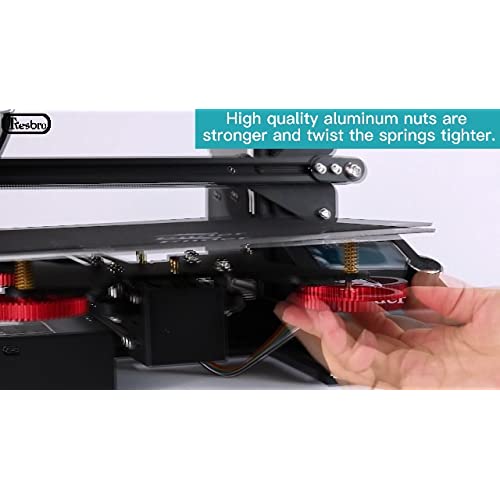
These red aluminum nuts are original upgraded replacement part. Made by high quality aluminum, last over years, much longer than black plastic nuts. Metal nut is more powerful and will twist more tightly than plastic nuts.
The torque of these nuts is large, making it easier to fine tune the hot bed.

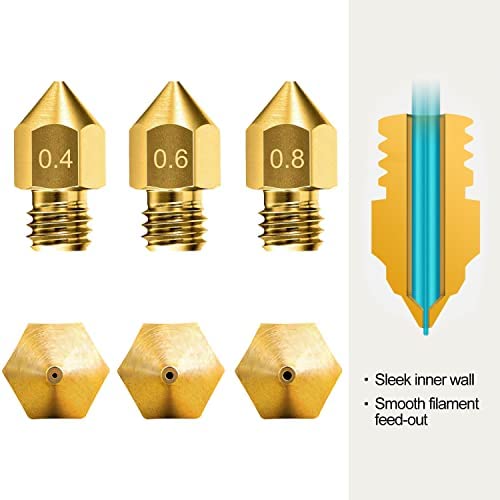
Three mk8 brass nozzles
The diameters of the nozzles are 0.4mm, 0.6mm and 0.8mm, you can choose different diameters to control the printing speed or details. which is of good thermal conductivity and high wear resistance, reducing oxidation reaction under high temperature and getting good prints. Filament Diameter: 1.75mm.
Applicable models

