
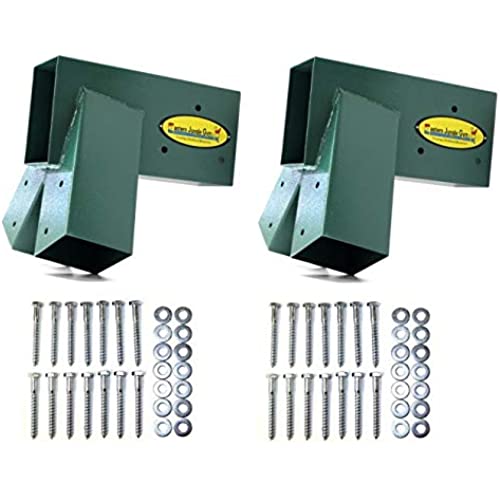
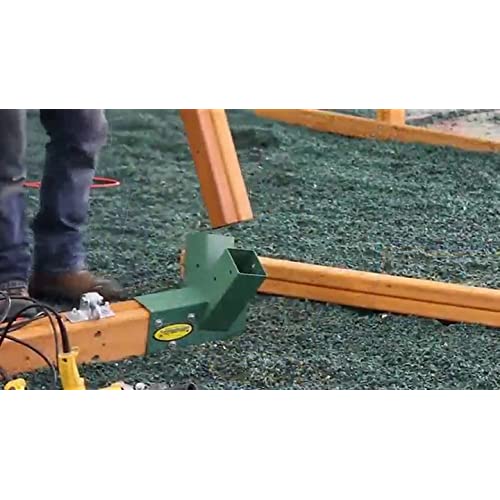
Eastern Jungle Gym Easy 1-2-3 A-Frame 2 Brackets for Swing Set with All Mounting Hardware, Green
-

steve_in_pa
> 3 dayWell, almost. Theyre big. Theyre heavy. Theyre sturdy. Every bit the 10 pounds they claim to be. Built mine 20 long with a 12 and 8 4x6 connected with the center bracket. All wood slid in fairly easily. Definitely not a one person job though. Mounted the hangers first, then slid the 4x6s in. I didnt encounter the issues some of the others did. Maybe my wood wasnt as green. I did have to tap one in with a rubber mallet. I also used 10 4x4 legs for extra swinging height. Thats where the second person comes in handy. Someone has to hold the leg up while you slide it into the bracket. I also made sure that all the wood slid in BEFORE I started constructing. Took each bracket and tested installing it, then figured which worked smoothest with which leg. Used three of us to raise it. Felt like an Amish barn raising. Overall, I think these will outlast the kids!
-
R. A. Holland
> 3 dayGood system. I’ve seen some reviews of complaints of beams not fitting in the brackets, taking them to the lumber yard and trying to fit 4X6 beams on a lumber rack-not realistic. I used a sheetrock knife to take down all four corners and then a 5 in orbital sander with 80 grit and sanded all sides down—make sure to radius the corners like in picture(bottom side is not complete so you could see the difference between the two). You will still need a rubber mallet but will slide on easily. Hope this helps some aggravation for people.
-
Cathy
Greater than one weekThree kids and a wife who loves green! DIY swing set came out amazing and the kiddos really enjoy the options.
-
Valerie U
> 3 dayThere are no instructions provided but its easy enough to figure out. Be sure to buy pressure-treated ground contact wood for 1) the swing set to last and 2) to keep the carpenter bees away. Also, its easier to stain the wood with a quality outdoor stain or sealer before you assemble it.
-
NOAMattD
08-06-2025Used these in combination with a middle bracket to make a 16 A-frame swingset. Pros: + Durable paint and steel, holding up perfectly after a few months in the elements + Included GALVANIZED hardware - important! + Snug fit - I see a lot of people complain about it being a tight fit for a standard big box 4x6. I see that as a good thing because I know its not going anywhere. About 15 minutes with a hammer and chisel and youll be good to go, but Id also recommend letting your pressure treated wood dry out for a week or two beforehand to make it easier. Cons: - As others have said, regular 4x4s fit a little loose in the leg holes. I didnt use shims or anything, but I wish they fit a bit more snug. - Lack of documentation: A little time with an angle finder and some experimenting and I found that a 15 degree bevel and 15 degree miter will get your legs to sit more or less flat on grass. It would have been helpful if the angles for the legs were provided by the vendor. All in all Im happy with the brackets; for less than the price of a premade swingset we got to build our own custom one.
-
bobcat
> 3 dayThis product works great, appears to have a good coating and came with hot dipped galvanized lag screws to prevent rust when used on treated lumber. I had read reviews from people who couldnt slide this onto cedar lumber. That is because cedar comes in full 4x4 dimension, whereas treated lumber is called 4x4, but is actually 3.5x3.5 nominal dimension.
-
Qvox
> 3 dayThere is another seller on Amazon that uses a very effective product title that leads you to believe that you are getting TWO brackets instead of one. Of course in that detailed description the seller clarifies its for ONLY ONE bracket, but its such a simple product, and the fact that most swing-sets will need two, someone like me might just hit click and buy. I was a bit shocked when only ONE bracket showed up. I sent that ONE bracket back primarily because I thought there listing was a bit shady, and instead I bought this set of TWO brackets. It comes with everything you need and includes all the bolts. The brackets are strong and produce a study platform for a solid swing-set. Im very happy with the product, AND it was cheaper buying this set of brackets then buying from the other seller. If this is what you are looking for, go for its a good quality product.
-
Brian H.
> 3 dayAs many other reviewers have noted, these brackets are very tight fitting on a 4”x6” cross beam. I took the brackets with me to a wood yard and I recommend you do the same. The yard I went to had a new bundle of 12’ 4”x6”s. I sorted through about 10 before I found 2 that the brackets would slip over both ends tightly. The other 4”x6”s would have had to be planed down 1/8”-1/4” to get the brackets to fit. The beams from the yard I was purchasing from were ‘Yellow Wood’, so that shows you what variations in dimensions you could get from a random 4”x6” from the supply store. The brackets have all of the hardware needed to affix to posts and cross beams. There were no issues with any 4”x4” posts fitting. Even though I made sure the brackets would slide over the ends of the 4”x6” cross beams, I still had to use a block of wood and hammer to get them to slide all the way on. I drove them all the way flush to the ends of the beam. If you wanted a 3’-4’ overhang, it would be difficult to get the brackets to slide that far without planing down your cross beam. I made a 24’ swing, so I used these brackets on both ends and a middle support bracket to join the 12’ Cross beams. The middle support bracket seemed to be a little larger than these brackets and went on both ends of the cross beams with relative ease. I installed hardware to hang 3 swings on each 12’ Beam. This allowed for 22” from cross beam end to the first swing and 20” center to center for each swing hanger and 20” between each swing. This is very spacious for my girls (10 and 7) and the 20” spacing also allows ample room for adults to swing. You could certainly fit 4 swings on a 12’ Beam if you needed too. With the 4”x4” posts angled out on the end brackets, you could get by with starting your first swing hanger at around 14” from the end of the beam and be fine. I used 12’ 4”x4” posts to allow the girls to swing higher. I also used a 2”x6” brace on each set of 4”x4” posts. I did not trim the ends of the posts where they join the dirt and I have not anchored my swing set. I tested it out by swinging as high as I could and this set does not move at all. I may bury 4 posts on each end of the swing set and screw the ends of the 4”x4”s too just to be safe as the girls get older and wilder. I attempted to stain and waterproof my wood before putting it up, but it was just too green to hold the stain. I’ll come back and do that in a couple of months. I did have the luxury of using a front end loader to hold the cross beam in the air while I stood the 4”x4” posts up and into the brackets. Most slid right in and tight. If they didn’t, I got on ladder and rocked the cross beam while pulling down and they easily slid the rest of the way down on the 4”x4” posts.
-
Edward C. Olivares
> 3 dayThis is a sturdy bracket for a swing set or porch swing. However, pressure treated wood will require fitting. I purchased my lumber, 4x6 beam and 4x4 posts from Lowes, so nothing non-standard. I went with pressure treated since the swing will be out in the weather. The beam and post ends required some significant work with a belt sander and coarse grit belts to fit into the brackets. Once the fitting is done and the brackets are installed they look good and will definitely get the job done, but be prepared to put some sweat into the job!
-
Andy
> 3 dayThese swing set frame brackets are very sturdy and well constructed. For my swings, I used a 4 x 6 x 10 treated beam with four (4) 4 x 4 x 10 treated support posts (the actual cut-measured sizes are a bit smaller). Since the beam and posts need to fit into the brackets, you want the lumber you choose to be as straight as possible. I rounded the edges of the posts with a sander to smooth any rough edges. This brought the beam height somewhere between 7 and 8 feet once assembled (which was a good height for both kids and grown-ups; however, I needed to add some links to my swings to lower them somewhat). I used 2-1/2 5/16 galvanized lag screws and 5/16 galvanized flat washers after predrilling holes. You need 28 screws and washers for attaching the posts and beam to two (2) of these brackets. It may not be necessary, but I also added a couple of side pieces for stability. The brackets are a tight fit which is better than if they were too loose. For this reason, you should expect to need to tap them onto the top beam (I did this first). Use a wooden block across the end to hammer against so that the bracket isnt damaged. If you are also adding swing hardware, fit the end posts first so that you can better tell where to add them. I was able to add three (3) swings (two regular, one toddler/baby swing) to the beam. Id suggest adding the swing hardware before attaching the posts. Its easier to drill holes for the brackets before adding the post legs. For the four (4) posts, I also wound up having to tap them in before predrilling holes and screwing the bracket to the posts and beam. After assembling the brackets, posts, and beam, the swing frame will be pretty heavy. You may need a couple of people to raise it up from its side. Its easier if you slide a work table or something underneath to raise it part way up to give yourself better leverage.


