
Micro Swiss Direct Drive Extruder for Creality CR-10 / Ender 3 Printers
-

Joseph
> 3 dayI tried other hotends and setups prior to this unit to keep the upgrades cheap. I spent more in the end taking that route though I learned a lot. This kit is the best though for out of the box upgrade and print improvement. Dont forget to adjust your steps though.
-
Dr. Alfonso McLaughlin V
> 3 dayI like the quality of both the direct drive and all metal hotend. It has also increased the quality of prints in an already quality product. Thank you Micro-Swiss. You rock!
-
Saul Dominguez
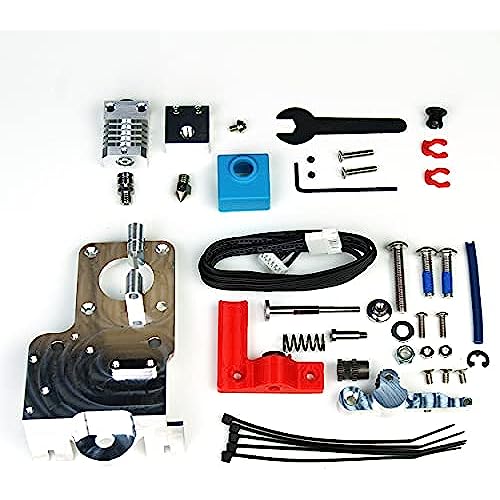
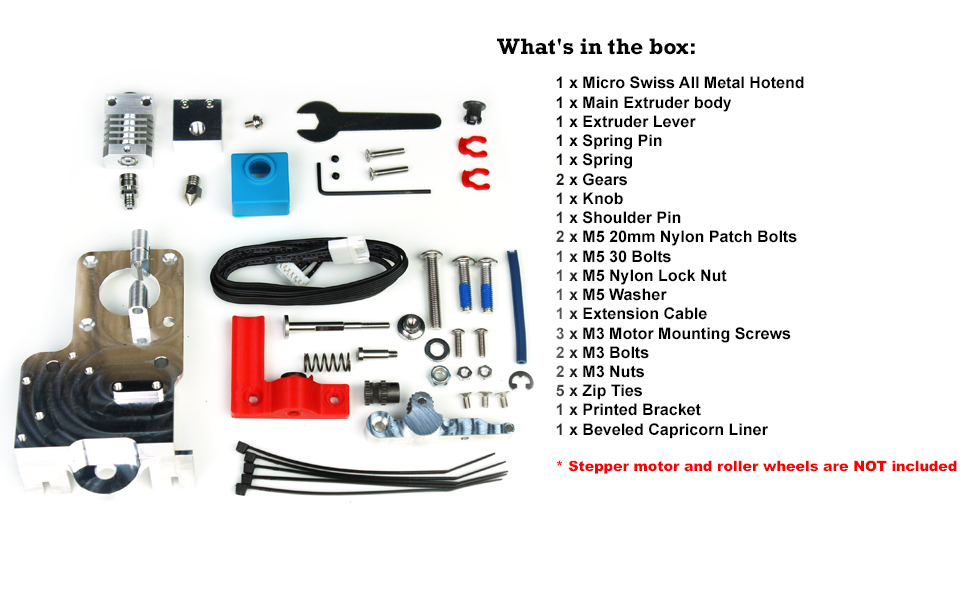
Greater than one weekGot this just in time, shipped right away. Opened the box and you can see everything is in there nothing is missing. Everything looks like it’s good quality material and well made. Can’t wait to start big projects.
-
M. Keadle
> 3 dayI purchased this as an Upgrade to my Ender 3v2 hotend and extruder. First, I have never gotten a print any better than what the stock hotend and extruder gave me. Actually, quality has decreased. It has gotten better, but I have spent HOURS tweaking settings trying figure out what this thing wants to see. I lost ALL adhesion on first layer (after releveling the bed and and resetting Z offset). Swapped back to stock and no issues with adhesion. Not sure what thats all about, but was a huge struggle. Had to go to a glue stick, then to PEI sheet which is awesome. Then the extraction settings... Nowhere close to the recommended setting from MicroSwiss. I am running a fifth of their recommendation for distance and at faster speeds. It is very well made- no question. I just wish I hadnt gone this route. Caused a lot of needed frustration and expense with wasted prints. I was ready to throw the MicroSwiss away and go back to stock. Probably still should since I get better results. I just hate spending that much money to take a step backwards in quality.
-
Gately Wells
> 3 dayInstalled this for my modded Ender 3 Pro. The extruder itself is fine but the hotend sucks. It has no supporting screws so it is free roaming, and also leaks filament constantly. For something that is nearly $100 Id expect much better. Update: Microswiss offered to send a replacement hotend and was very helpful when I contacted them. Everything works great!
-
John
Greater than one weekTakes a while to get the hang of the direct drive but works well.
-
Joseph E Dembrosky Jr
> 3 dayI bought one of the direct drive combos from the company and was somewhat happy with it, then i got this one and Im blown away! Everything about it screams worth the money. Wish it came with a small stepper motor, but ive got plenty of them left over.
-
mami2fourangels
Greater than one weekE steps MUST be adjusted!!!
-
James Gioia
Greater than one weekThis is all high quality stuff, the only issue is it makes the extruder turn backwards on Ender series. I spent the last week learning how to update my own firmware, and I can tell you it isn’t fun. So I wish they would address this very obvious issue. Besides that, though, just beautiful presentation, great prints, no complaints except for the figment.
-
Brian Wellman
15-06-2025Worthy upgrade
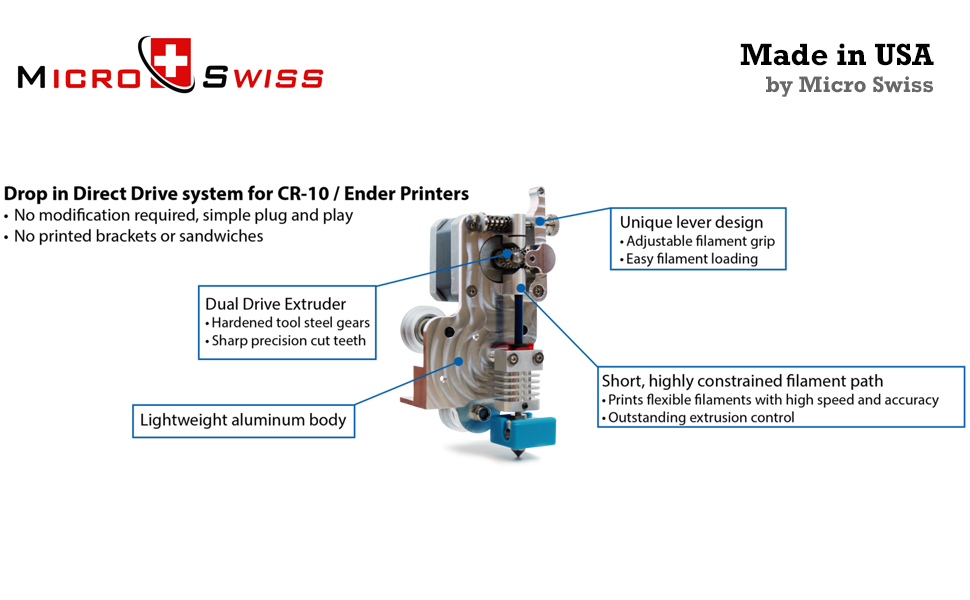
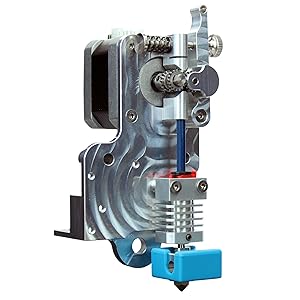
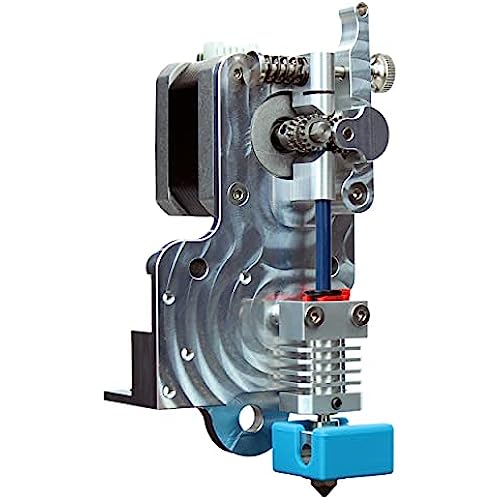
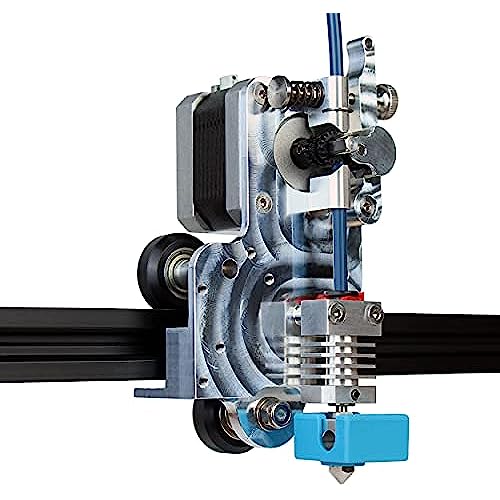
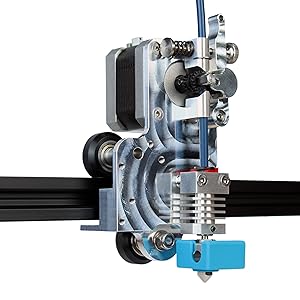
Micro Swiss Direct Drive Extruder is a drop in system for CR10 / Ender Printers
- No modification required, simple plug and play
- No printed brackets or sandwiches
Features:
- Dual-drive train
- Hardened tool steel, CNC precision cut gears
- Adjustable filament grip
- Easy filament loading
- Short, highly constrained filament path
- Prints flexible filaments with high speed and accuracy
- Outstanding extrusion control
Fits:
- Creality CR-10-S5
- Creality CR-10-S4
- Creality CR-10S
- Creality CR-10 MINI
- Creality CR-20
- Creality CR-20 Pro
- Creality Ender 2
- Creality Ender 3
- Creality Ender 3 Pro
Disclaimer:
We notice a recent extruder stepper motor update on Creality machines. Before ordering this kit, please check your extruder stepper motor. If your extruder motor gear is pressed in, you will need to purchase a new stepper motor to be able to complete the installation.