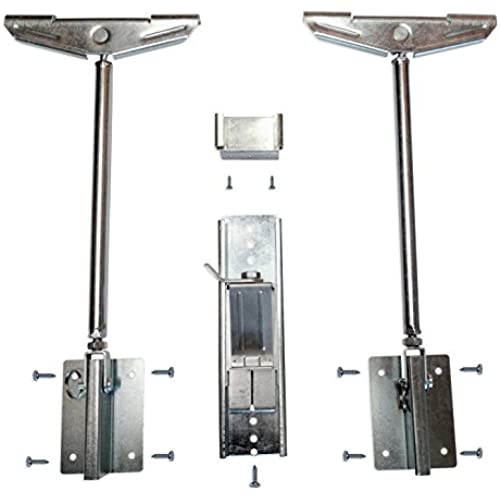
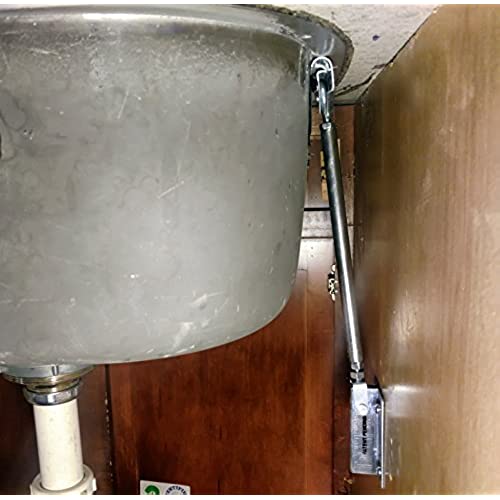
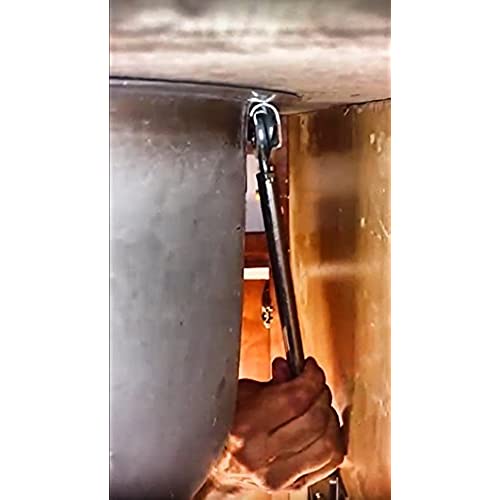
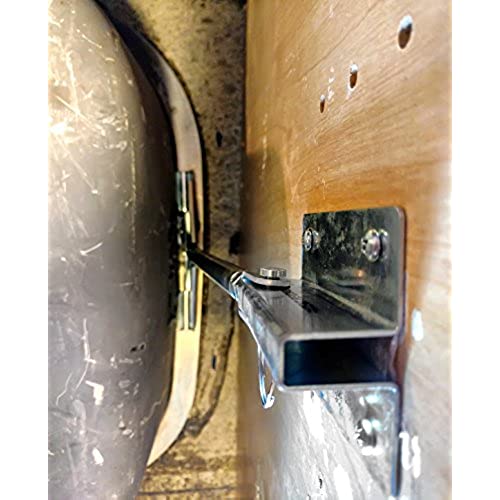
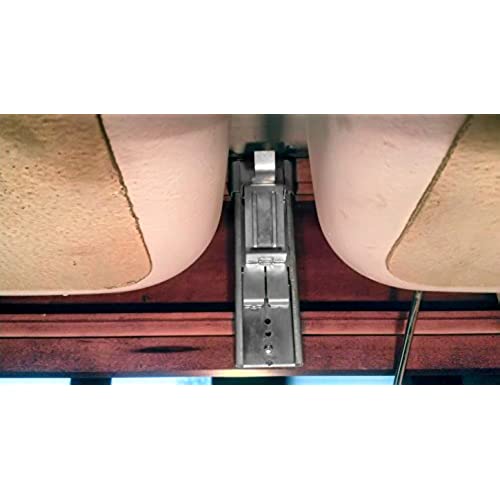
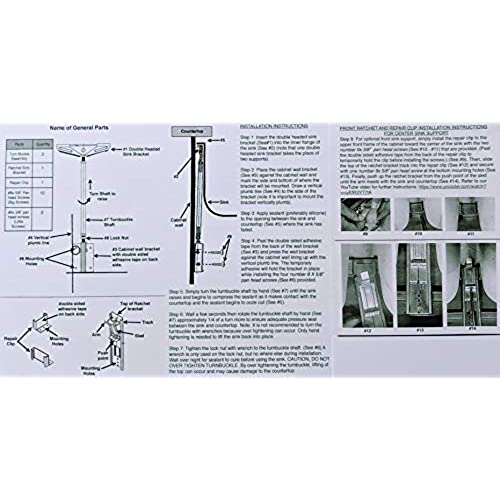


Never Fall Complete Sink Repair system
-

Josh and Melanie S
> 3 dayMy sink collapsed right before the holidays and I needed a quick way to get it back in place. I found this on Amazon, got it in two days and installed right away. Easy to follow instructions and very sturdy. Definitely a worthwhile purchase. Took me about 20 minutes to complete the job
-

LA Sulz
> 3 dayI was quite worried about cracking of granite to repair, but liked the idea of these 2 screws that you tighten manually to help avoid this. Had a friend who is quite handy who was able to complete the job in under 2 hours. Wasnt much room in front to put the middle brace, however. The other issue was once they were in place, the back still had a gap, so used the galvanized wire straps that had been used during the initial sink installation and this seemed to do the trick. I think this is similar to what others have said that perhaps you need 2 sets (2 each side) versus just one. . . or maybe you have to be VERY good at placing exactly in the middle of the sides of sink AND ensuring level when they meet the underside of the sink which was stressed in the install information. Also felt the price was reasonable in USD as Canadian website was much more expensive for same product.
-

Helper
> 3 dayAn innovative product from an inventor. It will help any handyman homeowner fix a fallen sink in matter of hours. Our builders plumber did a shotty job by using Epoxy and wood shims pressed against sink lip and granite. I learnt later that this is a common practice for under-mounted sinks on Granite or Quartz. Positives: Easy to install once sink is held in place using sink setters. Slide and lock mount is very handy to support in the front. Cons: The double sided adhesive cannot hold the weight of the bracket.... needs further development Recommendations: The set should include second Slide and Lock for balanced support or seller should create separate set with for larger sinks with 2 Slide and lock mounts. This is highly recommended for offset 2 bowl sinks like mine. I had to buy second set from granite fabricator supplies seller GrandQuartz.com. Seller needs to caution the buyers or installers not to over tighten the mounts as it would start pushing the granite up away from the cabinet or break the joint.
-

Rebecca
> 3 dayThis is a wonderful product, something I wish granite installers would put on (even at an add-on installation price) when the sink is first set into the granite. (Original install was with cardboard & silicone glue :0(. Our double sink (with same sized bowls on either side) had dropped & husband had supported it with a couple of 1X4s front & back. It was so dropped upon their removal that is was necessary to remove the sink, remove the silicone from the sink & the granite. It was a bit difficult for hubby to get into the cabinet to put the brackets in place, but he did it. Everything now looks brand new. This Never Fall system is so good that we bought a set for our secondary kitchen sink & a set for our son-in-law to install at his house.
-

Tom
> 3 dayThe undermount sink in my kitchen became detached from the countertop. It sunk down and, in turn, was causing an issue with the pipes since they were sized to fit from the original position. Im not that handy of a guy, so got immediate anxiety about who Im going to need to call and how much. Did some internet searching and found this product for a very reasonable price. I figured it was worth the try. From opening the package to having it installed...took under an hour. Its been in place now for a few months and Ive had zero issues. I deviated from the instructions a little regarding where to install the arms (front & back vs on the sides, etc.), so keep that in mind if you feel another spot would be better. But this thing was a lifesaver and I highly recommend.
-

silly goose
> 3 dayMy sink came with mounting hardware that required me to drill holes to the underside of the cabinet. I really didnt want to do that or spend money on tools Im only going to use once. I feel like the screws could eventually come loose from the countertop. Also, I wanted an easy way to remove the sink if I ever wanted to replace it or do any kind of repairs. So, I gave this a shot even though it says it is a sink repair system. I figure if it can support 680lbs, then it should work as a sink install system. Can I use this never fall system without the sink mounting hardware? I hope so. Maybe the company can chime in on this. Anywho, it has been about 2 weeks since I installed it. You need roughly 2-2.5 inches on both sides for the thing to fit. It seems sturdy enough, but I havent been able to put it under any kind of stress since the water is not yet hooked up. I couldnt use the extra support bracket because I dont have anything in the front to attach it to. Company said it would be fine, so I hope they are right. I may end up adding in some wood support. Only complaint at the moment is that turning the turnbuckle can become difficult if there isnt enough clearance on both sides. I couldnt ensure that I had fully hand-tightened it because my hand didnt fit in the gap. The only way I could test was to wiggle the turnbuckle to see if it moved. I will update to see if it holds up after I start using the sink.
-

C. Craig Deal
> 3 dayThe directions were clear and the brackets came with two-sided tape which held the bracket in place for drilling pilot holes and installing screws. Installation was easy.
-

~*~ Sunshine ~*~
Greater than one weekWe just installed these on our under-mounted, stainless steel, double kitchen sink yesterday and I am impressed. Our home is 12 years old and the sink has been dropping in front for some time now. We tried tightening the existing clips but it didnt last, which brought me to research solutions when I found these. Before fixing it, there was a 3/8-1/2 inch gap in the front of the sink, for reference. Im not sure of the limits of the brackets, but they were able to close our gap. Our sink was mounted with 4 clips held up with screws that are placed in slots milled into the underside of the granite countertop, and a glue/sealer between the sink and granite. This may have been adequate if not for a garbage disposal and the fact that the cabinet has a little hinged utility drawer in front of the sink making it impossible to support it in that entire area. That noted, we couldnt use the center mount that was included with this kit either, but the two side supports seem to be doing a great job by themselves. These parts are very sturdy and made well, IMHO. I was impressed with the weight and heft when I unpacked them. There is peel and stick glue-tape on the mounting brackets to hold them to the cabinet wall after you place them and before you screw them in, which is a huge help in installation. Its still a task with many frustrations, mainly from lack of accessibility under a sink with existing pipes and a garbage disposal, but we managed to mount them and tighten everything together after the caulk/sealer was applied. Hooray! It looks like a successful project completed! Fortunately, our double sink was a tight fit in the cabinet and the walls were close to the edges so the angle for mounting these was pretty ideal. We were able to fit the braces between the original clips and tighten them up as well so, hopefully, the combination will be adequate to support the weight even without the front sink support. There are other options that Ive seen in my research, if needed, that could be added, like a brace under the disposal or sink basins. I will update my review if there are any changes or failures with this kit. I would strongly recommend it at this point and, if youre a DIY-type person, that you would be able to install it yourself. Otherwise, Id advise a handymans assistance. 5 stars at this point!
-

Six48 Services, LLC
> 3 dayworked as expected. front clip was a little tricky and I could only use one screw on the base due to limited space. best installed before the sink.
-

Mrs_Mayer47
Greater than one weekHIGHLY recommend; with an undermount sink that fell right out of the granite countertop, I didnt know how to fix it. This made it easy and my sink is now fixed and rock solid. For anyone that doesnt have experience in such things, it was easy to install, with a great instructional video. Im extremely happy I didnt have to pay hundreds of dollars for a repair, and would absolutely recommend this sink repair system to anyone
