
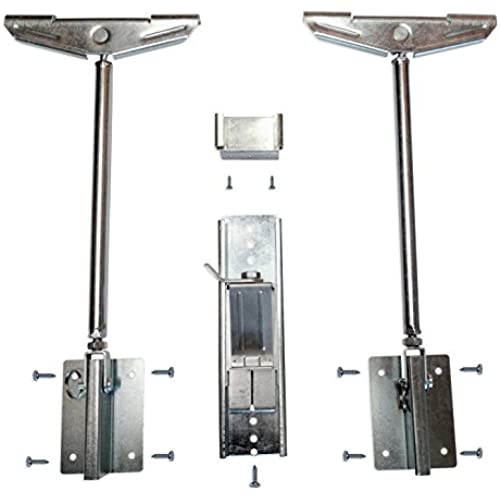


Never Fall Complete Sink Repair system
-

PA Mom
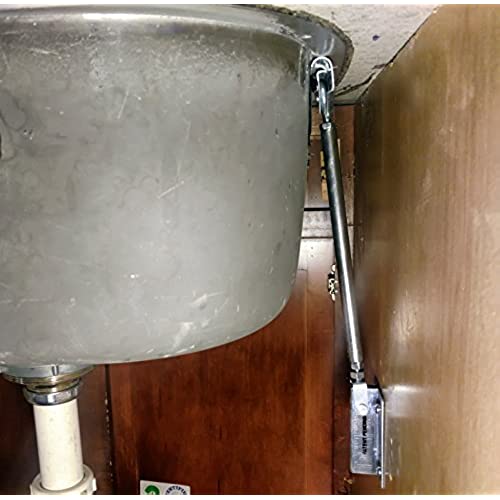
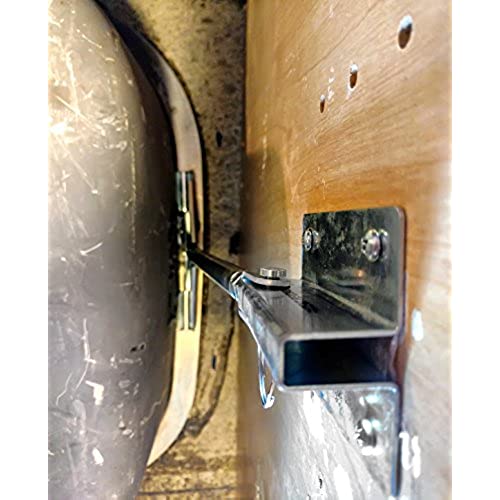
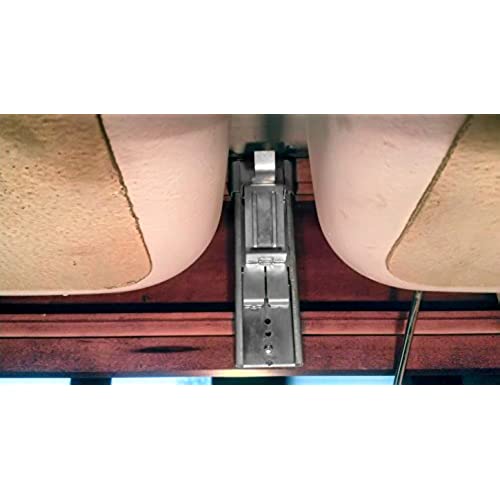
> 3 dayOur kitchen stainless double bowl sink failed on one side after 5 years from the disposal vibration. After wedging 2x4’s under the disposal to stabilize it, I found this Never Fall support system. It was a perfect fix to lift the sink back into position. We were unable to use the front support in the kit as we couldn’t secure the top bracket screw in such a tight space between the sinks. Also, the cabinet did not have a lip to use the alternate attachment. The 2 side supports are sturdy - screwed to the plywood inside of the cabinet. We did not have to disassemble the sink before working on it. Bought 100% silicone to fill the gap. We used painters tape to the granite and stainless sink before filling the gap. Also we placed a light below the cabinet to ensure we filled the gap with silicone sufficiently. If we saw light, we added more! As hubby tightened the sink back into position, I wiped silicone evenly around and then pulled painters tape off... easy process. Watching the YouTube video before starting helped. We found this was a pretty easy fix for the cost.
-
Johnny B
Greater than one weekI purchased 3 sets of these to install a new sink. With 2 sets at the back, 2 on the sides and 1 at the front center, I dont think Ill have any problems with the sink separating. Installation was straight forward, just dont mount the brackets backwards (et to Bruta), makes it easier to get the rods into place. If you have worked under sinks before, you will appreciate how easy the whole system is. Adjusting the tension was a breeze, just use a small pair of slip joint pliers and youre good to go!
-
Oscar DeGrouch
> 3 dayMy SS sink was falling out of the quartz countertop, in a one year old home. I was NOT happy. I found these, and they looked like the perfect solution. They installed very easily, and are very sturdy. My only problem was that the sink wanted to slip out of place, until the silicone set up—so I had to hold the sink in position for an hour. I don’t fault the supports. Silicone is really slippery when it’s wet. Just be aware.
-
J Brown
> 3 dayThe installation couldn’t have been easier. This saved me soo much time and money! Glad I didn’t have to call out a plumber to fix this. I would buy again and again! Sturdy; lifted my sink! Did everything thing I expected
-
Brannon Barnes
> 3 dayFirst I would like to explain my situation. I have been in my house for 5 years and we were able to design it before we moved in. The granite counter tops were my wife and I choice. So undermount sinks came with the idea naturally. Well it failed and caused us a heck of a whole lot of trouble. I am a handyman and a do it yourselfer, but I am very busy with my personal life,regular career and extra curricular activities. I have tried to overcome the situation by reapplying the braces getting new ones from HD! Well...long story short! These work very well I was wondering why some people say u need two sets but its wonderful for my double sink. If directions and some doityourselfer ingenuity is followed I believe you would never have to buy another kit again even if you upgrade your sink its truly universal!
-
Melanie
> 3 dayThis works really well!! I have a double sink, and there was no problem with the middle sagging as someone mentioned. I admit I did not do it, but it took just a few minutes, and with an electric screw driver, and it was a done deal! A lot of folks in the plumbing/construction industry dont want to mess with a falling undermount sink, especially when granite is involved. This easily solved the problem.
-
C. Craig Deal
> 3 dayThe directions were clear and the brackets came with two-sided tape which held the bracket in place for drilling pilot holes and installing screws. Installation was easy.
-
Dan Mora
Greater than one weekWhen I noted that the glue holding the under sink had separated from the counter, I thought that I would have a difficult job on my hand to make it right again. Until I was told about these sink repair devices. Upon looking at the items, I knew that they would do the job for me and it was a no brainier to get sink repair system. It only took some new adhesive, a drill/screwdriver and a steady hand to place the item in place. A few hours for the adhesive to dry and the sink is better than new. I would recommend this to anyone in a similar situation.
-
MikeL
> 3 dayWhy dont sink installers use these from the beginning instead of random blocks of wood slopped with silicone? Only thing I wish was that the rod was capable of using a wrench to turn. There isnt much clearance between the rod and cabinet to turn.
-
Scott A Akey
> 3 dayWoke up on a Sunday morning to find my sink had lost its hold and fell. Being somewhat handy, I had a clue on how to fix it but the thought of chipping away all the old epoxy and re-epoxying the sink was not something I really wanted to do. I had no room to add a support that made a lot of sense. Off to Amazon I went and I am so glad I did! Whoever invented this system is a genius! It is very simple to use, straightforward directions and gave options depending on how the sink is attached. I had to change the general use as my sink would not work with as directed in the instructions, but it worked flawlessly. I could not be more happy and am thankful I did not need to buy a new vanity or re-epoxy the sink.
