
Alpine Hardware Premium Heat Pump Drillless Drill-Less Window Air Conditioner & Heat Pump Bracket - Window AC Support - Supports Air Conditioners Well Over 200 lbs. - No Drilling 2023 Model
-

G001
Greater than one weekThere are two issues number 1 see photos. Number 2 there is no way to seal the surrounding gaps caused by the designs lack of slot for the STANDARD lower bracket on air conditioners. The value is negated by the entire process we went through - purchase, wait, receive, unpack, layout, gather the tools, assemble, realizing the improper weld, choose to forge ahead regardless to make it work, then realizing the typical window air conditioner lower support bracket that usually sits in the window frame has nowhere to go! We missed that when looking at the design. Our fault but, never the less there is no slot for this in the design. This means you have to come up with an alternative way of closing the gap caused by the air conditioners standard lower bracket that would normally sit inside the window frame for its left and right-side wings. Total pain in the ass...period! The amount of time spent on the process is lost so it was returned. Total bummer, nowhere like the majority of what’s available here, does the ad reveal where its manufactured. We are soooooo over this same story, DECEPTION ABOUND!!!!
-
Cawfee
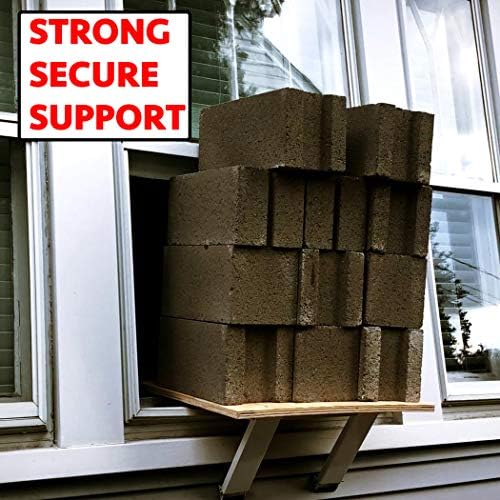
Greater than one weekI have used the one leg and this version. Installed a large 18.000 BTU unit with this item. Not too many parts, decent directions. I had to fiddle with the settings to get it right (VERY weird customer window so harder). Best part was the level-allowed me to gauge EXACTLY when i got everything right. Before the AC unit went in, I hung my 165 pound body on this to show my customer how strong it is. Dont screw around, an AC can break the glass in a window, and/or bend or warp your window. Instead place it on this support. It will protect your window from rot (same customer had wood under their last unit-this job included rebuilding the window ledge). The outside foot will protect most house cladding-even cedar shakes. Ill never install a window unit that weighs more than 45 pounds without the one arm or two arm version. Check your ac unit weight and buy one of these. It will look professional. (I am a Home Improvement/maintenance contractor).
-
John & Nicole
> 3 dayThe A/C support bracket seemed to be sturdy and well made. The double bracket could easily hold up the weight of a fairly large AC. The design seems pretty well thought out and could work in many different applications where a support bracket it required. That one caveat that I mentioned in the title is that It didnt work out with the type of vinyl siding on our house, so we had to return it. However, I cant really say its a fault in the design of the bracket. Our house has large, thick vinyl siding panels that imitate the look of wooden shingles. They are very flexible and stick out from the side of the house quite a bit. Ill include a picture below. While I was setting up the support bracket, I mounted it to the window and rested the rubber feet up against the house. When applying some weight, I noticed that the feet were pressing on the siding a great deal, causing it to flex inward. I was afraid that it might crack the siding over time from bearing the weight of the AC. Also, the vinyl siding is very flexible and springy, so the support feet didnt really have any available surface for which to be firmly planted against. So, Like I was saying, the bracket is solid and will work for a variety of applications, but if you have siding like we do on our house, it might not work out for you.
-
jsergo
> 3 dayThis AC bracket is heavy duty and well constructed. Instructions are a bit confusing and the support legs dont stay in place without an additional screw to hold them up. Im not sure if this is my fault because I cant follow the instructions as my window doesnt look like either of the pictures. But I made it work and I feel that it is sturdy.
-
Spider Mcgavenport
> 3 dayTheres a discrepancy on the build instructions that states using a 7/16 wrench or socket this is absolutely wrong on so many levels, its metric not standard bolts as the kit I received had 10mm nuts and bolts. It was easy to assemble straight forward but at least include the proper hardware with this universal kit please, or update the instructions because it seems like corners were cut on material cost(s). Once my new ac unit arrives Ill update my review with some video and pictures of what Im commenting on. Get this you wont be disappointed its of great quality looks very nice and powder coated steel. My speculation this will last longer than the ac its going to support!
-
lilbill
Greater than one weekThe directions have you assemble things in a weird order that makes assembly very difficult. Also the side bars have to stick out a minimum of four notches cause they hit they each other and can’t go any closer. Also the metal is slippery and the ac unit moves easily, maybe if it was textured it would be a little more stable.
-
Goat girl
Greater than one weekIf youre going to have a window AC unit, you probably need a bracket. This one seems very sturdy for its size, and is doing the trick in holding up my AC. Its not as easy to install as a simple 1-2-3 and there it is. It requires a drill and some technical expertise. Also, in order to fit snugly against the outside wall, you may need further bracing with wood wedges or similar (the shape of my exterior wall required two nearly 3 blocks to achieve level). Read the instructions through before starting installation. You dont want to get stuck halfway through the job with nothing in the open window! I had help from my dad, who thankfully knew better than to start hanging the bracket without taking measurements and cutting the necessary wood wedges (not included!). The integral levels in the arms are really useful to make sure that your AC unit tilts very slightly to the outside and drains away from the window. Once screwed in place, I assume that the bracket will be staying permanently, although Ill put the AC in storage come winter.
-
grannynan
> 3 daySturdiness of brace without using screws or nails!
-
Pro-vaxxer
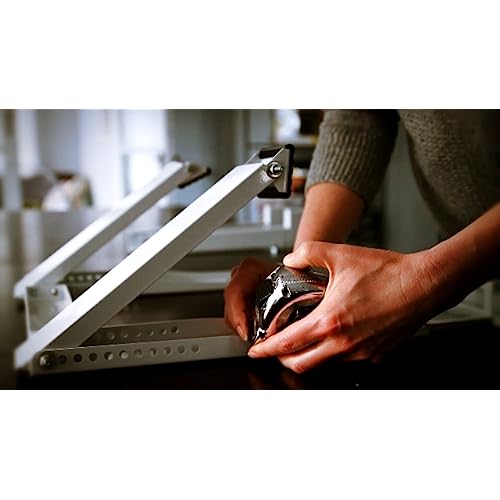
> 3 dayWe don’t assemble stuff very often so this took us a while. We used the written directions along with the online video. You need both. The first step where you attach the brackets is misleading because you should anticipate that they will need to be unscrewed and repositioned to get the angle right. That takes time and tinkering to figure out where they should go. But once you get it right this is a nice piece of engineering. Tension holds it in place and creates a sturdy shelf for the air conditioner. But also be prepared for a big gap at the bottom. It needed to be stuffed with 2x1 inch foam (the black part in the picture). We also used side panels to help cover the sides and to stuff any smaller gaps. Once it is put together we won’t have to do it again and installing the air conditioner in the future will be a breeze (pun intended).
-
Mark Sutherland
> 3 dayI use this for a small window AC unit on my molded fiberglass RV. I had to use different holes for the legs due to the rounded shell to make it level. Works great. I have no fears this will come off during use and destroy my AC unit. Once set up it is super fast and easy to install and remove. A bit pricey but worth the peace of mind.


These 4 Options Need Drilled into the Window Sill
|
|
|
|
|
|---|---|---|---|
Light/Med Duty 1 ArmThis supports up to 85lbs and is a light/medium duty 1 arm bracket. |
Heavy Duty 1 ArmThis supports up to 160lbs and is a heavy duty 1 arm bracket. |
Light/Med Duty 2 ArmThis supports up to 105 lbs and is a light duty 2 arm bracket. |
Heavy Duty 2 ArmThis supports up to 180lbs and is a heavy duty 2 arm bracket. |


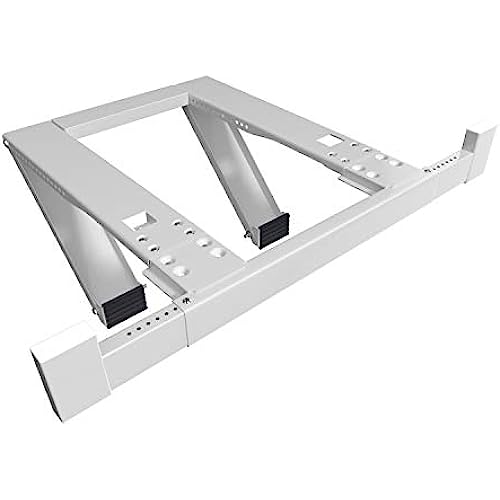
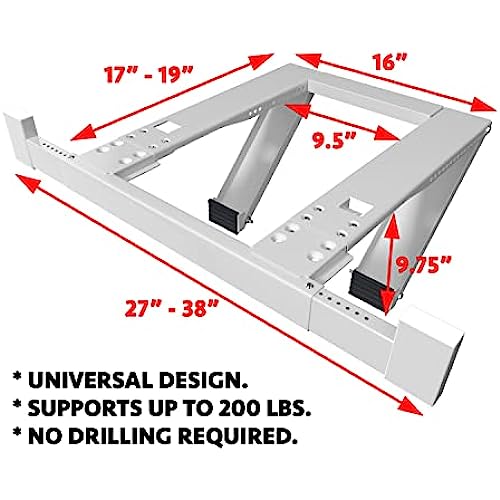
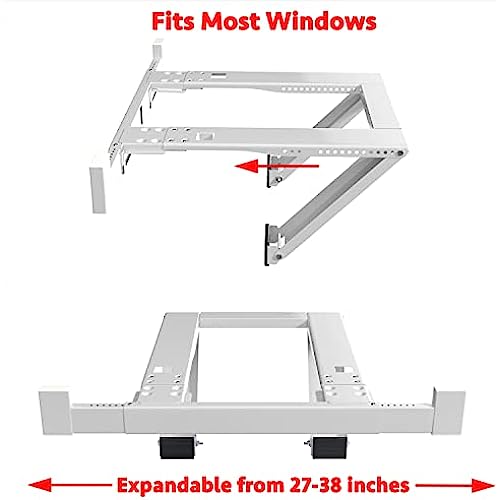
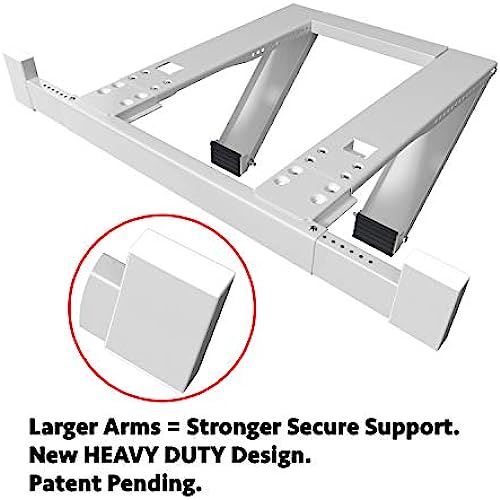
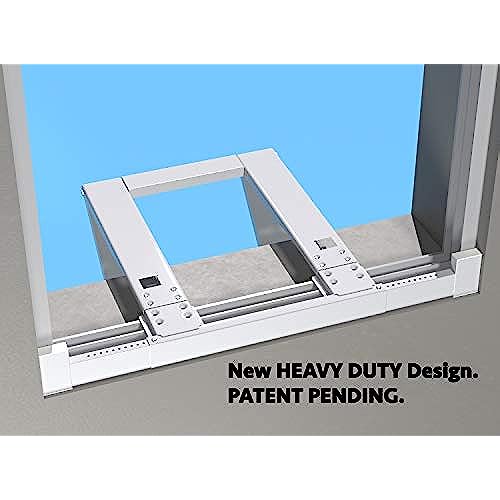
Drill-Less Support Option
This supports well over 200lbs and is a heavy duty bracket that is Drill-Less. This means it does not need drilled into the window sill.

|

|

|

|

|
|
|---|---|---|---|---|---|
| Outdoor Window Air Conditioner Cover | Indoor Window Air Conditioner Cover | Single Arm Air Conditioner Bracket | Double Arm Air Conditioner Bracket | Drill Less Double Arm Air Conditioner Bracket | |
| Options Available | 15" x 21" x 16" | 17" x 25" x 21" | 19" x 27" x 25" | 17" x 13" x 3.5" | 21" x 13" x 2.5" | 25" x 16" x 3.5" | 28" x 20" x 3.5" | Light Duty (85lbs) | Heavy Duty (160lbs) | Light Duty (105lbs) | Heavy Duty (180lbs) | Heavy Duty Drill-Less (200+ lbs) |
| Material | Heavy Duty Polyester | 210 PU Polyester | Metal | Metal | Metal |
| Season | Fall/Winter | Fall/Winter | Spring/Summer | Spring/Summer | Spring/Summer |