
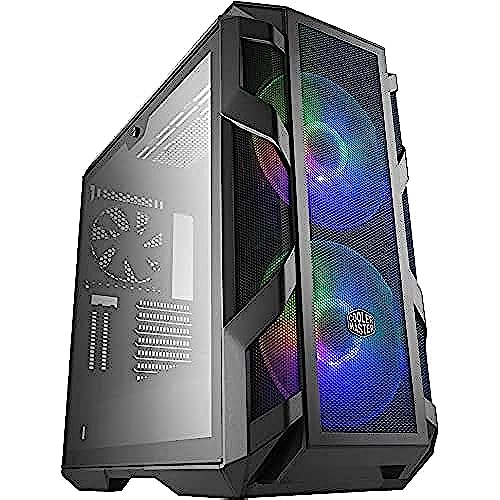
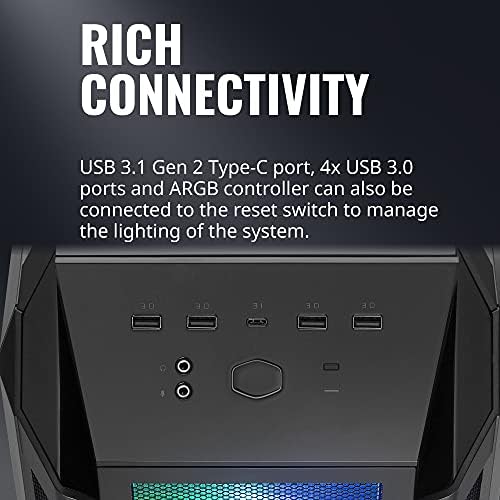
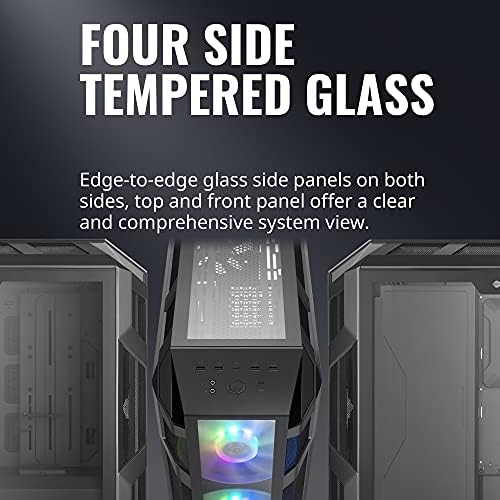
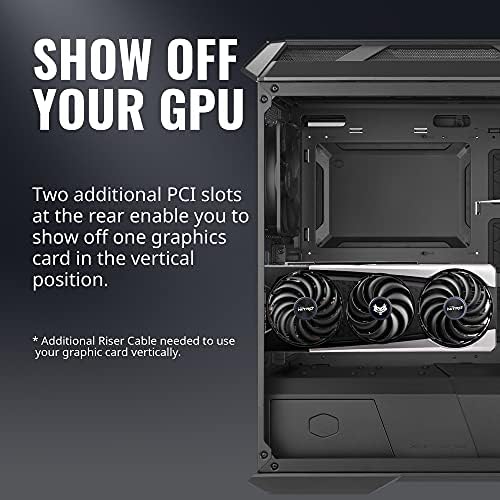
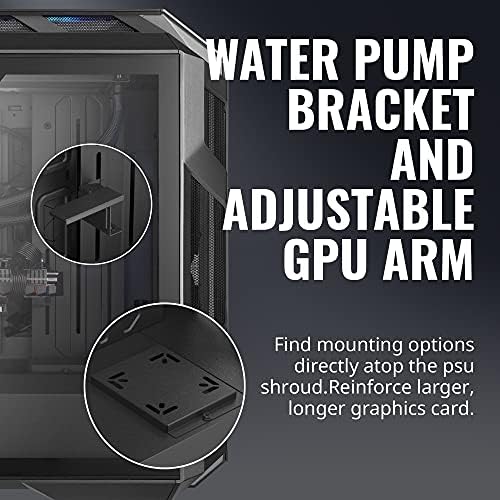


Cooler Master MasterCase H500M ARGB Airflow ATX Mid-Tower with Quad Tempered Glass Panels, Dual 200mm Customizable ARGB Lighting Fans, Type-C I/O Panel, and Vertical GPU Slots (MCM-H500M-IHNN-S00)
-

....
> 3 dayAs a HAF person for the last 15 years, follows the family, its big and heavy. Other then needing a handcart to move it OMG, this case is amazing. I was posting dozens of pics to discord as i built my machine. I will add going back to the big, i put a atx board in it, and could still park my pup inside, but beware cable length. its also what id call a case and a half wide, so while its great for adding your things.. its a big un. 10/10 super happy with this case
-
Micheal
> 3 dayFirst off, the case looks great. However, I am not a fan of the current trend of tempered glass computer cases. This one has four sides with glass on it (counting the optional front piece). And as the title says, the front piece arrived shattered in a thousand pieces because it is packaged on top of the case covered by a 1/4 piece of foam. Obviously something hit the top of the box during shipment which cause it to break, but still a disappointment none the less to pay over $200 for a case only to have it arrive with a broken piece. So I am just using it with the mesh front. As far as the performance, I thought this would provide great airflow to keep my AMD 3950X CPU cool. And it is good. According to Ryzen Master, the idle temperature is around 35 degrees Celsius, which is about 3 degrees higher than my previous case (AZZA XT1). The AZZA had two 140mm intake fans, one 120 mm and one 230mm exhaust fans. At idle, my computer was running around 31 degrees. Under load 50% load, it would hit about 63 degrees while rendering 4K video. When rendering a video in the H500M, the temperature fluctuated between 61 and 63 degrees, thus cooler or at the same temperature of the AZZA case. In my very unscientific test, idle temperatures are higher that I expected in the H500M, most likely due to the tempered glass sides. However, when the CPU is working, it is just as good or better than my previous case. I would recommend this case, but hopefully Cooler Master packages the extra glass piece better in the future.
-
Arnuful
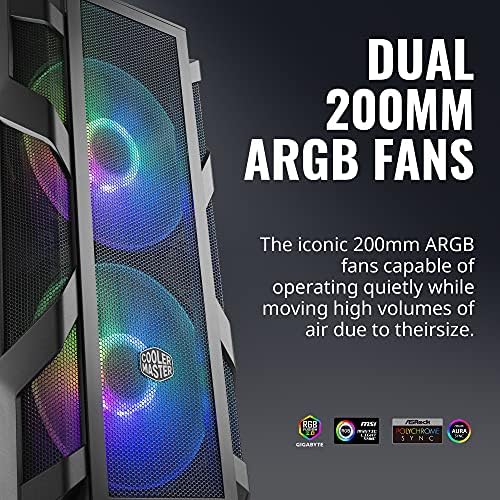
> 3 dayAirflow through this case with the included dual 200mm 800rpm intake fans is absolutely insane, not to mention the aRGB on the fans is stunning. As a first-time builder, this case made cable management extremely easy with a massive area behind the motherboard and in the PSU shroud to route everything. I really like the routing hole in the top of the PSU shroud, thats a fairly unique feature that you dont find on all cases. 2 things keep me from giving this case 5-stars and those things are no full control over the aRGB front fans and the size. There is a good 5-6 inches of length that go virtually unused in my build which is why the LED light bar is in there. Great for a custom water loop or something, but I dont think Ill ever need all this space. As for RGB control, all the modes in Mystic Lighting look great, I just wish I could individually address each LEDs color, the Coolmaster software has this functionality for some of their items, but Ive yet to get anything to work with these 200mm or the Halo fans Im using for exhaust for that matter.
-
toledos
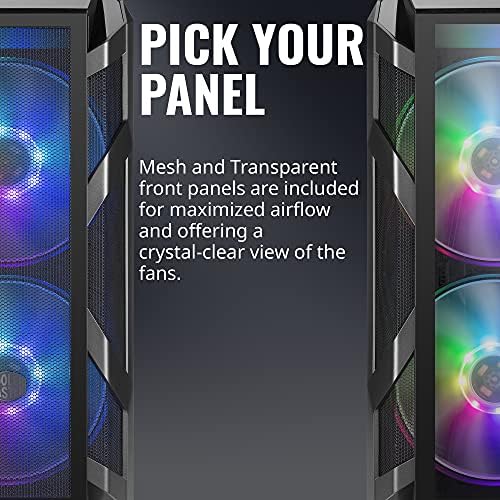
> 3 dayPros: - the glass sides allow for a great view inside the PC - I like that it comes with both mesh and acrylic screens for the front of the case - comes with 2 200mm aRGB fans and a 150mm exhaust fan - lots of holes and ports for routing cables - there are “shields” that cover the PSU and HDD/SSD store for a cleaner look - there’s also shields to cover the cables on the backside - no SSD mount needed as there are tons of places to simply screw them in all over the case. - aRGB chip for front fans already installed, in case you don’t have a controller. Haven’t figured out how (or if) you can control it. - there’s a little arm to support the GPU and prevent sag. Cool idea. Cons: - the mobo mounts don’t totally fit into the case? I had issues with the holes for the mounts being too small to screw them in. I’d get them to stick the best I could, but several times they just fell out while I was trying to get the motherboard in. Right now, my motherboard isn’t supported everywhere it should be. - the cable shields on the reverse side of the case are a little small. It’s really difficult to jam all of the cables in there, though it is doable.
-
Ning chen
> 3 daySo ...I custom build a Mid- High range gaming desktop with this case , first top quality for sure ! 99% metal and glass Constructed , awesome design with many ways for customizability that all you need from a mid tower , this is a bigger size mid tower which what I looked for , removed the Sata storage parts , since I got 980 pro M.2 , and it was blocking the airflow of the front lower fan , now more room & airflow ! I also added the universal raiser rack now can see the look of this 6900 XT i think this is what it designed to look like ? Considering will add the LED near -GPU , now is like a beauty hiding in dark ! ,very fast WiFi adaptor . I love this case sure it worth the price ! Specially when you got nice hardwares , the out-look should be stunning for sure
-
Aiden
> 3 dayOne of the best cases I’ve ever used.
-
Jared Court
> 3 dayAnd the plastic is great quality anyway. I especially appreciate the more stealthy matte look so smudges and dust arent as noticeable. Id been wanting to replace the cheap AIO cooler in my pre-built for a while. I decided to go with a high end Noctua (NH-D15S), and since it wouldnt fit in the Cyberpower case, it was the perfect excuse to move into a new one. The cheaper ones I was looking at, like the Fractal Design Meshify C, seemed great but would need some additions to get the best performance. The nicer ones I liked such as Phanteks were usually in the $130+ range, and I didnt really want to go over $100. I decided that the H500 would be best for my first build, with more room to work in than the Meshify C and better out of the box performance comparable to more expensive cases thanks to those huge fans that also add some color. Dont really care if its not all metal, Im not sticking a bunch of magnets to it. Its easy to work with and does its job well. My cat even chewed up the extension cord for the fans and they still work fine, although I should probably replace that. The only problem Ive had is that the PSU shroud wont seem to get back in place to line up with the screw hole on the back. Its still clicked in and not going anywhere, its just not secured by the screw. I think it might be my fault due to some poor cable management, but either way its really a non-issue.
-
Juan Razo
> 3 dayI previously had a case with a front panel that was choking the life out of my parts. After some research, I found this magnificent case. I already had an extra 200mm and 140mm set of fans to put inside, so I swapped over the 200mm Coolermaster fans to the top of the case. The front support for fans seemed a bit off, so I had to use zip ties to hold my own fans in place. It works fine and its pulling in air from two 200mm fans in the front while pushing air out the top and back with one 140mm fan and two 200mm fans. It is all Ive ever wanted. My only gripes are that with so many RGB fans and their own controllers, cable management was not as easy as Id hoped it would be in the back. It is a surprisingly tight fit back there with everything moving around and having to go to its proper place. Also the USB plugs for the front of the case just dont work well with my motherboard when it comes to the slots for cables built-in to the case. I opted to have them not plugged in at all because they were either sticking out the side, or they were bent trying to enter from the bottom. Actually bent my USB pins on my motherboard because of this. So, my advice is to try and get them plugged in on the opening from the right, and not the bottom.
-
Tyler Huskins
> 3 dayThis case it the best. I love the looks of it. I love the large 120mm fans. I love the mesh front. This thing is a great way to take your build to the next level.
-
Rwarcards762
> 3 dayI built my first full gaming rig in this case a year ago. Maintenance is easy-- the filtered intakes mean I dont need to worry about dust. The clear side panel means I get to enjoy my build every time I sit at my desk. The included 2x200mm RGB fans work great and look good as well -- theyre practically silent as well. I replaced the rear 120mm fan with an RGB-enabled one later on, but for the time I used it, it gave no issues and pushed plenty of air. Overall, as far as airflow goes, this case is a CHAMP. The minor flaw-- to clean the front intake, you must remove BOTH side panels and undo plastic clips. It would be much more convenient if there was a release lever or something on the bottom which would allow the front to slide off... however this is minor as you really shouldnt need to do this too often. Overall this was great to build in, comes with great included fans, has great airflow, and doesnt break the bank. Will always recommend this case to people.


