
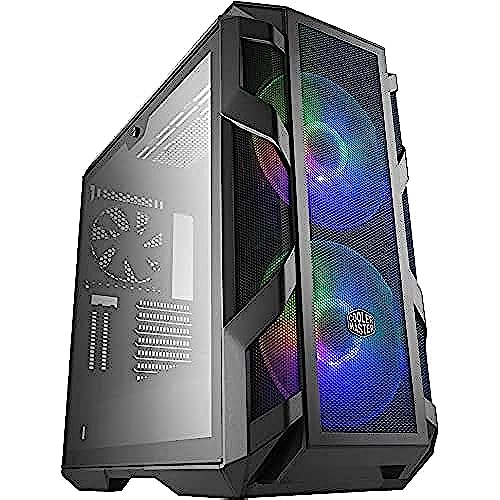
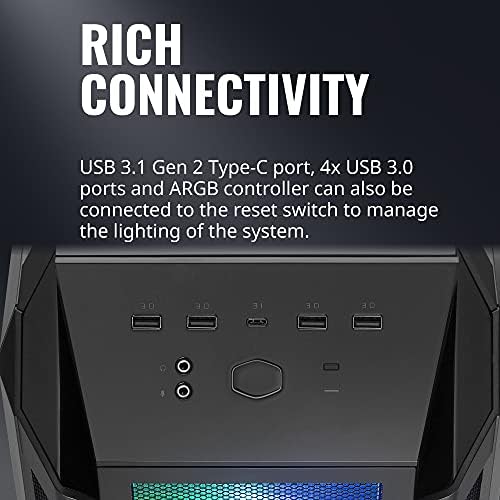
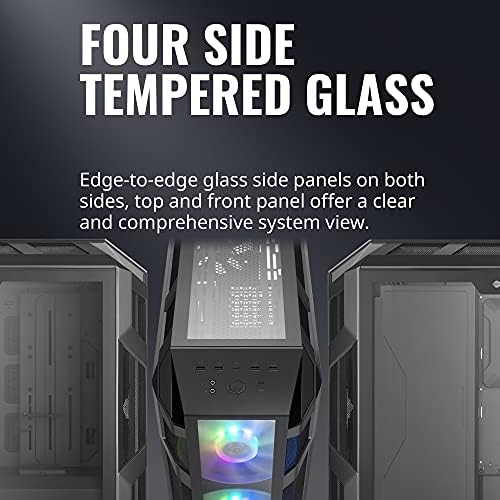
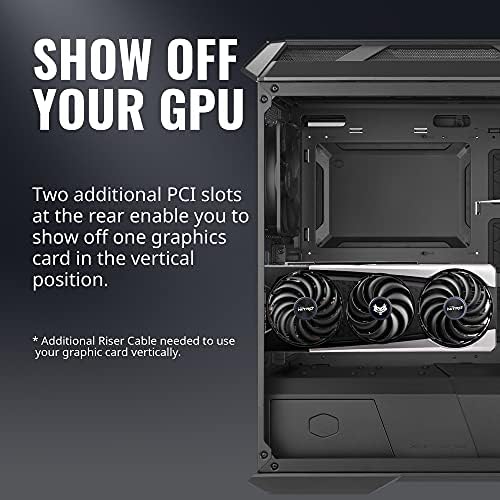
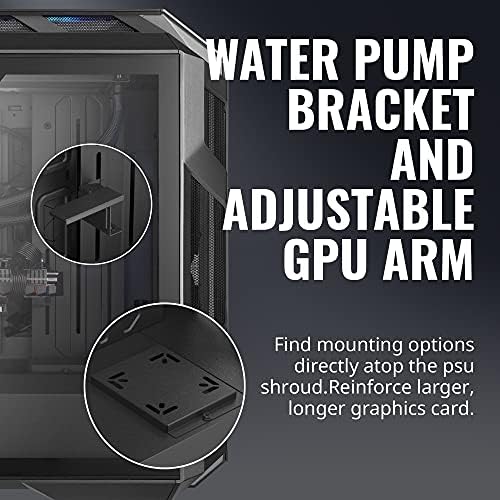


Cooler Master MasterCase H500M ARGB Airflow ATX Mid-Tower with Quad Tempered Glass Panels, Dual 200mm Customizable ARGB Lighting Fans, Type-C I/O Panel, and Vertical GPU Slots (MCM-H500M-IHNN-S00)
-

Lee Haddix
Greater than one weekIve happily used Cooler Master cases since the HAF, but was disappointed with the H500s airflow when I switched to it in 2017. However Im glad to say Cooler Master regained their footing with the H500M. It keeps my favorite things about the H500 design, and greatly improves several shortcomings I had to deal with. The top panel no longer sits loosely on the case so if I needed to carry the case out, I can do so without having to take it apart or worrying about dropping it. The top radiator/fan mount is now 360mm instead of 240mm max so I was able to mount a larger radiator for cooling. It has a USB C port on the front, FINALLY. Theres even a discreet built in GPU mount for the saggiest of video cards. But most importantly of all, this thing is an AIRFLOW BEAST. 10900k at 5.2 sits around 50c on full load, 3080 doesnt go past 65c on full load. With the newest GPUs pulling so much power its more important now than ever to get a good airflow case. If you liked the style of the H500 but were turned away by lack of airflow, the H500M is the case for you. My one con, if I had to say something, would be that although it supports EATX just fine, the cable shroud you would usually tuck your 24 pin behind sits flush with the side of the 24 pin terminal on my motherboard, at least. I was able to route my 24 pin extension around to the other side of the shroud in an aesthetically pleasing way so no real issues. Just keep that in mind. Other things about this case worth mentioning: The dual tempered glass side panels make this case heavier than normal but it gives it a nice symmetrical look and sheen. You wont have to worry about errant cords being visible through the glass because with the entire H500 line there are several wire panels that hide your mess, keeping that nice clean look no matter how much your cable management sucks. The top panel is still not meshed except for side vents but there is noticeably more headroom between the case frame and top of the panel allowing for excellent exhaust flow. The two front 200mm fans are markedly improved from their H500 versions, with more LEDs and quieter bearings. The PSU and HDD shroud below can be configured in many ways, but if you have a 360 radiator for the front intake and want to keep the shroud, there is fortunately a slot that pulls out from the front enabling that particular configuration. Its listed as a mid sized tower and it is, but the H500M is large for its class. Roughly 22 inches tall, 21 inches deep. Its main feature is excellent airflow, but the H500M should be noted as being a very modular case, and can accommodate many kinds of builds. I was almost tempted to go custom loop because of the built in pump bracket and space for two 360 rads.
-
Jesse
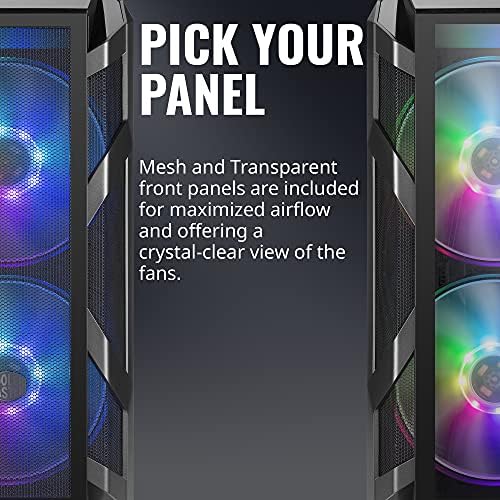
> 3 dayThere was a lot of thought put into the versatility of this case. You can swap a mesh front panel with a tempered glass panel. You can remove a cutout to expose your power supply. You can remove another cover to allow you to front mount a 360mm radiator if you choose. One of my criteria was that I needed at least 380mm of radiator bracket space on top to mount my Alphacool Eisbaer 360mm AIO. The end tanks on this rad are larger than most, necessitating approximately 380mm of lengthwise mounting space. Most cases that advertise the ability to top mount a 360mm rad are very difficult to actually get it to fit while having the clearance for your RAM and the rear I/O shroud on the motherboard. The H500M, with its removable radiator bracket and spacious domed top panel makes mounting even the largest and thickest of 360mm radiators a breeze. You could even do a push/pull config if your fans arent too thick. The included 200mm intake fans, while being only 3 pin fans and operating at a single speed, are virtually silent while also giving you aRGB functionality. The included adjustable GPU bracket is a nice option too as well as the water pump mount. On the back side of the motherboard tray, there are three removable wire covers that help clean up unsightly cables. These trays could be a little deeper to give you some additional clearance, but I got them to fit back on nonetheless. I would give overall wire management a 7 on a scale of 1 to 10. It would be nice to have some cable port grommets like most Fractal and Phanteks cases do. And it would be nice to have some port holes in the top of the PSU shroud so you could route your 8 pin GPU cables from directly below. Overall this is a terrific case, and the overall quality is better than average. Any price below 200 dollars is a good deal IMO. This case does what good cases do, it gives you the option to be as creative as you want to be with your build.
-
James
> 3 dayMost of this case is pretty well thought out. I love having space for four 200mm fans (good cooling without loud noise). The case is really solid construction internally, though some of the external parts (like the front cover) seem to come off pretty easily. It was nice that the case came with a bracket to support longer graphics cards. The screws on the side open/close inconsistently- it seems to take a bit of trial and error to get them aligned properly to take the glass side off. The backside isnt quite deep enough to do a great job of cable management (not deep enough for a glass side that shows it off). The RGB controller that comes with it seems like it was an afterthought- using the reset button to change programs (as the manual suggests) is esp. challenging- as the front case cable only barely reaches if you install the controller where it is supposed to go. A modular power supply is a good match for this one- there isnt a lot of room under the power supply cover if you also use the hard drive cage. Pretty good space for a 360 mm radiator on the front. I did a custom water loop install without space issues. If you need to move the case frequently, this isnt a great case for that- if you avoid lifting from the front (to avoid knocking off the front cover), your hand will naturally go to the rear back- where the slide out filter for the power supply air vent is located- which provides no stability in the case lifting process.
-
John D.
> 3 dayIt was down to the Lian Li Lancool II, Phanteks P400, and this case. I chose Cooler Master because it was in stock, and could be shipped the fastest (no joke). These three were in the running after watching Gamers Nexus exhaustive case temperature reviews. After owning a premium NZXT Case, I didnt want my room to be a billion degrees any more. Whats better about this case? - it just works. It has the same cabling and general layout as any other midrange case, but the function is perfect (without sacrificing form). Theres not a lot to get in the way. - those 200mm fans in the front are stylish, quiet, and get the job done - my PC gets cool air in/out through it again, so the GPU and internal components dont heat up to Death Valley levels - the PSU shroud and 3.5 bay are removable My only complaint is that I cant fit a 280mm radiator, or really any radiator for that matter in the top. Thats fine, as I mounted my 280mm in the front behind the 200mm big and quiet fans, and they fit/look perfectly. This ends up being a minor annoyance, as I can still get an EVGA Hybrid card and use the back case fan slot for the radiator/exhaust.
-
Haf 700. JUST MASSIVE.
> 3 dayBest case I have ever built in. The weight is a little on the heavy side so lift with legs. Overall mine was real good quality. Would recommend buying this case for anyone.
-
Beverly
Greater than one weekI bought this case for a new PC build I was doing, the cords were easy to use and manage, and it came with so much space and all the screws I needed for the motherboard, Hard drive, and a lot left over! Cable management was also a breeze because they left plenty of space for the cords and many slots for zip ties! The instructions were a little hard to decipher because there are not a lot of words explaining the pictures, but after Googling a review it was very straight forward. I was also impressed with the RGB controller. Since it isnt standardized across all motherboards, they included the plug for Gigabyte, one for Asus, MSI, and ASROCK, (those 3 are all one cable) and an adapter that converts it to a different cable that connected to a PSU cord. The forethought of this design is impeccable! The fans are also pretty quiet, I can barely hear them when I am on discord. -Beverly & Noah
-
Jacob Solo
> 3 dayUSB Ports were good the first year and a half, ever since then I’ve been dealing with on and off ports that would heat up for some random reason and then on top of that would cause the PC to freeze for a second everytime I had my controller plugged in and was playing a fast paced game. It wouldn’t really happen playing casual games or casually playing. I play Bluetooth now, but even then, the Bluetooth devices are faulty now too, and I feel like it’s also due to the ports maybe causing the Bluetooth drives to overheat and probably malfunction. Now my controller won’t stay connected to the computer even if it’s fully charged. It will connect for a few seconds and then disconnect immediately.
-
Arnuful
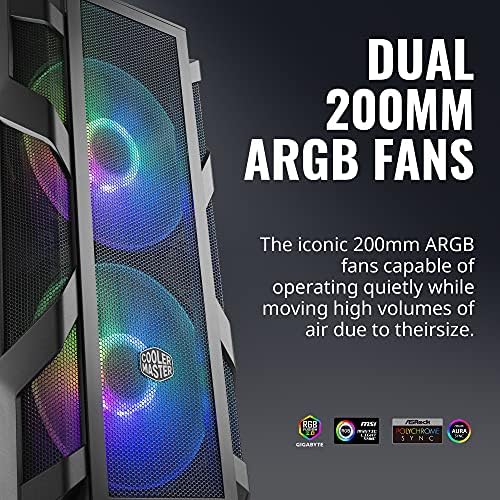
> 3 dayAirflow through this case with the included dual 200mm 800rpm intake fans is absolutely insane, not to mention the aRGB on the fans is stunning. As a first-time builder, this case made cable management extremely easy with a massive area behind the motherboard and in the PSU shroud to route everything. I really like the routing hole in the top of the PSU shroud, thats a fairly unique feature that you dont find on all cases. 2 things keep me from giving this case 5-stars and those things are no full control over the aRGB front fans and the size. There is a good 5-6 inches of length that go virtually unused in my build which is why the LED light bar is in there. Great for a custom water loop or something, but I dont think Ill ever need all this space. As for RGB control, all the modes in Mystic Lighting look great, I just wish I could individually address each LEDs color, the Coolmaster software has this functionality for some of their items, but Ive yet to get anything to work with these 200mm or the Halo fans Im using for exhaust for that matter.
-
kybeau
Greater than one weekIm a fan girl of NZXTs towers and was planning another NZXT-based build. I decided, however, to try something new, something that would be different from my regular builds. Cue in this Cooler Master H500. It has been nothing short of amazing. If youd like the short and sweet bulleted points, then just read this part, otherwise Ive written a lot of information. - a total of up to x6 (if solely using) 120mm fans, x4 (if solely using) 140mm fans, or x3 (if solely using) 200mm fans - a front mesh panel that captures dust; there is also an optional acrylic panel that can be used instead if preferred (more on this later) - tempered glass panel that has two screws that cannot be taken off (so its no longer easy to misplace). The glass panel also has hinges at the bottom so it wont accidentally fall and shatter, etc - supports ATX, mATX, or miniATX builds - has x2 M.2 slots, x2 3.5 hard drive bays (an additional mount can be purchased to support 4 more), and x4 2.5 SSD bays. 2 SSDs can be mounted on the right side of the case with little plugs, therefore offering a tool-less assembly). The HDD drive bay can also be removed if you just plan on only using the 2 SSD mounts - in regards to cable management, there is a vertical bar with rubberized routing holes. This is removable if you prefer a more spacious build - x2 200mm CoolerMaster MasterFan 200R RGB fans installed in the front panel and 1 generic 120mm fan - a removable PSU cover - 3 dust filter covers (for the top, front and bottom of the case) - a vertical GPU mount (riser cable not included) - multiple zip ties in order to manage the cables inside (among other small things) So, I wont be able to touch on everything, as I dont use the vertical GPU mount for starters, but I can give insight on other aspects. First off, this case comes with many fan placement options. For reference, I have x2 120mm fans up top, x1 120mm fan in the back, and x2 200mm fans up front. I currently have Corsair SP LL120 RGBs and they work great paired with the CoolerMaster fans. Side note, if you are in the market for the Corsair SP LL120 RGBs and would like it to pulse, breath, or mimic the 200mm fans, then youll need to purchase the CORSAIR iCUE Commander PRO Controller. Anyway, the case does come with a handy magnetic dust filter for the top of the case (fan area). 1 month later and I can tell that it is definitely doing its job. The front of the case has another mesh like structure and this allows for better airflow throughout the case. My build has been averaging 25-30C on idle with a max of 50C on high detailed games. Now, I have tried the acrylic panel and found that my temperatures, unsurprisingly, do go up: 30-45C on idle and 50-65C on load. Its not terrible temps but, while the acrylic does look cleaner, keep in mind that youre swapping temperatures for aesthetics. The side tempered glass panel is another nice aspect of the H500. Its not clear like NZXTs line, but I would say its around 40-50% tint, perhaps even 30%. Its definitely on the dark side. I didnt realise how tinted it would be, but it honestly looks amazing. Due to the heavier tint, the cables inside are pretty much invisible and the RGB/lightning looks like its coming through the darkness. Honestly, it looks great and is definitely something I didnt know I wanted for my build. The x2 200mm fan does deserve a mention as well, but this ones not as positive. It could be the lack of experience with RGB fans, but the cables were confusing as heck to pair with respective wires. Ive didnt even spend as much time on the rest of the build combined compared to the fan wires themselves. Im not going to lie when I say I cried a little out of frustration. The instructions arent very helpful. If I remember correctly, the RGB cables were pinned into cables that were unnecessary towards the whole build. Figuring out that cable was not necessary took an amazingly stupid amount of time. After taking out the unnecessary cables and then figuring out the appropriate ones, it was smooth sailing after that. Im not sure why its become the new standard, but pictorial instructions are ridiculous. I can only imagine how difficult it would be for someone just starting out. Cable management wise, theres really not much to say. Its superb and theres nothing difficult about it. Youll definitely need more zip ties than provided if you want a cleaner look. Also, the provided ties are surprisingly very thin so may snap easily if you stress it enough. There are notches on the cable side of the tower that allow you to zip tie cables on. Make sure to not zip tie in the panel grooves though. The rubberized routing holes and removable vertical bar is also appreciated. Some small thing that dont really detract but should be mentioned: if youre not going to fill the inside of this case, then be prepared to hear A LOT of air being pushed around. I have a lot of open space and it does sound cavernous. Also, this case is very much on the heavy side. It weighs a whopping 23.2lbs, maybe 30lbs+ after all the components are installed, compared to NZXTs 17.9lbs. If youve stuck it out and read through my long speech, then in short I highly recommend this case. Ive been very pleased with it and Im glad I took a chance. Like a lot of people have been saying, dont go for any other H500 (for example, H500P or H500M). Just stick with the H500-NO SUFFIX. It is Cooler Masters best - as of right now - and pretty much offers everything required for a high end build. This is a great starter case, offering excellent airflow and enough space to experiment around with. You wont be disappointed.
-
Ryan
24-04-2025Ive already gotten several compliments on how sexy this tower looks, Im big into white aesthetics and the front of this tower really works together nicely. I was also very surprised at just how quiet the massive fans in the front are; my stock CPU cooler is louder (not much of a surprise tho). Its also very user friendly when it comes to cord management, but this probably goes hand in hand with my biggest note: This thing is pretty massive for a mid-tower, it barely fits on my desk in addition to my dual-monitors. I actually had to filter my desk search to be sure I could fit this puppy on top instead of sitting it on the ground below. The combination of a large frame and solid cord management can make this thing feel somewhat empty inside. I might actually recommend this for those looking to put decor inside their case. I have a mini figure that Id like to stick inside and there is PLENTY of space to do that with, just be sure you run at reasonable temps. Unfortunately the stock cooler makes this a little impractical for me, but ultimately its the plan once I upgrade the cooler.
