
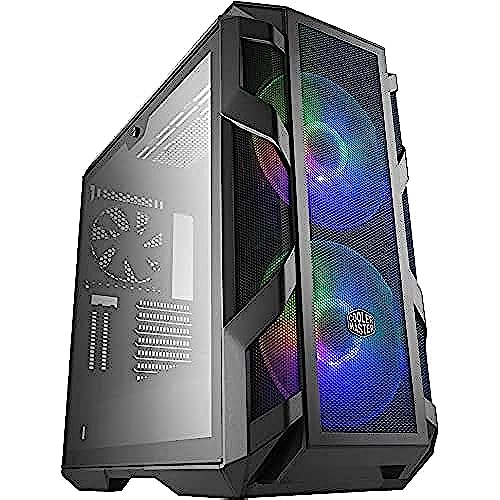
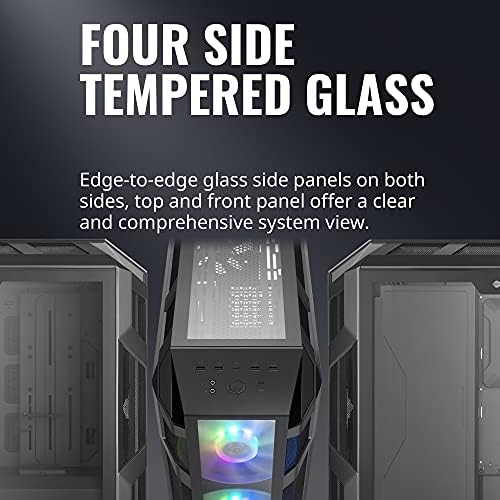
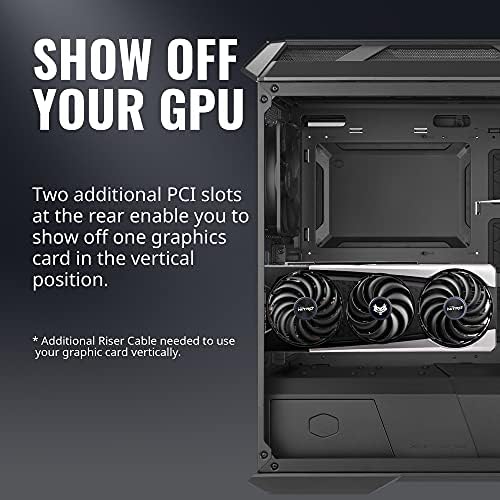


Cooler Master MasterCase H500M ARGB Airflow ATX Mid-Tower with Quad Tempered Glass Panels, Dual 200mm Customizable ARGB Lighting Fans, Type-C I/O Panel, and Vertical GPU Slots (MCM-H500M-IHNN-S00)
-

toledos
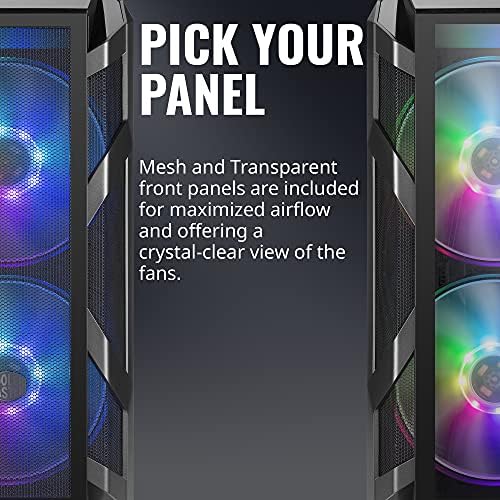
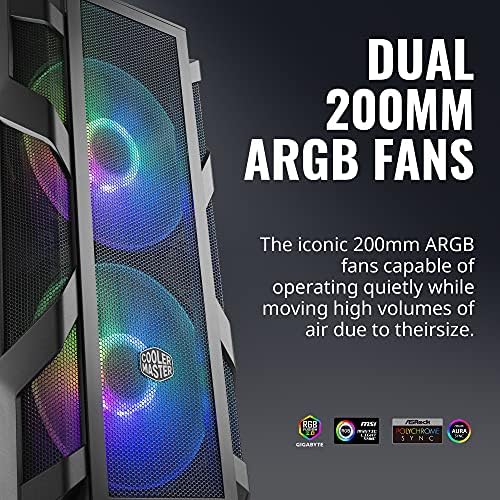
> 3 dayPros: - the glass sides allow for a great view inside the PC - I like that it comes with both mesh and acrylic screens for the front of the case - comes with 2 200mm aRGB fans and a 150mm exhaust fan - lots of holes and ports for routing cables - there are “shields” that cover the PSU and HDD/SSD store for a cleaner look - there’s also shields to cover the cables on the backside - no SSD mount needed as there are tons of places to simply screw them in all over the case. - aRGB chip for front fans already installed, in case you don’t have a controller. Haven’t figured out how (or if) you can control it. - there’s a little arm to support the GPU and prevent sag. Cool idea. Cons: - the mobo mounts don’t totally fit into the case? I had issues with the holes for the mounts being too small to screw them in. I’d get them to stick the best I could, but several times they just fell out while I was trying to get the motherboard in. Right now, my motherboard isn’t supported everywhere it should be. - the cable shields on the reverse side of the case are a little small. It’s really difficult to jam all of the cables in there, though it is doable.
-
Jayson
> 3 dayMy old case had temp problems (nczt500), this one has great air flow and looks great. Wish I bought this one 1st
-
Roman
> 3 dayFor 100 dollars, this case really is one of the best out there. You get a full fan layout (2 front fans, 1 rear fan). It comes with a PSU shroud as well. The tempered glass is very high quality. There is plenty of room in the back for cable management, and the back panel has a great mounting mechanism with two thumbscrews. This case also comes with some accessories like an RGB controller and zip-ties for cable managing. When it comes to airflow this case might be the best performing. The two massive 200mm fans on the front pull a tremendous amount of air through the case, while still being quiet. The design is quite nice as well, with a handle for moving it around. There are two dust filters, one for the PSU and one for any top mounted rads/fans. Overall very, very nice and worth every penny. The only con I can think of is how the tempered glass panel is held on by slotted screws instead of philips. Still pretty easy to tighten though, can be done by hand. But I think the fact that the panel has a resting ledge so it does not fall off when you unscrew it makes up for the odd screw type. 10/10 would buy again, and probably will for future builds.
-
Alexander Torres
05-06-2025The package was quite large when it came in and the instructions were perfect. I really enjoyed the tool-less approach taken for most of the build. I would say I needed a screwdriver for about 3-4 screws. The units sits cool and quite and rarely peeks over 50c with a 12th Gen. Admittedly it’s a bit pricey but exactly what I wanted for the possibility of a future water cooled project but for now my AIO works perfectly!
-
MJ
05-06-2025All I can say is that this case is a beast! The oversized 120mm fans in the front (preinstalled) move so much air at low RPM! The top panel can also hold a 120mm fan. Awesome! I installed a water cooler at the top and it fits and works great. Be sure to pay attention to the measurements. It holds a 2 fan radiator, not a 3 fan. The design of the case allows it to run cool and super quiet. It looks more amazing when I added RGB components to the inside. Cooler Master has done it again with this one. You wont be disappointed.
-
Aiden
> 3 dayOne of the best cases I’ve ever used.
-
C. Bender
> 3 dayMy son and I built two PCs together recently -- a first for both of us -- and I picked out this case primarily because its got great airflow, super-large fans (so they dont have to spin so fast and, thus, are quieter), and a handle for easy transportation. What I didnt expect was the evident quality of the case, particularly in comparison to the case my son picked out, and I didnt expect to even like the RGB lighting (which I considered leaving unconnected). Im pleasantly surprised, and Id buy this one again in a heartbeat. My only complaint is that the RGB lighting cannot be controlled by our Gigabyte motherboard (which has a four pin connector) and must be controlled by the (included) controller that came with the case. Practically, that means that the case lighting is controlled differently than my CPU cooler lighting, so if color harmony is important to you, best to choose another case (and buy a case made by the same company as your CPU cooler). For me, this case was great purchase. Super-happy.
-
B
> 3 dayI, like many others, am on the search for a case that is both functional and has the right amount of RGB. I have gone through all the phases with my PC - mini itx cases (Coolermaster NR200P, Jonsbo D31 mesh, Lian Li Q58), Mid Towers (Corsair 4000D, NXZT H510), Open Air Cases (Thermaltake P1 & P3). Recently, I have decided to go down the route of a full tower PC case that can house all of my fans, hubs, and RGB accessories with ease. This case caught my eye as its sister case 700 EVO is out of my price range. This case was designed for one thing, airflow. There is no shortage of fan configurations in this case. I currently have 2 (200mm front fans), 3 (140mm Noctua bottom fans), 3 (140 Noctua side fans), 2 (120mm back fan), 1 (200mm top fan) & 3 (120mm LLs top). Needless to say, my PC stays cool under any load placed upon it. My CPU ( Ryzen 9 5900x) @ idle stays around 35C-40C. Under load, it stays below 60C, which is impressive for that specific CPU as it runs hot. My GPU (EVGA 3090 FTW) @ idle stays around 35C. Under load, it doesnt go past 72C. I do not have any overclocking/underclocking enabled. All stock. The case is massive, compared to what I am used to. However, this is by design. The building was seamless. For the most part, this is a toolless case. I liked the locking mechanism that Coolermaster has designed to be used for most of the pieces. Specifically, the back panel is used to hide or rather, keep all the cables/hubs in one place without having them protrude and prevent the back cover from being snapped on. This stood out as I have 4 hubs (2x corsair Commander XT, 1 Commander core & 1 Node lighting). The front mesh panel of the case allows for adequate airflow. If fans are set at an appropriate fan curve, the case is silent. Coolermaster included two fan hubs. One that allows for the RGB/fan speed and another to accommodate additional fans for the case. All of these will be controlled via the motherboard, but a nice must-have. The RGB is standard if thats your thing. The Coolermaster software is bland compared to icue (corsairs version). For my case, I have cables that convert basically any manufacturer 3-pin RGB to be compatible with icue (thank you PirateDog.com). Overall, I am satisfied with this case and if the full tower setup is what youre looking for, include this case as one of your options. Keep in mind that its LARGE. So, if you are limited in space, this may not be the right choice. Happy building!
-
Darren Loftin
> 3 dayI could see where others have a problem setting up the RGB, Luckily my x570 has connections for it. Its quite large so space may be an issue for some. I originally had a Cooler Master H500 with a ml240r AIO (3700X). I swapped to the H500M with a ML360 AIO. Didnt see a drastic temp change at idle, but under load it dropped around 8-10C. The biggest difference was the GPU temp. Id average 75C playing BFV on ultra. (Red Devil 5700XT) After the case and AIO swap, Im seeing 65C max. Junction temp stays around 80C. I didnt change any fan settings, but I do have it set to 100% when it hits 55C. Cable management is easy enough. Not near as many tie down points as the H500, but there are 3 large covers on the backside. There are 0 cables exposed on the backside of my case. TLDR CPU and GPU temps dropped a lot. Easy cable management. Lot of screws to remove to fully disassemble. Overall, 10/10 would recommend.
-
Connor McLeod
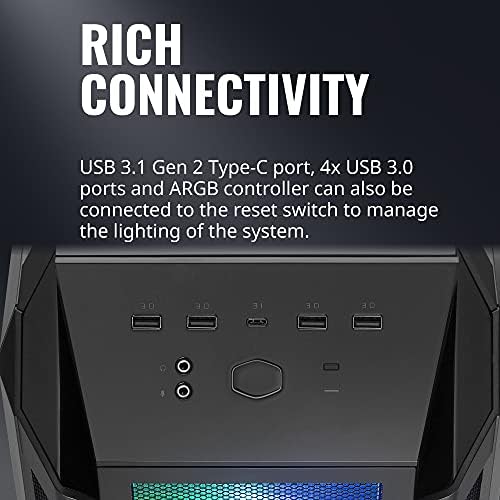
> 3 dayIn Summary, Good: - Looks great, better in person than in photos - Plenty of room for cable management & part clearance - Solid front IO selection with 2 USB 3.0, 2 USB 2.0, headphone 3.5mm in, mic 3.5mm in, power & reset buttons - Fantastic design for airflow, Im air-cooling a 3950x in this case, albeit with an absolute monster of an air-cooler Bad: - Case itself is a bit wobbly due to (relatively) low weight, poor weight distribution, and narrow feet - Half length PSU shroud feels a bit outdated at this point, though that only really affects aesthetics. This is a very solid case with some really nice spots, but I wouldnt call it perfect. For the price (being ~$120 for the H500 ARGB), its on the lower end of where you start getting into serious cases, and I think it delivers a fantastic amount of value at that price. First, if youre interested in this case but worried about aesthetics, dont be. This case looks so, so, SO much better in person than it does in photos, and it already looks pretty nice in the photos. The RGB fans look a bit cheap in the photos, but they look great in person. I think they look best if you just pick a solid color and set both the fans up to it, but they do support a variety of non-static lighting effects if youre into that. Next, talkin bout the build experience. It was mostly great, its a wide open case, both side panels come off and you have plenty of room for cable management. It comes with a removable drive cage, I went all M.2s so I removed it for some more cable room and cleaner airflow to my PSU. Really the only negative I experienced while building was trying to get the CPU power pins on the top left, and thats on me for not doing that before installing the motherboard into the case and also using a massive heatsink on my CPU that blocked most of the access. (That heatsink is the Scythe Ninja 5, its massive and I bought this case just to have enough clearance to fit it. It does fit it.) Finally, the biggest thing I dont like about this case is the weight. Not that its too heavy, rather if anything it is too light. This isnt too much of a concern, and Im sure its nice on the package handlers (thank you package handlers), but it is compounded by the cases feet. Its nice to have some airflow under the case, certainly, and they do include a bottom facing dust filter for your PSU, so you can mount it drawing in fresh air from under the case, but ultimately just look at the size of the feet. Youre resting an entire large case on really quite a small surface area, and theyre angled in such a way that this thing looks like it was built to roll along the ground. Combined with how light the case is, and how the weight of your components is distributed throughout the case, it brings the center of gravity up quite high. I think it actually sits above the center of the case in my build. This makes the tower wobbly! That doesnt feel good! I can just tap the tower with my finger and I can see the entire thing shake a little bit, its concerning. My heart skips a beat if I ever swivel in my chair and accidentally bump it. All-in-all, if youre looking for a huge case at this price point, this is a very strong contender. It wasnt my first choice, I was looking at an ASUS TUF Gaming GT501, but of course my first choice was out of stock. Even so, I am not at all disappointed with this as my second option, its even got a better front IO selection.
