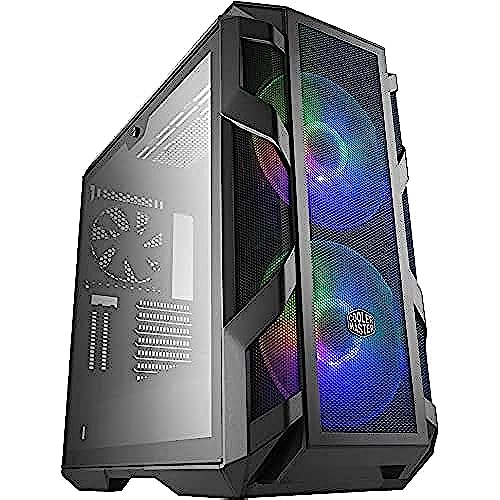
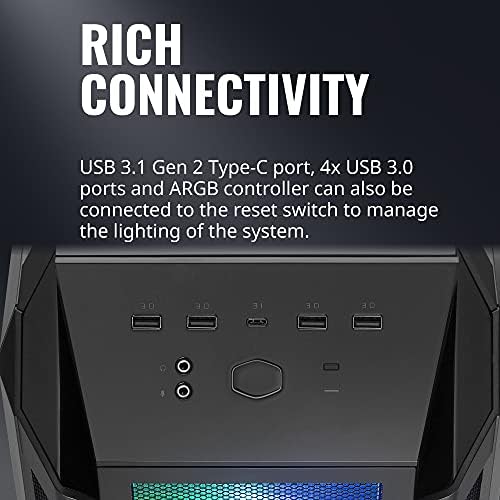
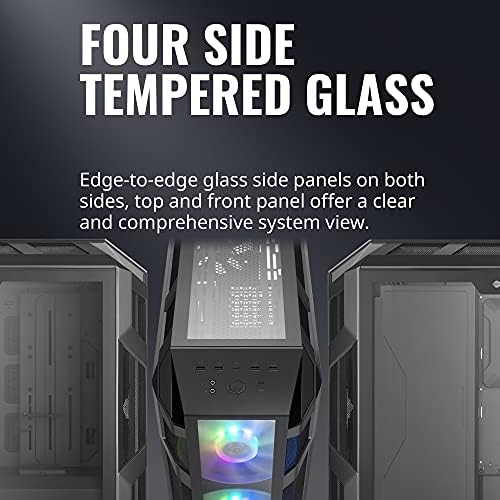


Cooler Master MasterCase H500M ARGB Airflow ATX Mid-Tower with Quad Tempered Glass Panels, Dual 200mm Customizable ARGB Lighting Fans, Type-C I/O Panel, and Vertical GPU Slots (MCM-H500M-IHNN-S00)
-

go0den0w
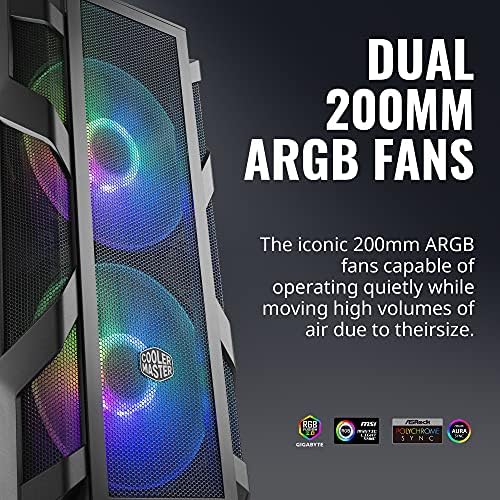
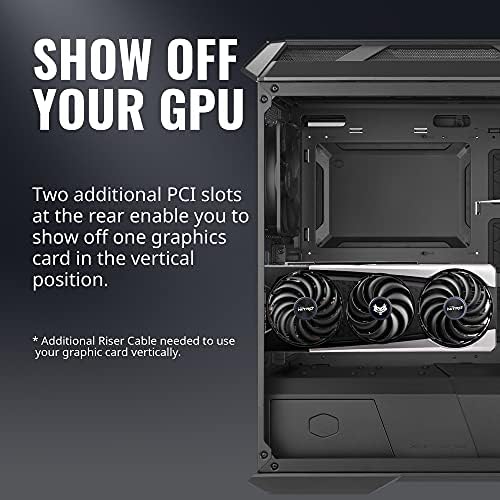
> 3 dayWhen I purchased this case, I had never built a PC before. Id also recently ended my 5-year career as an electrician to go to law school. I needed a hobby & a way to satisfy my need to build stuff. Well, I have gone to town on this case and loved it. Most of the black screws it came with are half silver from me taking it apart so many times. The case is big enough to be a sort of blank canvas for just about any configuration you can imagine, albeit with some limitations: I think its a bit small for a 16mm OD PETG custom loop; I wish it had been designed to support bottom intake fans; and the top clearance for a 360mm AIO/radiator is too small for a push/pull configuration. Keep in mind if you continue to read, I am running an overclocked i9-10900K & need as much cooling capability as possible (with all case parts still properly attached, of course) The stock 200mm fans look good and move a decent amount of air, but I replaced them with higher CFM (& IMO better-looking) Thermaltake Riing Trio 20s. Be mindful: the screw hole configuration for front 200mm fans is different from that for the TT 20s I put in. The stock CM 200s support two different screw layouts. Limited by the layout, I mounted the TT 20s diagonally with two screws & used double-sided adhesive foam to dampen any noise vibration might cause from the 2/4 screw mount. I havent heard noise once. There is no bottom fan support, but I was able to push some air up to the top AIO by cutting in a 2 hole on the front HDD shroud & mounting a 120mm fan over the hole. I wish I didnt get an HDD since the rack is easily removable (& moveable btw), leaving ample space for more modification--might make some bottom fan support in the future, who knows? Similarly, the case does not support mounting a radiator/AIO to the right of the motherboard, but the metal cover there is great for cable management and is also a good place to mount RGB/fan controllers &/or USB hubs out of sight. Further, a little drilling, a few washers, nuts, & 6-32s later, the metal cover is great for holding up my little Pikachu acrylic. The vertical GPU mount is great, but know that--in my case, at least--the card will end up close to the glass, which may restrict air flow to the GPU fans. I have yet to have any issues with thermals, but I am also running a 3060 there, which is limited much more by its hardware than thermals. I also added a GPU support because the GPU sagged a bit and was slightly crooked when only connected to the vertical mount. When using a top-mounted 360mm AIO/radiator equipped with standard 120x120x25mm fans, the fit is tight. The back fan pushes harder against the 4+4 CPU power connections on my Aorus Z590 Ultra motherboard than I would prefer, but I have yet to experience any problems. If pushing against the cables worries you, be sure to check the dimensions on your AIO before purchasing or opt for a smaller AIO/radiator. I had this issue with both the CM ML360 & Arctic Liquid Freezer II. Furthermore, if you plan to top-mount an AIO/radiator, you cannot fit a push/pull configuration because of clearance issues with the CPU 4+4 connections. I tried mounting pull fans on top of the bracket to remedy this but even using 120x120x15mm slim fans, I could not close the top cover. Obviously, the front is mesh, but the top is acrylic with no mesh option available. Skeptical, I removed the top cover and averaged 5.5 degrees lower in stress tests. I assume this is because my AIO was able to expel exhaust heat much better. I dont recommend you do this, but I ended up taking a Sawzall to the top & removing most of the acrylic so I could fit some aRGB pull fans on top of the AIO. 120x120x15mm fans fit nearly flush with the top cover once the acrylic is out of the way. It snaps out if you do not want to cut it, but that leaves large holes where dust, etc. can get in & takes away from the look. If you go this route (for real, dont do it), you may want to buy grille guards since the fans will be much more exposed. You can front mount an AIO/radiator. I tried it. The hoses probably will not be long enough to reach the CPU if you mount it connections down, and the HDD shroud will further complicate this. Hoses up will reach, but then youre left with the decision of whether to pick from either of two undesirable options. You can (a) flip your 200mms over to the ugly side & use the 200s as pull fans for exhaust and whatever fans the AIO/rad comes with as push fans. In this case, youll be pulling hot air from inside the case to cool the liquid in the rad/AIO and taking away from the good looks of the case. Alternatively, you can (b) not flip the 200s & use them as push fans and use the AIO fans as pull fans. This blows hot exhaust air into the case. With no bottom fans, youre left with trying to use the top (restricted by acrylic plus hot air rises) or back (supports 1 140mm fan) as intake. I tried (b). I even mounted a 92mm fan on the PCI expansion area to try to push more air into the case. Thermals were bad. Mount your AIO/rad on top & save yourself the hassle. Regarding aRGB, the case comes with this little joke of a controller you can install to convert the computer reset switch to RGB control. I never even took it out of the plastic. Buy an aRGB controller unless you plan to connect the included 200mm fans directly to the aRGB header(s) on the motherboard. Some general advice (since no one asked): try to find a brand you like for aRGB & stick to it. At one point I had four different RGB apps and its annoying.
-

Ning chen
> 3 daySo ...I custom build a Mid- High range gaming desktop with this case , first top quality for sure ! 99% metal and glass Constructed , awesome design with many ways for customizability that all you need from a mid tower , this is a bigger size mid tower which what I looked for , removed the Sata storage parts , since I got 980 pro M.2 , and it was blocking the airflow of the front lower fan , now more room & airflow ! I also added the universal raiser rack now can see the look of this 6900 XT i think this is what it designed to look like ? Considering will add the LED near -GPU , now is like a beauty hiding in dark ! ,very fast WiFi adaptor . I love this case sure it worth the price ! Specially when you got nice hardwares , the out-look should be stunning for sure
-

Euresko
> 3 dayI liked the cable management, had holes and tie down points in good places. The way to mount the SSD to the back of the Mobo tray is interesting, the bag of screws came with some adaptors that screw into the bottom of the SSD and then can just plop the drive into the chassis behind the Mobo. Wasnt too crazy about bright LED fans and you cant turn off with the included wire harness, but without the included harness can just plug in power and its all good. To do that I removed the little black button/box thing, thats the brains that control the LED parts, then I taped off the connections so they wouldnt short something out by accident. Then plugged the remaining wires into power from the mobo or a sata to fan adapter. The fans spin and were really quiet. I bought this case for the airflow, and it doesnt feel like it has a ton of flow but will do some testing with the side panels on and see if I am still having trouble with 3080 GPU temps. Might have to leave the glass side panel off to provide good airflow. One thing is that there is really not a lot of room on the backside for cables, had to put pressure on the side panel to get it back on the case. Also, not a ton of room down below for power supply cables, really had to bend them over at an angle to get them to exit the cable management holes. This might depend on your Mobo, but I am not using the PSU shroud as it is right up against my bottom GPU. If I had a different Mobo that might work better and I would be able to use it.
-

C. Boswell
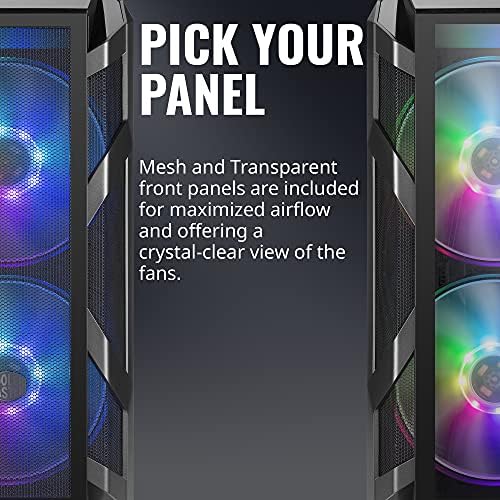
> 3 dayLet me start by saying that the normal price for this case is a hundred dollars. If significantly more is being asked for it, just be aware that you are paying more than MSRP. That said, this is an excellent case. It is better than the older Cooler Master case I was using before. The airflow is amazing, and the aesthetics are very much to my liking. The lighting isnt overdone or gaudy. The thick tempered glass side panel is really nice. The cable management is outstanding, with holes right where you want them, and covers to make everything look really clean. They give you a generous amount of space behind the back panel and spots for zip ties to keep all your cables where you want them. It has two trays that can take a HDD or an SSD, and two spots on the back to mount SSDs out of sight. The front fans look fantastic, and they move an insane amount of air while remaining super, super quiet. The included optional RGB switch works great if you dont have a motherboard that supports RGB control (I dont). Do be aware that the rear exhaust fan is not RGB. I had a fan from my old case that I used to replace it. I also added a 140mm fan from my old case to the top for extra exhaust, and that gave me almost perfect neutral pressure. Its just barely positive pressure now, which I consider to be ideal. I still have the mesh front panel on, and I think it looks great, but if maximum airflow isnt necessary for your build, the included acrylic front panel looks really nice as well. One of the main reasons I got this case is that is has a handle on top. I usually game in my living room, but I have a dedicated VR room as well, so I have to carry my tower across the house pretty often. The handle on this is great. They dont tell you this, but there is a second handle under the bottom front support, so you can carry it with both hands. Its heavy, but you can really get a secure hold on it. Its also very doable with just the top handle. I found this case to be a joy to build in. Every aspect of the build quality feels like a more expensive case. I honestly cant believe they are selling these for a bill. I would have felt I got my moneys worth even if I had paid half again as much. I would strongly recommend this case. I am super happy with it, and my PC buddies are jealous.
-

Joshua C. Brown
> 3 dayCase is awesome to build in. Has a ton of features that are insanely cool, but everything is, of course, quality of life stuff that the non-enthusiast doesnt need. The glass on the front sparkles from top to bottom, creating a rainbow of customizable colors and it looks absolutely breathtaking. Cooler Masters RGB software actually isnt bad, either. The case itself is made from mostly high quality steel/metal and there is very little plastic built into it; the only plastic I can really tell is the removable and easy-to-clean filters and the grip portion/sides of the front panel. The feet are also plastic, and I do have to say, that gripping them in certain spots does feel like the plastic is a bit unstable for the weight attached to this thing. The main feet are solid, its mostly the connecting plastic that gives way. Almost everything is toolless, which is awesome as well. Highly suggest this case for the RGB/case enthusiast that has some bank to break in. My one big critique(besides the price) is the riser cable thats included. Its much too short and actually pushes the bracket away from the inside at an angle, which is not ideal. Dont expect to use the riser cable that comes with it, you may have to purchase a longer one, which is probably what Ill be doing. Not really a fault of the case, since Cooler Master includes their basic riser and not a customized one for the case. I did reach out to Cooler Master and they said they dont sell longer riser cables anymore, which is weird.
-

Jesse
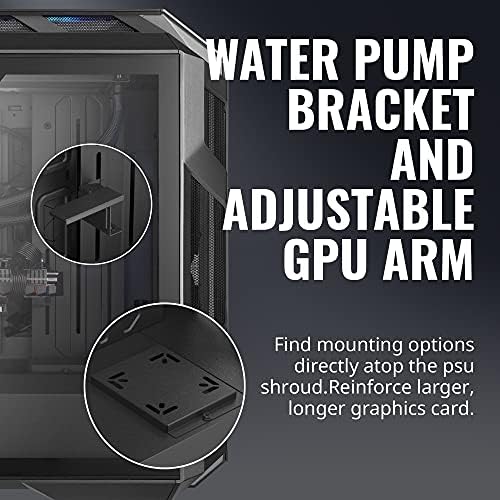
> 3 dayThere was a lot of thought put into the versatility of this case. You can swap a mesh front panel with a tempered glass panel. You can remove a cutout to expose your power supply. You can remove another cover to allow you to front mount a 360mm radiator if you choose. One of my criteria was that I needed at least 380mm of radiator bracket space on top to mount my Alphacool Eisbaer 360mm AIO. The end tanks on this rad are larger than most, necessitating approximately 380mm of lengthwise mounting space. Most cases that advertise the ability to top mount a 360mm rad are very difficult to actually get it to fit while having the clearance for your RAM and the rear I/O shroud on the motherboard. The H500M, with its removable radiator bracket and spacious domed top panel makes mounting even the largest and thickest of 360mm radiators a breeze. You could even do a push/pull config if your fans arent too thick. The included 200mm intake fans, while being only 3 pin fans and operating at a single speed, are virtually silent while also giving you aRGB functionality. The included adjustable GPU bracket is a nice option too as well as the water pump mount. On the back side of the motherboard tray, there are three removable wire covers that help clean up unsightly cables. These trays could be a little deeper to give you some additional clearance, but I got them to fit back on nonetheless. I would give overall wire management a 7 on a scale of 1 to 10. It would be nice to have some cable port grommets like most Fractal and Phanteks cases do. And it would be nice to have some port holes in the top of the PSU shroud so you could route your 8 pin GPU cables from directly below. Overall this is a terrific case, and the overall quality is better than average. Any price below 200 dollars is a good deal IMO. This case does what good cases do, it gives you the option to be as creative as you want to be with your build.
-

Qahar Raheel
> 3 dayThis is a really great case and love that it came with two dedicated hdd slots for my 3.5 drives. Its easy to assemble and disassemble. The filters have easy access as well. Really wish the side glass didnt require a quarter or a flathead to remove everytime. Although, I just hand tighten it so its not so bad. Thermals are good and everything is stable. Im of my biggest issue is with the LED lights in the front. There is no software to adjust it. I dont want to open the back panel everytime I want a different color. I dont know what the developers of this were thinking but it would have been a whole lot easier if they had a dedicated button in the front panel of the case. I went from a HAF X to this so its a world of difference. Would I recommend this case? Depends on your project but this should be sufficient for most cases.
-

Ryan
> 3 dayIve already gotten several compliments on how sexy this tower looks, Im big into white aesthetics and the front of this tower really works together nicely. I was also very surprised at just how quiet the massive fans in the front are; my stock CPU cooler is louder (not much of a surprise tho). Its also very user friendly when it comes to cord management, but this probably goes hand in hand with my biggest note: This thing is pretty massive for a mid-tower, it barely fits on my desk in addition to my dual-monitors. I actually had to filter my desk search to be sure I could fit this puppy on top instead of sitting it on the ground below. The combination of a large frame and solid cord management can make this thing feel somewhat empty inside. I might actually recommend this for those looking to put decor inside their case. I have a mini figure that Id like to stick inside and there is PLENTY of space to do that with, just be sure you run at reasonable temps. Unfortunately the stock cooler makes this a little impractical for me, but ultimately its the plan once I upgrade the cooler.
-

adam adkins
Greater than one weekI have built over 20 pcs and this is by far one of the best cases I have used. You would be hard pressed to find many cases with better thermals and the ones that do are not by much. The use of 200mm fans provides a huge volume of air with much less noise. Even at max rpm this case is very quiet. Cable management is great, 2 3.5 hard drive expansion bays, and 2 2.5 hard drives can be added. The only very small issue I have with the case is Im not a big fan of the power supply shroud but thats a really small gripe. Its not terrible but can be a pain to install after removing. This case will easily handle a high powered build and liquid cooling for a gpu is really unnecessary. A 240mm AIO easily fits on top.
-

Landon Porterfield
> 3 dayHad a cooler master case before but it was a mini case that looked more like a guitar amp than a tower. It had poor airflow so I upgraded to this and my average gaming temps (cpu) went from 85-87 degrees Celsius to 68-70 degrees. The two 200mm fans on the front are extremely quiet to be so large. I replaced the rear case fan with a Corsair, but the cooler master fans it comes with work great and are quiet as well. The case is pretty heavy but it’s also very sturdy and well put together. My favorite part by far is the trays that store the ssd’s/HDD’s. They just slide in and out and the wires go straight to the back side where they’re hidden. No complaints about this case at all.
