
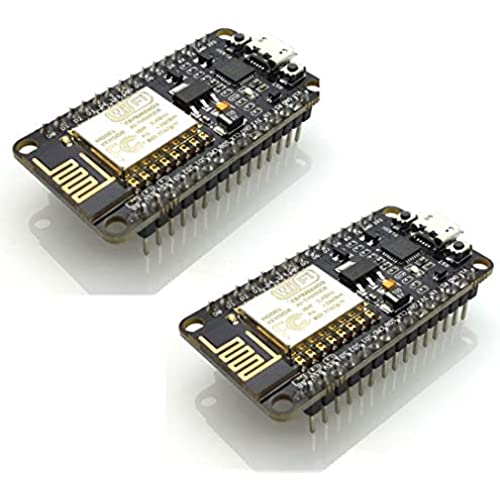

HiLetgo 2pcs ESP8266 NodeMCU CP2102 ESP-12E Development Board Open Source Serial Module (Pack of 2PCS)
-

marvin torgeson
> 24 hourIve used 3 different boards all worked perfectly. Great value wifi mqtt and gpio all did well.
-
Douglas Wolf
> 24 hourIve used several of these NODEMCU board now (from several manufacturers) from several different vendors. The HiLetGo boards are by far the most reliable, with one serious caveat: They are the V2 versions of the NODEMCU, and have a different form factor than the newer V3 NODEMCU boards. (NODEMCU V3 boards are a few millimeters wider than V2 boards). This only matters if you intend to mount the board on a base-board (effectively, a breakout board)... all of the NODEMCU base-boards Ive seen are for V3 NODEMCUs. Form factor aside, Ive have great luck with the Hiletgo versions of these boards. Downloads at full speed always seem to work, and they never seem to barf with the dreaded espcomm sync failed error. If you have any Arduino skills, these are *great* boards. I (who have lots of programming experience, but close to zero web-coding experience) was able to use one of these boards as the brain of an internet-enabled, web-accessible garage door manager. I highly recommend the Hiletgo version of the NODEMCU boards. Hiletgo: if youre reading this, please release a NODEMCU V3 version of this board. :-)
-
Logan Heath
> 24 hourTotally worth buying from this manufacture! I purchased 5 boards from them and all work effortlessly! One thing I recomend if your computer isn’t picking up the board, and you have the drivers already installed is to try and find another cable to connect to your computer. If you connect the board to your computer and it lights up and the computer doesn’t recognize anything but the board lights up with a blinking pattern , then it’s most likely that the cord your using is only supplying power to the board and not actually making a usb connection. I almost sent this product back thinking it was broken because of this. MAKE SURE YOU HAVE THE RIGHT TYPE OF CORD!!!!
-
Glannicus
> 24 hourAll the git gud u need in a smol package... dont up the price HlG....
-
Chris Gifford
> 24 hourTwo out of 4 failed a week into use. Random reboots and unstable operation make this a poor choice for any project. HiLetGo reached out to me and sent me two more nodemcus. Same story, random issues with rebooting
-
Chef
> 24 hourI was looking to test an MQTT-based Proof-of-concept. I needed a few more ESP-based MCUs to round out my inventory. I stumbled across HiLetGo while searching for this product. I was skeptical, at first; the prices were very low, and normally, that means that quality has been sacrified. I took a chance, and I am very pleased! The pins are clearly labeled. There were no traces, jumpers or poor soldering spots. But lets talk about what really matters: Did it work? Yes! I tested the NodeMCU with the Arduino IDE. It worked perfectly! I have some other boards that constantly needed to be reset every 3 or 4 writes. Not so with these boards. First time, every time. Had I known about HiLetGo eariler, I could have saved myself some time. Learn from me. Buy some now! I have included a screen shot of the NodeMCU using an I2C SSD1306 OLED. Helpful hint: even though the board says to set it at 9600 for the upload speed, dial it up to 115200. You will thank me later!
-
Mikhail Bondarenko
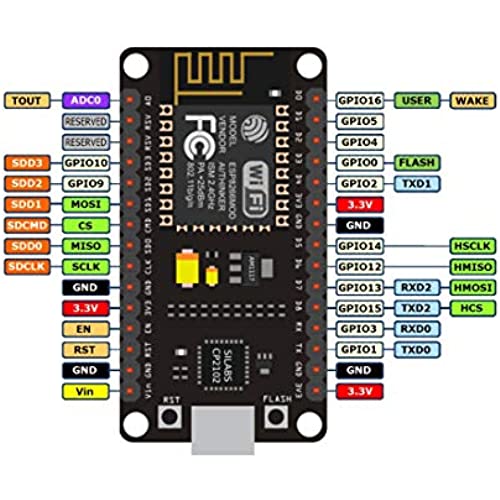
> 24 hourMost important piece of info that no one seems to share. Connect Pin GPI00(Pin D3) to GND. Plug into USB Run the Firmware programmer(com port, I set baud to 9600, select your firmware build) Hit flash and voila its working, wait until blue bar finishes.
-
Philip
> 24 hourAn awesome device with so much capability for its size!
-
Sagar M.
> 24 hourpin headers are soldered on. Theyre not shady about it, I just didnt notice. But heads up if it doesnt work with your application
-
me_little_armalite
> 24 hourIve purchased 6 of these. Worked fine as described.
