
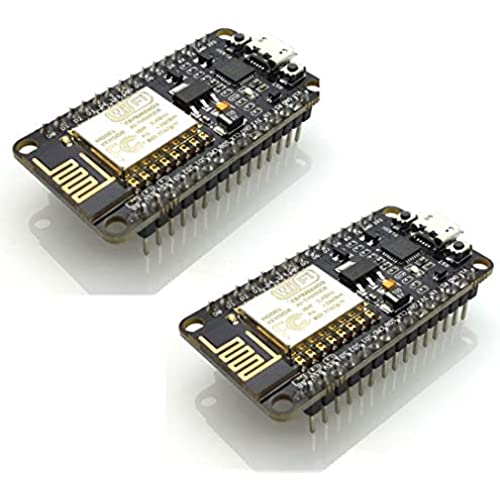

HiLetgo 2pcs ESP8266 NodeMCU CP2102 ESP-12E Development Board Open Source Serial Module (Pack of 2PCS)
-

Yanni
> 3 dayWorks great, unless youre trying to build a battery operated device, in which case this board draws too much current even in deep sleep mode. It seems like it would be easy for the board manufacturers to use better components (for example, the HT7333-A voltage regulator is great for low power, and they could have used it instead.) I dont know why none of them consider that use case.
-
Ben V.
> 3 dayI bought these for a IoT project and they are working great. They are fully compatible with all of the libraries and devices I am already using and the price was great. No issues getting them working either so Im happy with my purchase.
-
ADS
> 3 dayIm on my third order of these and they have all worked flawlessly.
-
Jack in the Green
> 3 dayWhats not to like? Good (though not complete) compatibility with Arduino IDE and most libraries, and wireless communication built in. Ive really enjoyed messing with these, and Im surprised that the 3.3 volt limitation... really hasnt been a limitation. Plenty of displays and sensors use that now. Some of the best bang for the buck in development boards out there!
-
David
> 3 dayThese boards work just as expected, but as mentioned in the headline, they can be a little bit troublesome to set up. For best results: 1. Find a USB to micro-b cable that has both power and data (very important) 2. For Windows: Open Device Manager > You should find it under ports (you can ignore any USB errors from Windows) Mine was COM4 (Make sure you also install the proper driver or it wont work) (https://www.silabs.com/products/development-tools/software/usb-to-uart-bridge-vcp-drivers) > reboot after driver installation For Linux: type lsusb in the termial > Should see something like below > My port was listed as /dev/ttyUSB0 Cygnal Integrated Products, Inc. CP2102/CP2109 UART Bridge Controller [CP210x family] (no driver install necessary) 3. Configure settings in Tools menu (Luckily, I included the settings you will be needing as the 3rd photo) =) Good luck! 4. Hit the right arrow button to upload (yes, 115200 baud worked fine for me and 9600 was dog slow)
-
Kindle Customer
> 3 dayIm using for home automation project. Easy to use and integrate, very good wireless signal as well. Also low power draw. Occasionally stop communicating, but easy to push reset button and youre back up and running.
-
Shaunathan
Greater than one weekUPDATE: I first thought this board was defective, given the exact same behavior experienced in the reviews. HiLetgo reached out to me, which was nice. Their response didnt help, but once I got a good IDE up and running, the boards seem to work fine. So, user error I guess.
-
P. Tuesley
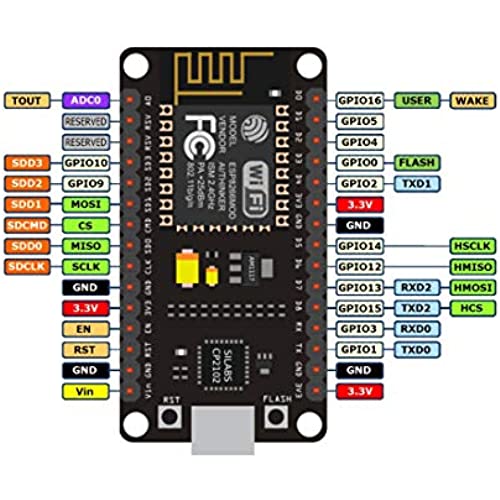
> 3 dayI bought a couple of these a while ago for a project I had in mind. I did the development on an Adafruit Huzzah board and everything works fine. It connects to a couple of BMP280 sensor board and displays temp and air pressure on a web page. I connected the same sensors to this board (had to change the pins, it is NOT pin-compatible!) and tried to upload the program. Note that there is no direct support for Hiletgo boards in the Arduino IDE, I used the same generic ESP8266 board I used for the Adafruit board. As soon as I uploaded the program, the serial monitor starting spewing garbage. I finally found the review that mentioned the serial baud rate is broken, so I changed it per their suggestion. Yea! I can now see that the serial monitor is saying Fatal Exception (0) over and over and over... Next, I created a simple Hello, World program and uploaded it. Same Fatal Exception over and over and... Pretty much a piece of garbage.
-
T.Snyder
> 3 dayWell packaged, easy to program and use with Arduino IDE.
-
hngonagstrng
> 3 dayGreat. Got it to use with ESPeasy. Works perfectly. Love this connected IOT board
