
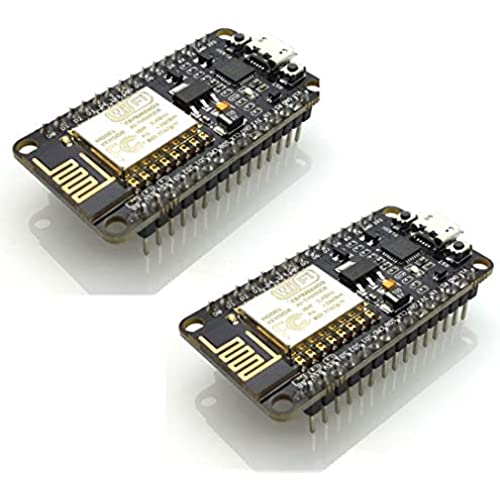

HiLetgo 2pcs ESP8266 NodeMCU CP2102 ESP-12E Development Board Open Source Serial Module (Pack of 2PCS)
-

patrick g
> 3 dayId have to guess ran over
-
T is for Tech
> 3 dayThese are great, and the first time Ive used a NodeMCU development board. In the past Ive used other Arduino boards, but have always wanted something that has built in WiFi...and this one does! I used it as the primary controller for a YouTube Subscriber Counter device (will upload pictures). I didnt have any issues getting this flashed and using the Arduino IDE - just follow the instructions in the Amazon description left by the manufacturer. There really isnt any directions - but there is a lot of stuff on line if you just do a quick Google search for the ESP8266. This is a really good deal for 2 of these boards, I actually cant believe you can get something so neat and cool for such a cheap price. I had been using the Raspberry Pi 0 W controllers for some other things, but those are overkill for simple IoT type devices - these are a great choice for something like that!
-
ATT
> 3 dayI had purchased arduinos and the esp-01 separately before I realized these were a thing. I purchased 6 of these so far and will probably end up buying more. These are very versatile and are perfect for the automation project Im working on. I would recommend these to anyone looking to work with devices (sensors, servos, etc) that they want to control or monitor online.
-
paul
> 3 dayI bought this to build an alarm clock that is time synchronized to an NTP server. The instructions provided by HiLetgo on Amazon got me going very quickly, the only part I had to change was step 3 where it said use: esp8266com_index.json. This URL periodically seems to go off line, and was unavailable when I was setting up, so instead I downloaded the source, and used that locally. Then I added the oled display (also from HiLetgo) https://smile.amazon.com/gp/product/B0711RKXB5 and ran the example sketch to display wifi networks. Both products are great quality and easy to use.
-
Alex Arrow
> 3 dayoverall a decent item. purchased 2 cards ,one arrived defective so knocked of a star but excellent attentive customer service, took care of fast replacement as well as technical support decided rewrite the review Thank you!
-
zman121
> 3 daybut if you are making a project with this, you should expect to put in a little time to get it set up. Once configured, it programmed just fine over USB. Havent done much with it yet -- other paying jobs take precedence -- but the few things I tried worked just fine, Im confident I wont have much trouble with them.
-
Frank W.
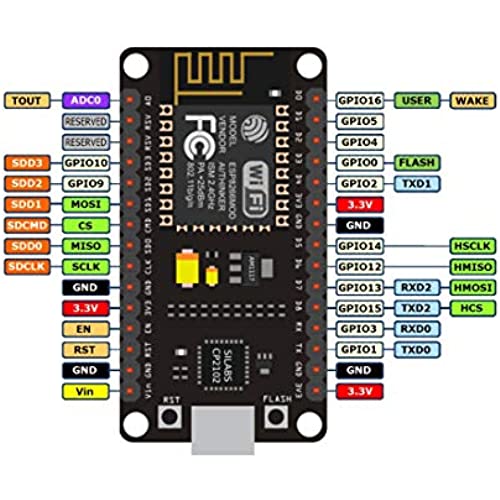
> 3 dayComplete project description follows. Im using the NodeMCU as a web server and it works great. It was a struggle to find example code that actually connects outside my local area network but I found some. Also had to learn the rudiments of HTML. Only issue is it seems to need to be restarted every 4 or 5 days. Since Im going to leave it in a remote location Ill put some code in the MEGA that sits right next to it to restart the NodeMCU every couple days, by pulling the RST pin low. Green Pond Bridge Boat Clearance At ‘very low tide’ the clearance under Green Pond Bridge in Cape Cod is 6’6” or less and that is too low for the boat I use. The tide charts for Falmouth, MA are theoretical and can vary as much as 18” from what is actually happening at the bridge. This system monitors the clearance and transmits the information on the internet. All of these parts were purchased from Amazon. Transmitter An (Arduino) Elegoo UNO R3 board is connected to an Elegoo HC-SR04 Ultrasonic Distance Sensor. The UNO and the sensor calculate the distance from a fixed dock to the sea level, then transmit that data using a MakerFocus NRF24L01 Wireless Transceiver to the Receiver described below. The Transmitter sits on the end of a dock where there is no power, so the UNO, Transceiver and Distance Sensor are powered by the energyShield 2. This battery has special capabilities – it wakes everything up every 15 minutes. The system takes a couple readings of the distance to the water then transmits that data, then the battery shuts it all off. The data transmitted includes information from the battery – time, date, and voltage. I have been testing this unit at home (in Dallas) and it has been operating outside, for about 20 days. Based on battery drain it looks like it will operate for about 4-5 months before it needs a recharge. When the temperature drops below zero the system still works fine but the voltage reported in the battery seems low. All of this is housed in a plastic box printed for the purpose with a FlashForge 3d Printer Creator Pro, using eSun White ABS+ filament Picture below. Receiver An (Arduino) Elegoo MEGA 2560 R3 is connected to another NRF24 Transceiver to receive the data. The MEGA does the math to convert the distance from the dock to the water, to the bridge clearance. Then the information is displayed on an Elegoo UNO R3 Touch Screen (that also works fine on the Mega). Picture below. A small plastic frame for the Receiver was also printed on the 3d printer Web Server Finally, the information in the MEGA is transmitted over a serial bus to a Hiletgo ESP8266 NodeMCU ESP-12E Internet WIFI Development Board (Also operates using Arduino IDE programming). This board is connected to the MEGA via the XCSOURCE Logic Level Converter and powered by a UCEC MB102 Breadboard Power Supply Module. All mounted on an Elegoo Breadboard. The ESP8266 is programmed to be a web server. It connects to the internet through the modem/router provided by AT&T. Picture of my cell phone below.
-
Sagar M.
> 3 daypin headers are soldered on. Theyre not shady about it, I just didnt notice. But heads up if it doesnt work with your application
-
Nunyabiz
Greater than one weekEasy to progam and the small size makes it easy to put anywhere.
-
marvin torgeson
> 3 dayIve used 3 different boards all worked perfectly. Great value wifi mqtt and gpio all did well.


