
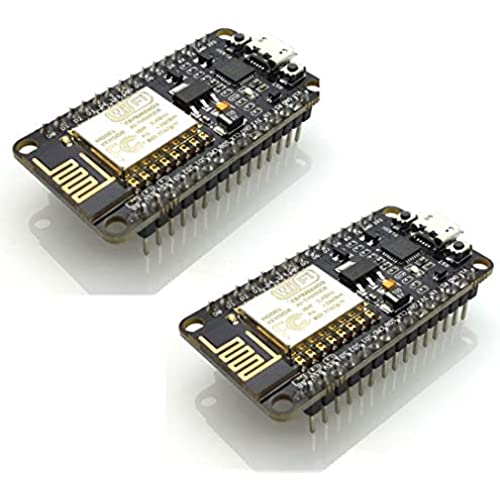

HiLetgo 2pcs ESP8266 NodeMCU CP2102 ESP-12E Development Board Open Source Serial Module (Pack of 2PCS)
-

Jim
> 3 dayOne board works perfectly. Had the other board break but hiletgo was quick to help replace the one that broke. Overall very pleased with the board
-
Ccampbell
> 3 dayIt is working great, and havent had any issues loading from arduino. Will use in other smart projects.
-
Ike C.P.
Greater than one weekWorks as it should. Supports many programs and services. It also has useful LEDs to check the status of uploads, downloads, connections,etc.
-
mahooga
> 3 dayI use these NodeMCU to control the lights on my house for every holiday. Using ESPEasy to install WLED was very simple and straigtforward. No programming skills were needed to accomplish my task
-
Patrick E. McKnight
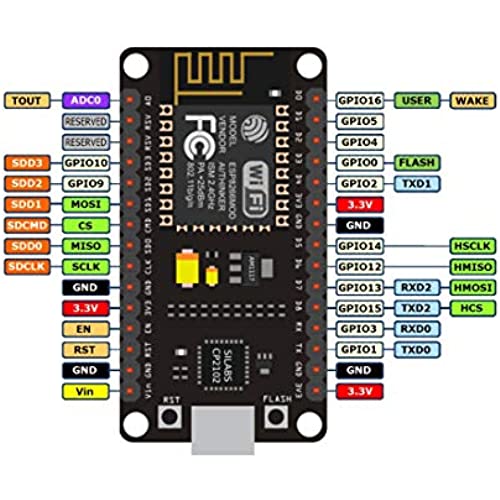
Greater than one weekOne-star but should get ZERO Background: I bought these a while ago and got around to working on several projects over the holidays. To my dismay, I found that these ESP8266 Amica modules simply do not work. I am a hobbyist, Arduino, RaspPi, Linux, and electronics tinkerer and have been for over 10 years or so. These are singly the most frustrating pieces I have ever had the misfortune of wasting my time figuring out. Let me elaborate on these modules: First, the CP2102 fails to negotiate with Linux, MacOS or Windows. I get the following error almost routinely after a sketch fails to upload: cp210x ttyUSB0: failed set request 0x7 status: -110 Second, the pinout for the module is wrong. Many who contributed their views to this board have commented as such so I wont elaborate. Third, the stability of this piece - the one that I could get to upload a sketch - simply was insufficient to warrant even paying one US cent. The module crashed, rebooted, and did not allow serial connections to monitor the processes. In sum, I think this was not as much as a waste of money but it was a HUGE waste of time. I cannot get back the time but I can spend my money elsewhere. HiLetgo will no longer be an Amazon supplier I will purchase from in the future. I suggest looking elsewhere for any and all products if you value your time. Hope this review was helpful. Addendum: If you are wondering whether I followed the myriad of tips, suggestions, HOWTOs and such online, the answer is an emphatic yes. I scoured the internet to find every insight I could for this cheap piece of silicone (offensive language not my style). After exhausting every idea, I simply gave up. You ought to steer clear unless you want to learn everything you can about UART, USB, and Arduino IDE/Python esptool error codes. The bottom line is that these modules are time wasters. Save yourself the time and energy and look for something more dependable.
-
Alia Torp
Greater than one weekWorked great for my use.
-
xcesmess
> 3 dayGreat little board. Definitely recommend switching to the Arduino IDE though as youll get more bang for your buck with the minimal memory it has. Be sure to watch out for the pin usage... having certain voltages on the pins caused mine to not boot and put it into other modes. Otherwise great little board for the money!
-
Chef
Greater than one weekI was looking to test an MQTT-based Proof-of-concept. I needed a few more ESP-based MCUs to round out my inventory. I stumbled across HiLetGo while searching for this product. I was skeptical, at first; the prices were very low, and normally, that means that quality has been sacrified. I took a chance, and I am very pleased! The pins are clearly labeled. There were no traces, jumpers or poor soldering spots. But lets talk about what really matters: Did it work? Yes! I tested the NodeMCU with the Arduino IDE. It worked perfectly! I have some other boards that constantly needed to be reset every 3 or 4 writes. Not so with these boards. First time, every time. Had I known about HiLetGo eariler, I could have saved myself some time. Learn from me. Buy some now! I have included a screen shot of the NodeMCU using an I2C SSD1306 OLED. Helpful hint: even though the board says to set it at 9600 for the upload speed, dial it up to 115200. You will thank me later!
-
hngonagstrng
> 3 dayGreat. Got it to use with ESPeasy. Works perfectly. Love this connected IOT board
-
Frank W.
> 3 dayComplete project description follows. Im using the NodeMCU as a web server and it works great. It was a struggle to find example code that actually connects outside my local area network but I found some. Also had to learn the rudiments of HTML. Only issue is it seems to need to be restarted every 4 or 5 days. Since Im going to leave it in a remote location Ill put some code in the MEGA that sits right next to it to restart the NodeMCU every couple days, by pulling the RST pin low. Green Pond Bridge Boat Clearance At ‘very low tide’ the clearance under Green Pond Bridge in Cape Cod is 6’6” or less and that is too low for the boat I use. The tide charts for Falmouth, MA are theoretical and can vary as much as 18” from what is actually happening at the bridge. This system monitors the clearance and transmits the information on the internet. All of these parts were purchased from Amazon. Transmitter An (Arduino) Elegoo UNO R3 board is connected to an Elegoo HC-SR04 Ultrasonic Distance Sensor. The UNO and the sensor calculate the distance from a fixed dock to the sea level, then transmit that data using a MakerFocus NRF24L01 Wireless Transceiver to the Receiver described below. The Transmitter sits on the end of a dock where there is no power, so the UNO, Transceiver and Distance Sensor are powered by the energyShield 2. This battery has special capabilities – it wakes everything up every 15 minutes. The system takes a couple readings of the distance to the water then transmits that data, then the battery shuts it all off. The data transmitted includes information from the battery – time, date, and voltage. I have been testing this unit at home (in Dallas) and it has been operating outside, for about 20 days. Based on battery drain it looks like it will operate for about 4-5 months before it needs a recharge. When the temperature drops below zero the system still works fine but the voltage reported in the battery seems low. All of this is housed in a plastic box printed for the purpose with a FlashForge 3d Printer Creator Pro, using eSun White ABS+ filament Picture below. Receiver An (Arduino) Elegoo MEGA 2560 R3 is connected to another NRF24 Transceiver to receive the data. The MEGA does the math to convert the distance from the dock to the water, to the bridge clearance. Then the information is displayed on an Elegoo UNO R3 Touch Screen (that also works fine on the Mega). Picture below. A small plastic frame for the Receiver was also printed on the 3d printer Web Server Finally, the information in the MEGA is transmitted over a serial bus to a Hiletgo ESP8266 NodeMCU ESP-12E Internet WIFI Development Board (Also operates using Arduino IDE programming). This board is connected to the MEGA via the XCSOURCE Logic Level Converter and powered by a UCEC MB102 Breadboard Power Supply Module. All mounted on an Elegoo Breadboard. The ESP8266 is programmed to be a web server. It connects to the internet through the modem/router provided by AT&T. Picture of my cell phone below.

