
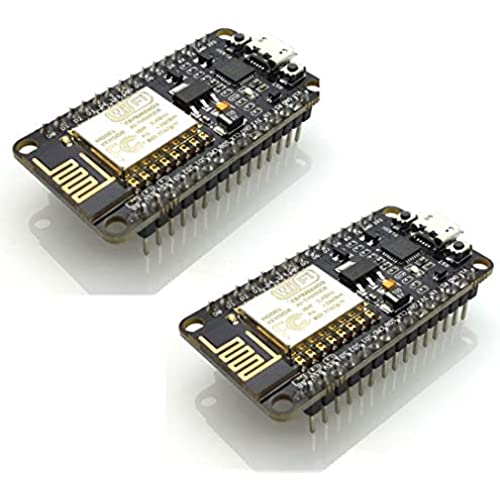

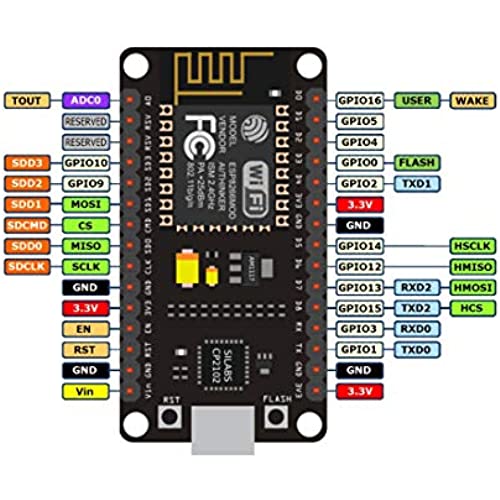
HiLetgo 2pcs ESP8266 NodeMCU CP2102 ESP-12E Development Board Open Source Serial Module (Pack of 2PCS)
-

Oliver
> 3 dayI refunded this because of the micro usb connection not working (there was no blue light)
-
Ant
> 3 dayWorked great for using along with a common PS4 project. Only turn it on when I need it so I cannot comment if it lasts running 24/7 but when I need it the device boots up quick. Very easy to use. No problems programming, I did choose a slower speed when writing to the device. Took about 30 minutes or so to write to it.
-
Rob
> 3 dayThese are fun. The board is overpriced, but you get them much faster. If you have time to wait a month, they can be ordered from China for about a third of the price. I was happy to pay extra and get same day delivery. Well constructed and easy to program. Hooked it up to an 8 channel relay board. Let the fun begin :)
-
Scott Lancaster
> 3 dayThese cheap little chips are awesome! Took a little bit to get them working, but once I did, I was able to connect them to a linear servo and control the air ducting in our house from any device. Ive worked with other web based arduino chips before but these are really cheap and work great!
-
zman121
> 3 daybut if you are making a project with this, you should expect to put in a little time to get it set up. Once configured, it programmed just fine over USB. Havent done much with it yet -- other paying jobs take precedence -- but the few things I tried worked just fine, Im confident I wont have much trouble with them.
-
Johnston
> 3 day#1. They came packaged extremely well and obviously sealed correctly with no bent pins, dings or scratches. This set the pretenses of my expectations although still skeptical. #2. The boards themselves were solid all the way around. No wiggling pieces from bad soldiering ect. #3 I mentally prepared for a difficult time in flashing any type of program onto them as I havent delt with microcontrollers in this magnitude. I over read as I waited because again, to my surprise, it was simple. #4 The route I chose was to utilize Arduino IDE and github for the first one. #5 A plethora of information is online as well as several hundred page user guide I downloaded from the link that came in the box(another easy venture to do). #5 I chose Arduino IDE as I have an UNO R3 and had some experience with that. I also installed MicroPython and CircuitPython and because I use Virtual Studio Code for Python programming. It works awesome on that platform as well . #6 You dont need either if youre running Linux(I used my Ubuntu, havent toyed with kali yet or a VM) as everything can be done from the command line if you prefer. #7 AND FINALLY I WILL be purchasing these again!
-
Tesha Wrotenbery
> 3 dayThis product worked exactly as I wanted it to for my project. I am using it as a light for my bedroom that I can control via my phone. I connected them up to some programmable LED light strips and it does exactly what I want it to. The only part about this product that didnt work as well as I’d like it to is the connection with the WiFi. However, this issue could be caused to my WiFi router not putting off a strong enough signal. Other than that little issue though, these devices work wonders and I am very happy with my purchase.
-
Douglas Wolf
> 3 dayIve used several of these NODEMCU board now (from several manufacturers) from several different vendors. The HiLetGo boards are by far the most reliable, with one serious caveat: They are the V2 versions of the NODEMCU, and have a different form factor than the newer V3 NODEMCU boards. (NODEMCU V3 boards are a few millimeters wider than V2 boards). This only matters if you intend to mount the board on a base-board (effectively, a breakout board)... all of the NODEMCU base-boards Ive seen are for V3 NODEMCUs. Form factor aside, Ive have great luck with the Hiletgo versions of these boards. Downloads at full speed always seem to work, and they never seem to barf with the dreaded espcomm sync failed error. If you have any Arduino skills, these are *great* boards. I (who have lots of programming experience, but close to zero web-coding experience) was able to use one of these boards as the brain of an internet-enabled, web-accessible garage door manager. I highly recommend the Hiletgo version of the NODEMCU boards. Hiletgo: if youre reading this, please release a NODEMCU V3 version of this board. :-)
-
TULIO TRONCOSO JR
> 3 dayi am impress with the modules i am in a learning process stage good product
-
Sean M. Florer
> 3 daynice micro wifi hotspot diy kit
