
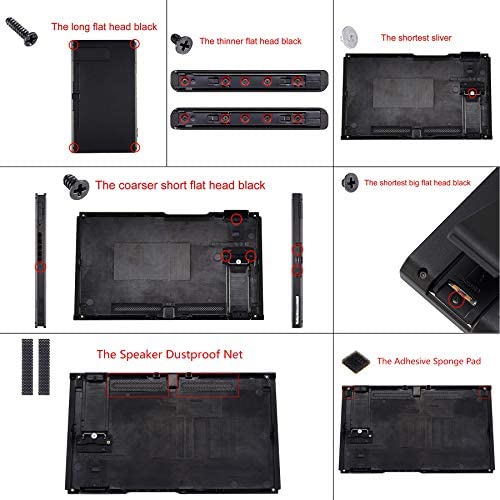
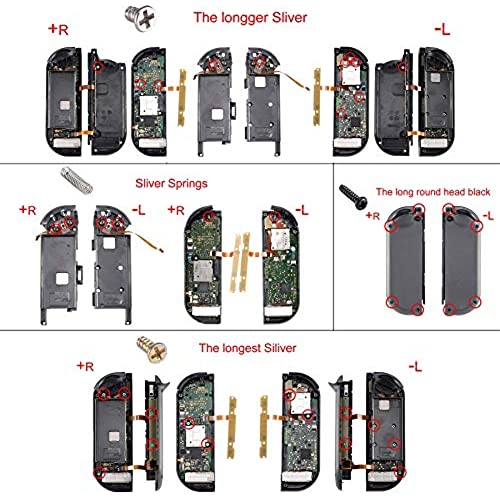


eXtremeRate Glossy Back Plate for Nintendo Switch Console, NS Joycon Handheld Controller Housing with Full Set Buttons, DIY Replacement Shell for Nintendo Switch - Chameleon Green Purple
-

DigitalBanshee
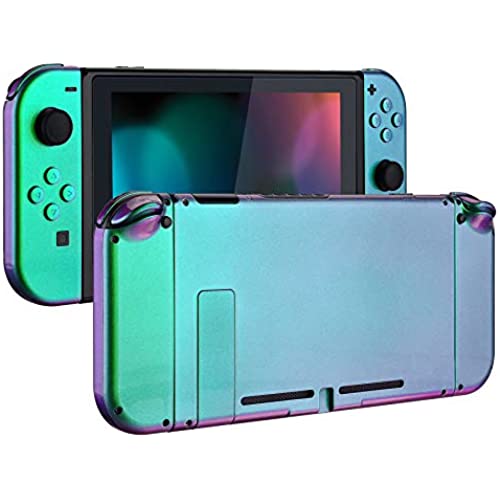
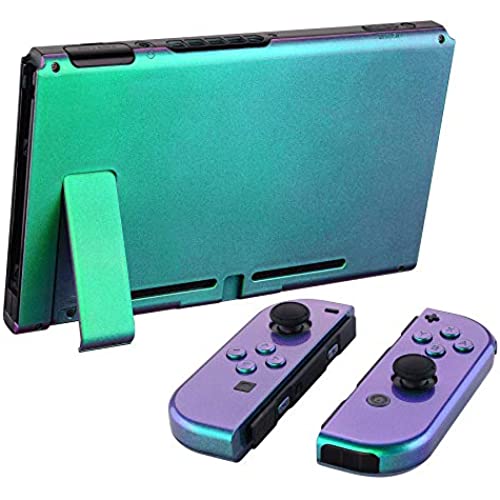
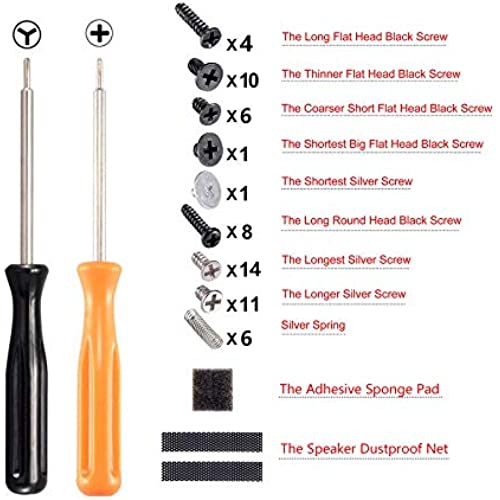
> 3 dayThe coloring of the case is quite cool. My pictures don’t really do it justice but the gradient purple to blue shifts as you tilt it in the light. The case doesn’t feel too bad, it’s quite smooth and I didn’t see any faults in the design or structure of it. Everything fits together snug and the kit comes with the screwdrivers needed to take the beast apart. The tools that came with it worked really well! They have a little magnetic power to them so they picked up most of the screws. I’ll be keeping these for another project in the future. So I have zero experience with putting a new case onto any system. A complete newbie here. Luckily I had been exposed to a YouTube video prior to buying this case. Thought it looked cool and figured why not try it since I have to replace the joysticks anyways (which I also got at the same time as this case kit). The video I found used the same case and had a step by step tutorial on how to do it. I followed it and actually got it to work. Only thing I did different was based on personal preference; I didn’t use all of the purple buttons. I felt that there needed to be some more black throughout the case to make it more unified. I did use the purple button casings for the interior buttons (the ones that rest against the switch itself) as I didn’t want bright red and blue buttons on a purple case. You definitely need patience if you’re a beginner like me. It took me 4 hours to do because of some trouble with ribbon cables and getting 3 of my screws out of my switch. (They assembled it pretty darn well, making the screws difficult to deal with. But that has nothing to do with the kit). Just a warning though. Do be careful about the screws that nintendo has on their system. They strip really easily! And yes, if I know someone that would like to change up their switch. I’d buy this kit or another one of their styles. I am very pleased with how this turned out!
-

Abby Lynn Sullivan
> 3 dayThis product is amazing!!! I was surprised that I got no written instructions but I found YouTube installation videos. The quality was great and it looks so flawless! I would totally buy again and would recommend!
-

Cierra Singleton
Greater than one weekAllow me to preface with the information that I am a complete novice to any kind of repair, home or electronic. My apartment consists of a pitiful toolbox of a hammer, ruler, and hand screwdriver, of which, I have no idea what kind of screws it is meant to actually use. I went into this with bright, wide eyes hoping with naive innocence it would be a fun, easy process if following a tutorial. I began my journey at 3pm. At 8pm, I was finally able to rest, and after a few tweaks later in the night, I rested easy, proud of the work I had accomplished. Behold....her. In all seriousness, I firmly believe that this is something any novice can learn to do. I, however, did not use the tools that came with it. It seemed nice enough, Metal with magnetized removable tips, but after fighting with the backplate, I used the additional tools that I had purchased. I recommend purchasing another set anyways, strictly due to the fact no tweezers comes with this set. Now, onto the process. I am still uncertain if my issues with the backplate were due to my tools or me not knowing how much pressure was needed (a lot!) or a combination of the two, but in fear of stripping my screws I saved the backplate for last and went immediately to my left and right joycons, which, were less of a hassle than the backplate was for me. Take your time with this! If you find yourself getting frustrated just move on to a new screw and go from there, or use a new tool. Don’t keep trying to push a square peg into a round hole. Using tweezers helps lessen the chances of ripping one of the delicate ribbon cables, and just take your time with the process. Unless you have done this before, it is going to take a long time, and that’s okay. I’m really happy with the end result, and I feel confident that I could do this again if I had to.
-

Nicholas L.
> 3 dayAfter about three months of installing the replacement housing, I can say that these buttons and joycon shells are worth the money. Im glad I opted for extremerates over the other competition! The overall feel and comfort of the material is nice and soft to the touch. That being said though, I have encountered a very disappointing issue; the shells tend to stain very easily. Ive noticed that the back of my joycon shell is getting noticeably darker than the backplate of the Switch. I highly recommend getting a slim transparent case in order to preserve the quality of the material, all the while still displaying its beauty. That or be extremely careful to not dirty your switch because these stains do not come off even with water/alcohol. Overall, Im still happy about these products but in order to keep everything nice and pristine, you really have to take care of your switch.
-

Tess McDonald
> 3 dayPlease for the love of God do NOT use the screwdriver provided with this kit, it strips the screws immediately making them impossible to get out— it almost ruined my switch completely! Don’t risk it, buy another one and BE CAREFUL I ended up buying another one which comes in a kit from Best Buy. Other that that issue this kit is wonderful! The soft touch is so nice especially on the back plate. They give you tons of extra screws which is a life saver! It might seem a little intimidating but it’s actually pretty easy to do. If you’ve ever worked on a PC or laptop it’s reminiscent of this. Probably like an hour or so to do, the only thing you have to watch out for are the y screws. If you follow the tutorial, the part where they reconnect the right ZR button they plug it in upside down. I was wondering why it was not working and had to open it up again so keep this in mind while doing the right joycon. That was a little frustrating that they would show it the wrong way. I definitely suggest doing the joycons first so you can test all the buttons!
-

Nizel A.
> 3 dayFirst off buyer beware because mirror plated material is a GIGANTIC fingerprint magnet. If that doesnt deter you then heres my full opinion of this product. Its cheap & makes you really appreciate the craftsmanship thelat Nintendo put into the Switch. Every OEM part is meticulously machined & made to perfection while stuff like this is just lazily thrown together for a quick cash grab which results in a poor quality product. Does it look good? Absolutely. The mirror gold & black combo is a work of art. Missing are the details like the OEM markers, logo, etc. which is understandable why they arent on there, but disappointing nonetheless. Due to the poor craftmanship some parts like the triggers leave too much wiggle room. This adds on to the major problem which is the cheap springs. Nintendos springs attach to the triggers & dont let go...these do not so youre forced to hold them in place while praying that they go in the right spot of just stay put in general. 45+ minutes playing around with cheap springs is unacceptable. Once you get everything together it looks great, but the journey is a pain. Not to mention its made out of thin plastic and the gold plating will just wear off after a few years. It would be nice if this was actual metal. Youre also going to need extra things like spudgers to get off the clips on the joycons & tweezers to install the springs as well as the ribbon cables. It at least comes with a screwdriver & bits.
-

Steven B
> 3 daySoft slight silicon texture thats great for gripping. Was pretty easy to assemble and came with extra screw which came in handy.
-

Ace3x
> 3 dayGreat quality. The only knock is that you have to reuse your original kick stand hinge receiver and install ot into the custom backplate. One of the main reasons I purchased this kit was because my kit stand was worn out and would constantly fall off. I assumed all the kick stand parts would come with the kit as the kick stand is replaced with the back plate.
-

steve
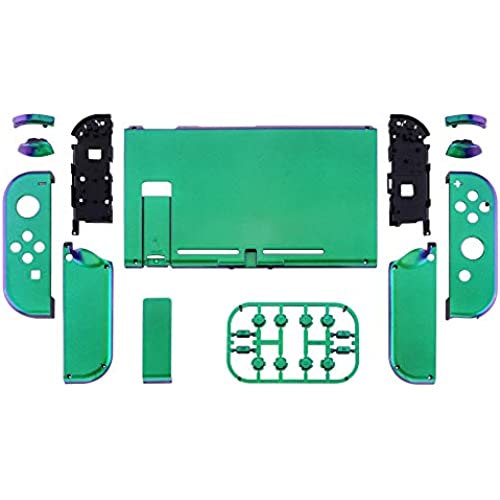
21-11-2024Awesome product, easy DIY project. Took about an hour, everything you need is included; screwdrivers, and unexpectedly a full set of additional hardware. The spring came in handy lol. Another bonus is my system seems to be working better than ever, probably due to the fact that i was able to clean the dust filter, but also very likely due to the material used for the backplate. Better cooling? Better performance? Love it! I bought this and i was so happy with it i had to write a review immediately. Literally same day i got it, i ordered another shell kit for my other set of joycons. This time im getting the d pad model. Again super happy with this product. Well done
-

Marina Gomes
Greater than one weekfinally changing from the ugly neon highlighter joycons to this pink one was much needed. i used a tutorial on youtube and used my own set of tools (dont use the tools provided, invest in a tool set from amazon) so i didnt strip my screws. in total it took about two hours for me but its an easy process, the back plate is definitely the easiest. in the end it was worth it!
