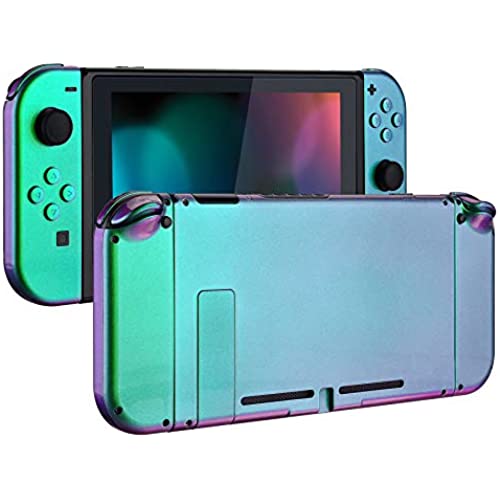
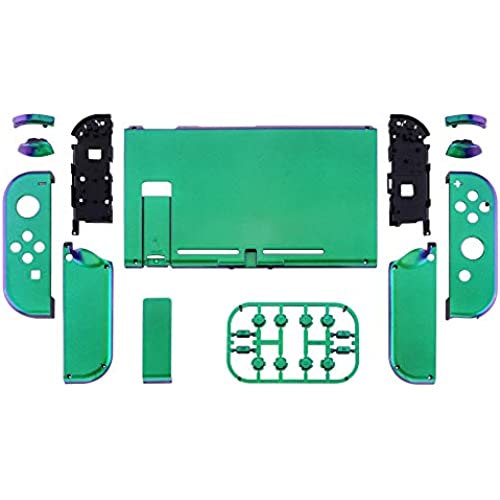

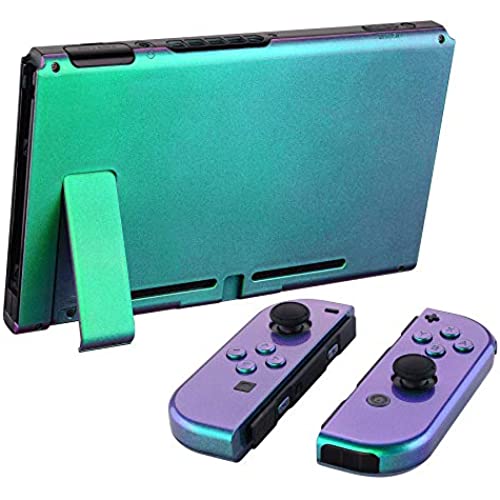
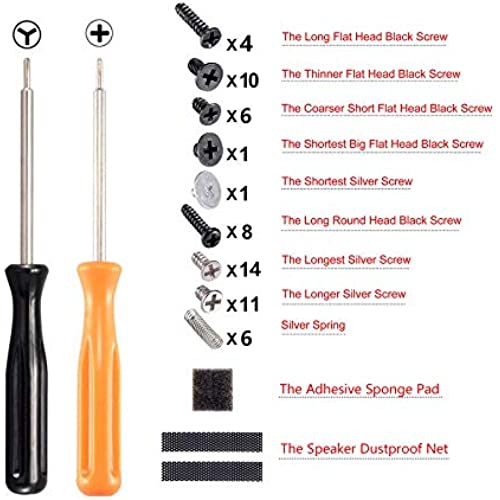
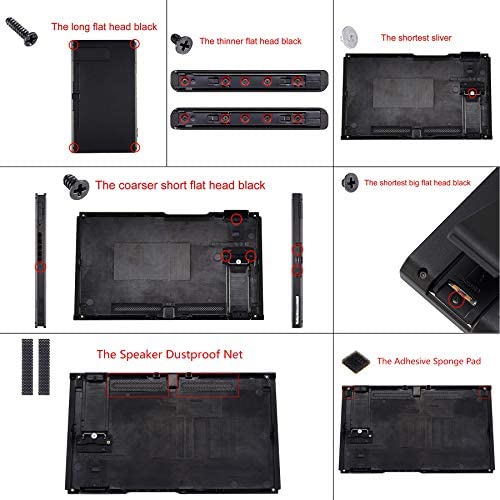
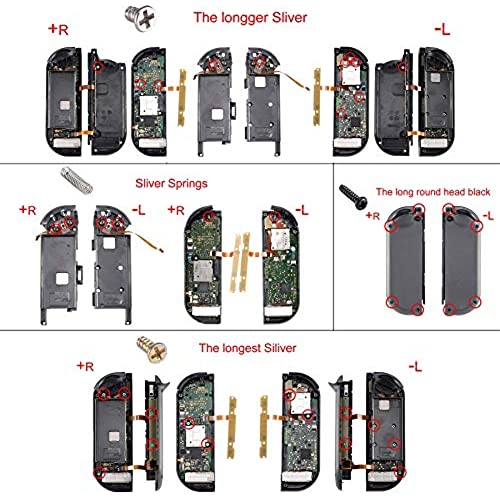


eXtremeRate Glossy Back Plate for Nintendo Switch Console, NS Joycon Handheld Controller Housing with Full Set Buttons, DIY Replacement Shell for Nintendo Switch - Chameleon Green Purple
-

Anonymous
> 3 dayI gave it 3 stars because the “T” screw driver is very hard to use and so I couldn’t change the back plate at all(so I had to apply a sticker). It also hurt my hand because of the style of it. I’m gonna have to buy a separate set to change it but other than that it’s very nice and I would do it again.
-

Chris
> 3 dayPros: + Had no issues installing this kit. The provided tools got the job done. + The surface finish feels soft to the touch. No glaring imperfections. + Came with extra replacement Philip head screws and buttons. + The replacement Joy-Con parts (including the buttons) are molded exactly like Nintendos, so it fits perfectly. Cons: - Provided tools are quite small. Can be bit of hassle to use. Neutral: • Hopefully theyll release more color options. Pretty limiting at the time of this review. (Not that Im complaining about the red set). • The right Joy-Con replacement buttons are not double-injected molded, so no white letters. I think this was intentional for aesthetic reasons or manufacturing costs. • Can be challenging to replace for the inexperienced. Other notes: • $40 can be quite expensive to some, but what youre getting in the box is definitely worth it. • The reviews in this product page contain reviews from a previous product. Its sorta tampering with the overall review score. (Ill update this review if any issues come up. Other than that, excellent shell so far! Its definitely superior than Basstops in terms of quality!)
-

Marina Gomes
> 3 dayfinally changing from the ugly neon highlighter joycons to this pink one was much needed. i used a tutorial on youtube and used my own set of tools (dont use the tools provided, invest in a tool set from amazon) so i didnt strip my screws. in total it took about two hours for me but its an easy process, the back plate is definitely the easiest. in the end it was worth it!
-

N
> 3 dayI just installed it today and so far Im really impressed. The quality is great but Ill update this if I ever notice any discoloration or other issues. I also didnt use the included buttons, more out of personal preference. The included ones look fine though. Consider buying another button set color before you disassemble it. After you install one, you probably wont want to do it again. A few tips Im not sure Ive seen others mention yet... - Set aside a bright space and some time to work. It can take 1-5 hours depending on your tech savviness and how delicate you can be. - Watch the youtube video once all the way through at 2x speed just to see the process, then watch it slower and pause step by step as you go. Its not hard but its tedious, so you should know what youre getting into. - Keep track of where each screw goes, and then make sure to use the same size from the new kit. I accidentally used too long of a screw in a joycon and I made a small bump on the front surface. Much farther and it would have been a hole. - I dont think the included screwdriver was bad, the real issue is the Switchs original screws, especially on the back plate of the switch body. But it helped having a second magnetic precision screwdriver set because youll be switching back and forth between phillips and tri wing a lot as you disassemble it. I used my own Y0 screwdriver for the trickier ones, with a rubber band. - Use a wide rubber band between the tri tip screw and screwdriver to give it more to bite onto. Dont wait until you already started stripping it, do this for every screw. Trust me. - Test buttons as you put it back together, not only at the end, to make sure theyre aligned correctly. I had problems with this a few times. The same goes for docking the joycons on the body; I had the release button turned 90° and it didnt lock correctly. - Since the shell holes arent threaded, dont overtighten them. When screwing directly into the shell, turn it just until you start to feel a little more resistance. Do what you can to avoid unscrewing and rescrewing in the same spot, because its easy to strip the plastic. - Last, squeeze the joycon shell together before you set the last 4 screws to make sure things are aligned, especially the ZR/ZL and any stray ribbon cables. (dont force it!)
-

~Krishna~
> 3 dayLike everyone else says this takes time and patience. I was doing great until I got to the joy cons and thats where I messed things up. The tools given were not the best. Takes a lot of time to finish! Helped but also almost stripped the screws of my switch. Came to the point where I decided to take it into a repair shop and get it done by professionals rather than me continuing to messing it up. So well see what it looks like in a few weeks. Color was pretty though. A very light pink color which goes perfectly with my desk aesthetic! Rate 3/4. Great once done I think but the process to get it done was a pain in the butt which is why I docked off two stars. My charging port was easy to change so I recommend doing that first. Color was pretty.
-

GuyFlannigan
> 3 dayI decided to not bother with the video guides as Im pretty familiar with repairing electronics. No issues whatsoever with the back plate on the Switch. Taking apart the Joycons for the first time really gave me an appreciation for how well theyre designed (as well as the cost associated with them). So much packed into a tiny housing. I would highly recommend a set of tweezers - curved and straight; they come in extremely handy for the ZL/R ribbon cables and their springs. The right Joycon ZR ribbon cable doesnt give you a lot of room to reconnect it. Take your time, use the tweezers (CAREFULLY), and try to reconnect it before screwing the main board back down. The left ZR springs are the only real issue on the left side. The ribbon cable was infinitely easier to work with than the right. Great little kit and very nice to have a full set of replacement screws/springs for when one inevitably flies off somewhere.
-

Blah
22-11-2024I read a lot of reviews and watched many tutorials before buying this because I wanted to make sure it was as easy as I hoped. I am moderately technical savvy. I’ve replaced several phone parts, and have a partially custom PC, but I wasn’t sure if these unnaturally tiny pieces would prove too much for me. Fortunately, it was one of the smoothest applications I’ve ever had. I read that I should purchase better tools, but even though I purchased both at the same time, this kit came before the tools, so I figured I’d try to use the tools that do come in the kit and stop if anything bad started happening. The tools looked just like the tools in the YouTube tutorial and were very well made! I did the entire installation with the tools from the kit without even coming close to stripping a screw. The only thing I’d hoped for was a functioning magnet because it very rarely picked anything up. It did take a little over 3 hours for the entire ordeal. I was very slow and patient, and used a set of nice tweezers most of the time. I do have small hands, so someone with average to large hands might have a difficult time with the small screws. They do provide extra screws and springs, which is very thoughtful. I watched the entire YouTube video BEFORE I even started and then played it at 0.5x speed through the installation with a lot of pausing. All in all, I’m very satisfied with how installation went and it looks so cute!
-

Gabi
> 3 dayI bought these to make my Switch a bit more unique, and I have almost nothing bad to say about the product itself. It fits together perfectly, and feels just as quality as the original housing for the Joycons and Switch. My only issue was with the screw slot that holds the right Joycon rail in place, the plastic that was supposed to hold the screw was too wide causing it not to fit in at all. I was able to use super glue to fix this and get the screw to stay, as I dont plan to remove the casing from these Joycons, but it might be harder to work with if you had this issue and wanted something less permanent. As far as the actual process of replacing the housing goes, it is certainly frustrating to do on the Joycons and took me a few hours to get everything perfect. If you are easily discouraged or frustrated it may not be a project for you. I recommend doing the Switch back plate first, and if you have too much trouble with that, replacing the Joycon shells may not be a good idea as it is much more difficult (I had to take apart and redo each joycon a few times as I did make mistakes). JerryRigEverything has a good video tutorial on how to do it, and if you follow his steps and keep everything organized you should be able to do it without messing anything up. In the past my only experience with something like this was a modification I did to my 3DS, so even someone new to this kind of stuff should be able to accomplish it with patience.
-

Jacob Thompson
> 3 dayIt requires a bit of know-how to swap the shells on joycons and some time and patience. But in the end it works great. Great feel. If you want to go the extra mile, there is software to make your switch show that color when they are attached to the system.
-

tyhuze
> 3 dayId like to give this 3.5 stars, but I cant so heres 3. This mod looks great and Im really happy with the end result. I feel like Ive got a unique look to match my other white/black accessories. Another positive is that it feels great to hold - the soft plastic being very comfortable. I decided to stick with the existing buttons because theyre already black and it was less to fuss with not having to replace every button. This is definitely doable by someone willing to be patient and meticulous. Heres some notes for anyone wanting to give it a go. -The included screwdriver (as shipped in 2021) is great, you dont need your own. -You absolutely need some small, precise tweezers. -The kit includes replacement screws for pretty much every screw. If you even *think* you stripped or started to strip a screw, just replace it as the original screws on the switch are not good. -Youre probably going to strip a screw. Maybe. -The soft plastic of the shell is great because it feels nice. But that also means that its very easy to bore out any hole where a screw goes into the soft plastic. So be careful not to over-tighten a screw. Personally, I bore out three - two on the shell (before I knew what to expect), and one in the joy-con. -There are some great YouTube videos that walk you through every step. Make sure to use one! Overall, Im happy with the product and would do it all over again. (and probably do it better)
