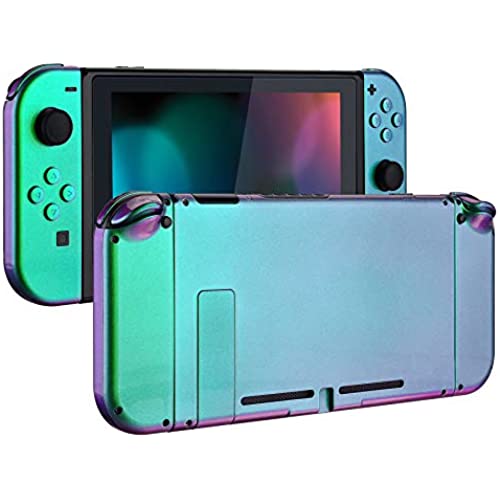
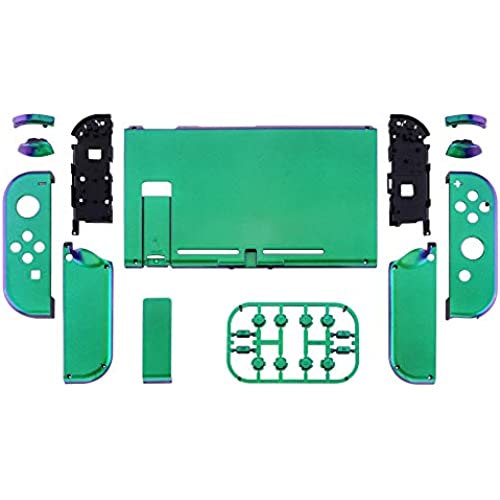

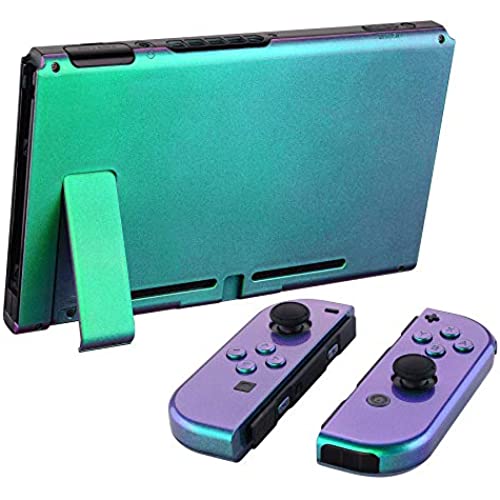
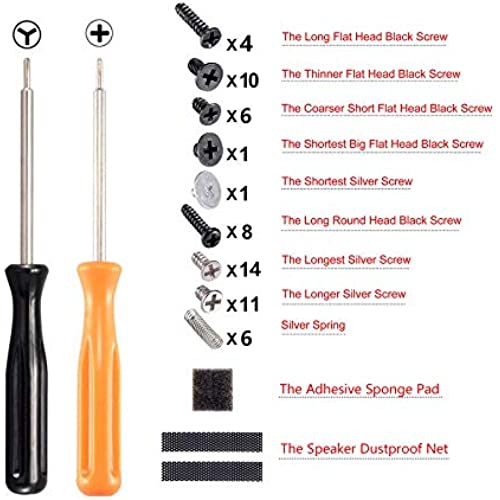
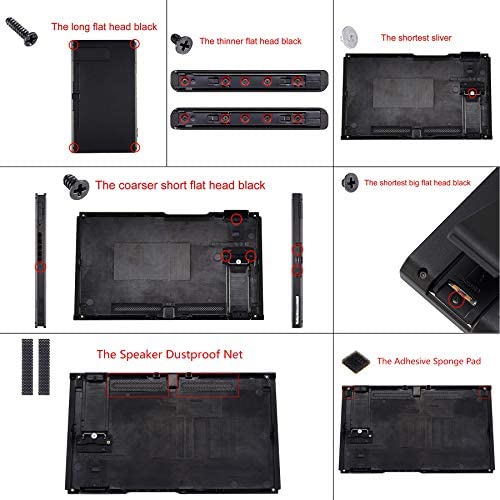
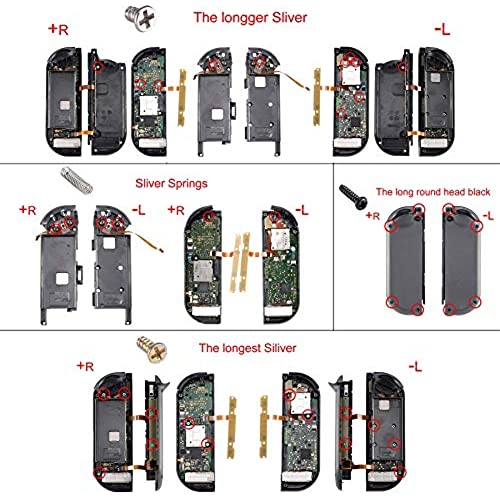


eXtremeRate Glossy Back Plate for Nintendo Switch Console, NS Joycon Handheld Controller Housing with Full Set Buttons, DIY Replacement Shell for Nintendo Switch - Chameleon Green Purple
-

Cristina Foster
> 3 dayI wanted to create my own custom Sailor Moon themed switch so when I found this pastel pink kit I was so happy(stickers were purchased by me on Etsy). I’m super impressed with the quality and the finished look. I also purchased the white button kit from them. My experience with installation was very good. I had no issues whatsoever. So with that in mind here are a few tips: 1. Use your own tools. Yes, the kit comes with the screwdrivers you will need. But they’re not very good. You can get a set of small screwdrivers, as well as the special Nintendo screwdriver right here on amazon. You will need the “switch screwdriver” as well as a ph000 screwdriver. I cannot stress this enough. Using the ones that come with the kit will very easily strip the screws as you’re trying to get them out. 1a. While on the topic of screws, pay attention to the screws you’re are removing and make sure you’re using the correct screwdriver. Some are “y” shaped. These will require the special Nintendo screwdriver. 2. TAKE YOUR TIME. This is not a quick project. If you’re in a rush to get it done, you will make mistakes and possibly damage something. This requires a patient and delicate hand. DO NOT OVER TIGHTEN THE JOYCON SCREWS as you’re putting it back together. This could not only damage the delicate parts inside but also mess with button function. 2a. If you do strip a screw the tiniest bit, but you manage to get it out DO NOT reuse that screw. Replace it with one of the screws from the kit. 3. FOLLOW THEIR VIDEO. The video is very detailed and well done. My suggestion here is to change the playback speed of the video to .5x. At original speed it’s a bit too fast to follow. I paused after each step to make sure I was doing it correctly. If possible watch the video before you even begin just to get a feel for the whole process, then begin your installation. 4. Pay attention to the screws as you are removing them. There are many different lengths used. I used little paper cups to put the screws in as I removed them step by step. So I had several little cups to keep the screws I removed sorted. 5. Some screws might give you a little bit of a fight. BE PATIENT WITH THESE. Nintendo doesn’t want you getting up in there so some of the screws have what looks like a tiny bit of tread glue. So you’ll have to “break the seal”. Again, be patient and careful. The last thing you want is a stripped screw as you’re trying to remove parts. This is where having proper screwdrivers will come into play. 5a. This also goes for some of the internal parts of the JOYCON that will need to be removed. For example, the little vibration element is taped down, as well as the battery. It’s not hard to remove them at all. Just be aware that they are taped down. 6. Get a good pair of tweezers! This was insanely helpful. Not only in disconnecting the ribbon cables, but also in getting out and putting some of the smaller buttons back in. This last one is about the casing itself. Because of the satin/matte finish the casing could very easily get dirty or scuffed. I opted to purchase a clear protective shell to ensure neither of those things happen. I also knew I’d be adding stickers so I wanted to keep those clean and safe as well. Personally, I like the look of the clear protective shell. **EDIT** MAKE SURE TO READ THE DESCRIPTION ON THEIR INSTALL VIDEO. THEY MADE A SMALL MISTAKE IN THE VIDEO WITH THE ZR BUTTON RIBBON AND THEY CLARIFIED THIS IN THE DESCRIPTION OF THE VIDEO** I think that is about it. I’m very happy with my purchase and the final result.
-

Steven B
Greater than one weekSoft slight silicon texture thats great for gripping. Was pretty easy to assemble and came with extra screw which came in handy.
-

Jorge Andrés Cediel
Greater than one weekSe nota que la calidad es excelente, el tacto en mi opinión es incluso mejor que el original, es más suave. Perfecto para darle una segunda vida a tu Switch, que en mi caso es de 2017 y ya estaba bastante rayada
-

Lei Lee
> 3 dayI really wanted this to work and I followed the great advice in the other reviews - I bought 3rd party tools and followed the video exactly, but the newer Switch models have the screws glued in so they are harder to get out. Even with the better tools the 2nd screw I tried immediately stripped and couldnt be removed. My Switch is brand new and I didnt want to risk damaging it so I decided not to proceed - and I couldnt really anyway at that point. I may have been unlucky with mine, so if youre brave enough to try the final results are probably worth it. I did do this successfully with the Pro Controller housing from eXtremeRate and it looks awesome. But I just didnt want to risk damaging the console so I think Ill try a custom skin instead. Also, I ordered the Heaven Blue color and hoped it would be a little more Tiffany (aqua) blue bit its pretty much straight up baby blue.
-

Maddie Ze
> 3 dayThis product is exactly what I had imagined it to be! The soft touch is a significant step up from Nintendos original cold, smooth shell that gathered fingerprints and hand oils way too well. This shell is easier to hold onto, and is basically just a joy to have in my hands. I love the light pastel pink and have even purchased additional sakura covers for my joysticks and a sakura pink case to match! Im ordering a clear case to put over it in order to slow down the shell wearing down overtime/protect it from outside debris, dirty grabby hands (I have younger cousins and siblings who sometimes borrow my switch lol), and overall to just keep this shell safe! I love it too much. It took me around four to five-ish hours to disassemble my original switch and put in the new sakura shell. While my heart was beating a mile a minute as I disassembled and I was super anxious (and worried Id ruin the inner contents of my switch by accident and make it unable to work), I realized it wasnt all as bad as I thought it would be. The screwdriver that came with the ExtremeRate shell wasnt too good (it was just a screwdriver handle with two separate screws to put in and switch out), so I purchased Youniks Nintendo Screwdriver set and everything was all good! Youniks set came with multiple magnetic screwdrivers of different sizes, picks, pliers, and many other handy stuff an amateur like me needed. With the right tools, patience, and pressure, the screws are all able to be taken out with ease (for those who want to purchase their own screwdrivers, get a Y00 and a Y2.0 triwing screwdriver and a 2.0 Phillips screwdriver. I hardly used the Y2.0 triwing, but it helped whenever I got close to stripping screws). I frankly believe a lot of the stripped screws people are talking about are partly because of user error (not enough pressure used, impatience, or frustration) but then again, my switch didnt have any glued down screws or anything. At times I occasionally stripped some screws halfway, and this is when Id refer to my Younik kit and use a larger screwdriver. Again, with enough pressure I was able to get out the stripped screws and put them back in again fine! When youre unscrewing and you fear youre starting down the path of stripping them, pause and take a deep breath and move on to another screw. This helped me multiple times when working on the back of my switch, as I didnt become frustrated and I didnt keep trying to do it while annoyed and possibly ruining it further. By the time I got back to the almost stripped screw, I had enough practice from the other screws and used what I learned to take this one out (again, use some pressure! At times I had to push a little hard!) Using ExtremeRatess youtube guide really helped me on this and I highly suggest using the video as you go, pausing and rewinding as much as you need. However, the video has a few things you might want to look out for: you dont have to unplug the ribbon cables at all! Simply unscrew everything, treat everything very gently and make sure nothing heavy (like the battery) weighs too heavily on the cables. One of my batteries and both of the white boxes beneath them were held down with tape, but gentle, slow prying got them out soon enough. Just make sure to know what youre pulling at when youre pulling, and make sure to do so slowly. Remember, its better to spend a lot of time doing something right than it is to do something quickly and do it wrong. Regarding ExtremeRates buttons, I wasnt too much of a fan of them. They had a louder clicking sound than Nintendos original buttons, and the ZL/ZR buttons had the engraved letters really close together to the point that they touched and it looked like it said some weird hidden alphabet letter. Not only that, but the ZL and ZR buttons were too long/big and when I put the joycon shell on, it left a pretty significant gap that made it super easy to actually look inside my joycon from the outside/for things to someday get stuck inside. So I ended up using the original Nintendo buttons, which fit so much better and kept that light, soft clicking sound that I find so much more pleasing. I dont mind that the right joycons buttons have white lettering, it actually is a lot easier for me to see them! Aside from that, this shell is amazing and Im so happy with my purchase. Maybe one day when this shell wears out (Im assuming it will after a few years, this is only natural!) Ill use another ExtremeRate shell!
-

MomentumTV
> 3 dayOnly disclaimer I would give, is that it does NOT come with the kick stand bracket, the cartridge cover, etc. So I had to order the bracket for the kickstand. ALSO just a fair warning that the joycons are a nightmare to swap the shells lol. But overall the quality of this was terrific, they supplied the tool needed for the screws and it looks great on my switch!
-

Nathan
> 3 dayHas a great feel and fits nice. You have to be prepared to put a lot of time and patience into this project though.
-

Alex
> 3 dayThe shell is perfect, it feels solid is almost identical thickness to the original and the color is just how it is in the product picture! My only major complaint is that the the included Tri-point screwdriver broke, I had just finished putting the joycons together when all of a sudden the tip snapped, I had to look around and buy another Tri-point screwdriver to be able to finish replacing the rear shell. Other minor thing is the kickstand is pretty stiff, but other than that its all good! Well see how the shell holds up overtime but honestly Im pretty happy with the end result and I would buy again from them.
-

Dustin
> 3 dayI got this originally because of quickly the original housing for the Switch got worn. I used it one day before my silicone grip for it came and the area around the buttons was already shiny and worn looking. For me, thats awful. I like my stuff looking good and taken care of. I cleaned it often, put a glass screen protector on it, got a carrying case for it and obviously the silicone grip which protected everywhere else, or so I had hoped. After a year of heavy portable usage I found that the rubber grip also wore away the matte coating that Nintendo put on their housing so the whole Switch looked as bad as if I had never used a grip. So I started looking for a replacement housing and the only real popular one was the Basstop series, but I wasnt a fan of any of the colors, then I lucked out and found this line. Holy crap I love it. Its seriously the best red I ever wanted, and the soft coating is awesome. Upon inspection it looks like the coating is a lot like a clear coat on a car, something that wont easily get worn away. It also cleans really well too. Installation was about as challenging as I expected. I have a lot of prior experience with these things so the goal is just to take it slow and be careful. Ribbon cables can tear easily, the connectors they go in on the board can break, and screws can strip or break the plastic. Fortunately, I can say that installation went off without a hitch. As some other customers have said, the color is in fact spray painted on so on very few small areas you can see a hint of white, not a big deal to me. I left the kick stand black because I thought that looks cooler. I switched out the latches with metal ones(not included), and I got a grip for it that shows off the color. On the side note I migrated the Switch dock circuit boards to the Basstop mini dock replacement housing. Awesome combination. So in conclusion, if youre looking for a replacement housing for your Switch, this is the brand you want. I also hear theyre going to be making a D-Pad variant for the Joy-cons soon, so there is that. The only thing I wish for, and I know its not likely, is a front housing replacement. Id be willing to move the screen and digitizer over to it so the front of the Switch main unit would be soft dark red too. If they ever do make that Im totally getting it.
-

Annet
Greater than one weekbackplate was pretty easy to install!!! joy cons were a little difficult but its worth it in the end! this color is so so pretty!
