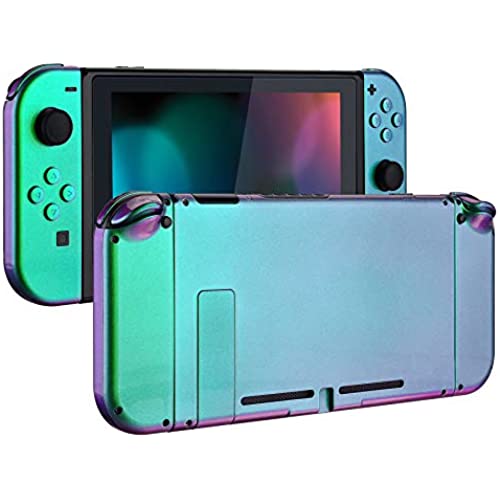
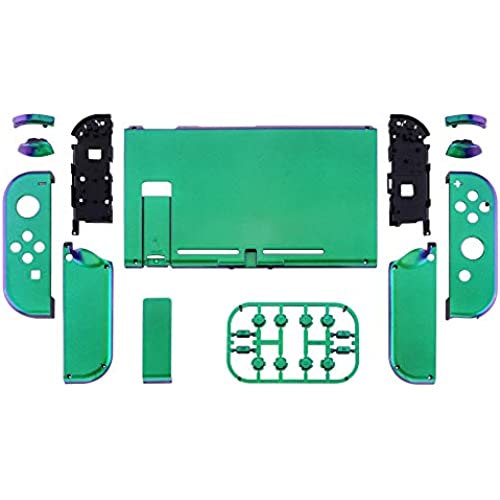

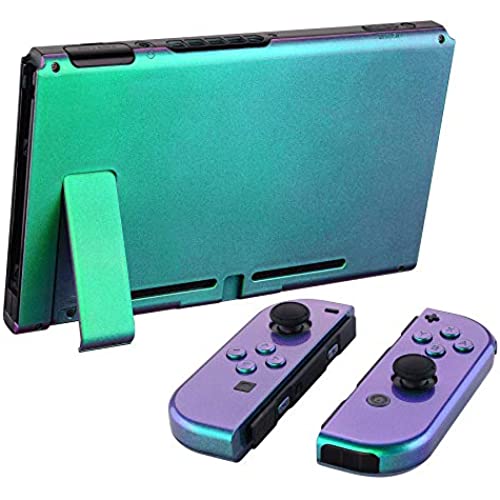
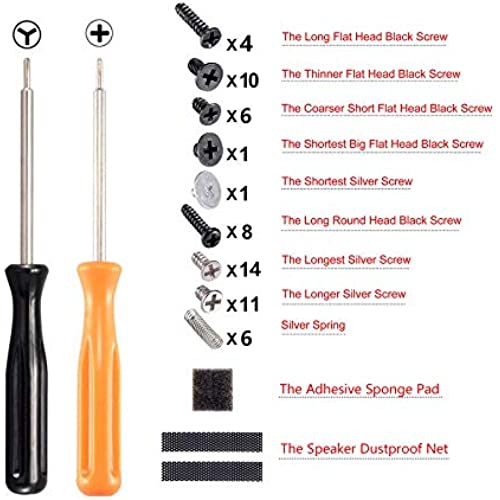


eXtremeRate Glossy Back Plate for Nintendo Switch Console, NS Joycon Handheld Controller Housing with Full Set Buttons, DIY Replacement Shell for Nintendo Switch - Chameleon Green Purple
-

tyhuze
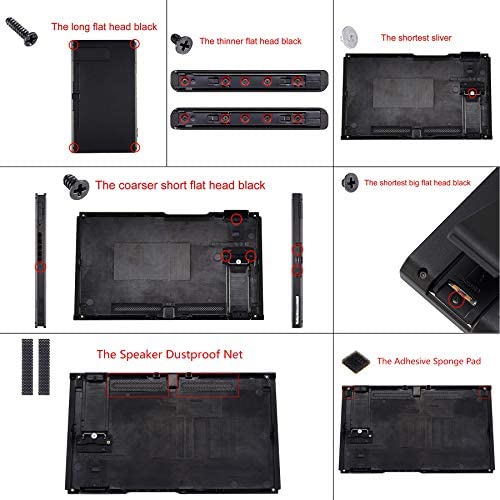
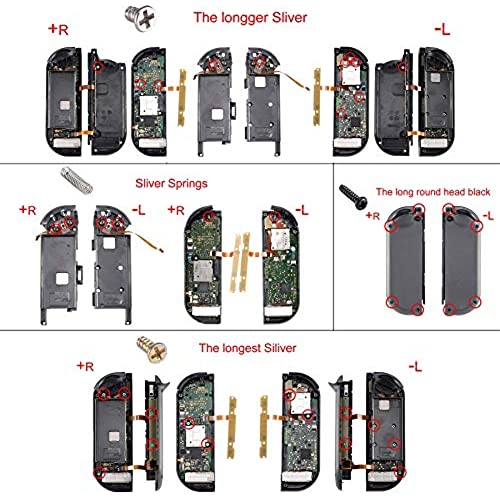
> 3 dayId like to give this 3.5 stars, but I cant so heres 3. This mod looks great and Im really happy with the end result. I feel like Ive got a unique look to match my other white/black accessories. Another positive is that it feels great to hold - the soft plastic being very comfortable. I decided to stick with the existing buttons because theyre already black and it was less to fuss with not having to replace every button. This is definitely doable by someone willing to be patient and meticulous. Heres some notes for anyone wanting to give it a go. -The included screwdriver (as shipped in 2021) is great, you dont need your own. -You absolutely need some small, precise tweezers. -The kit includes replacement screws for pretty much every screw. If you even *think* you stripped or started to strip a screw, just replace it as the original screws on the switch are not good. -Youre probably going to strip a screw. Maybe. -The soft plastic of the shell is great because it feels nice. But that also means that its very easy to bore out any hole where a screw goes into the soft plastic. So be careful not to over-tighten a screw. Personally, I bore out three - two on the shell (before I knew what to expect), and one in the joy-con. -There are some great YouTube videos that walk you through every step. Make sure to use one! Overall, Im happy with the product and would do it all over again. (and probably do it better)
-

Marina Gomes
> 3 dayfinally changing from the ugly neon highlighter joycons to this pink one was much needed. i used a tutorial on youtube and used my own set of tools (dont use the tools provided, invest in a tool set from amazon) so i didnt strip my screws. in total it took about two hours for me but its an easy process, the back plate is definitely the easiest. in the end it was worth it!
-

Brendan I.
Greater than one weekThis is an amazing product. The photos dont do justice to the beautiful luster that the scarlet red has. The yellow was the housing my joycons had before. I cannot speak for all of the colors, but the scarlet is actually quite soft to the touch and I have noticed that it hides fingerprints pretty well. I did not follow the included instructions, and instead followed along with a YouTube video that demonstrated installing the same product. I used to mod and repair my own cellphones, so this was a cakewalk for me. I think this is an easy/intermediate project for someone who has never fiddled with electronics before. As long as you are patient and careful with all the tiny screws, youll be able to install this product. A pair of hobby tweezers and a magnetic parts dish are essentials. Hope this helps!
-

N
> 3 dayI just installed it today and so far Im really impressed. The quality is great but Ill update this if I ever notice any discoloration or other issues. I also didnt use the included buttons, more out of personal preference. The included ones look fine though. Consider buying another button set color before you disassemble it. After you install one, you probably wont want to do it again. A few tips Im not sure Ive seen others mention yet... - Set aside a bright space and some time to work. It can take 1-5 hours depending on your tech savviness and how delicate you can be. - Watch the youtube video once all the way through at 2x speed just to see the process, then watch it slower and pause step by step as you go. Its not hard but its tedious, so you should know what youre getting into. - Keep track of where each screw goes, and then make sure to use the same size from the new kit. I accidentally used too long of a screw in a joycon and I made a small bump on the front surface. Much farther and it would have been a hole. - I dont think the included screwdriver was bad, the real issue is the Switchs original screws, especially on the back plate of the switch body. But it helped having a second magnetic precision screwdriver set because youll be switching back and forth between phillips and tri wing a lot as you disassemble it. I used my own Y0 screwdriver for the trickier ones, with a rubber band. - Use a wide rubber band between the tri tip screw and screwdriver to give it more to bite onto. Dont wait until you already started stripping it, do this for every screw. Trust me. - Test buttons as you put it back together, not only at the end, to make sure theyre aligned correctly. I had problems with this a few times. The same goes for docking the joycons on the body; I had the release button turned 90° and it didnt lock correctly. - Since the shell holes arent threaded, dont overtighten them. When screwing directly into the shell, turn it just until you start to feel a little more resistance. Do what you can to avoid unscrewing and rescrewing in the same spot, because its easy to strip the plastic. - Last, squeeze the joycon shell together before you set the last 4 screws to make sure things are aligned, especially the ZR/ZL and any stray ribbon cables. (dont force it!)
-

Janet
> 3 dayHave had this set of sakura pink shells for about five months now, and played around 150 hours with them on. Ive mostly liked them. The feel is more hard silicone-y than the original plastic shells, its nice. I like that I can swap out the original backplate to my Switch and feel safe putting stickers all over it now. I havent had the peeling problem with any parts of these shells that some reviews mentioned. The reason I docked a star though is that one of the parts broke on me after four months: For each joy-con, there are three parts to the shell: the front half, the back half, and a middle piece inside that your trigger button attaches to. The part that broke on me was the middle part. It made it so my trigger button presses went from normal clicky to shallow and mushy, basically no tactile feedback. I had to open up my joy-con again and saw that a small piece of plastic that holds up the trigger button had completely broken off - in retrospect Im not too surprised since the middle shell piece does feel a lot flimsier than the original Nintendo part. I ended up replacing the broken middle part with the original joy-con shells middle part, but now my joy-con looks a little uglier: its only a little bit visible when your joy-con is assembled, but you can see the middle piece of plastics color in between the shoulder button and the trigger button of each joy-con. Looks kind of ugly if you have any original joy-con color there other than maybe the gray ones in between this sakura pink color. So yeah. Im disappointed about the loss of aesthetics, but Id consider buying these shells again because I liked them so much otherwise.
-

Abby Lynn Sullivan
Greater than one weekThis product is amazing!!! I was surprised that I got no written instructions but I found YouTube installation videos. The quality was great and it looks so flawless! I would totally buy again and would recommend!
-

Nicholas L.
> 3 dayAfter about three months of installing the replacement housing, I can say that these buttons and joycon shells are worth the money. Im glad I opted for extremerates over the other competition! The overall feel and comfort of the material is nice and soft to the touch. That being said though, I have encountered a very disappointing issue; the shells tend to stain very easily. Ive noticed that the back of my joycon shell is getting noticeably darker than the backplate of the Switch. I highly recommend getting a slim transparent case in order to preserve the quality of the material, all the while still displaying its beauty. That or be extremely careful to not dirty your switch because these stains do not come off even with water/alcohol. Overall, Im still happy about these products but in order to keep everything nice and pristine, you really have to take care of your switch.
-

john p.
> 3 dayExtremely nice outcome but man I didnt know what I was signing up for when I got this. Its a ton of tiny screws and clips involved with this one took me about 3-4 hours to install but looks great
-

Donald Mcsherry Jr
> 3 dayI like the design the dislike was how hard it was to change
-

Matthew Barcas
Greater than one weekI love the pastel sakura pink shell! I was very nervous when I first opened my switch as I’ve never done something like this before, but watching many videos on changing switch shells prior and during the process helped a lot. Just be patient and pause certain parts of the video if you’re unsure and watch it again and again until you get it. I took caution of what other people said about their tools so I bought a separate set of screwdrivers to install. It took me a several hours to completely change the shells and buttons (which I also bought from them) as I’m a bit slow and wanted to make sure everything was correct, but it was well worth it. I couldn’t be happier with how it looks together! I only wish there was plating for the front part of the switch, too. The material does feel soft and quite nice, but it doesn’t feel as sturdy as the original shell. We’ll see how it holds over the months/years tho. Overall I’m quite satisfied with this purchase.
