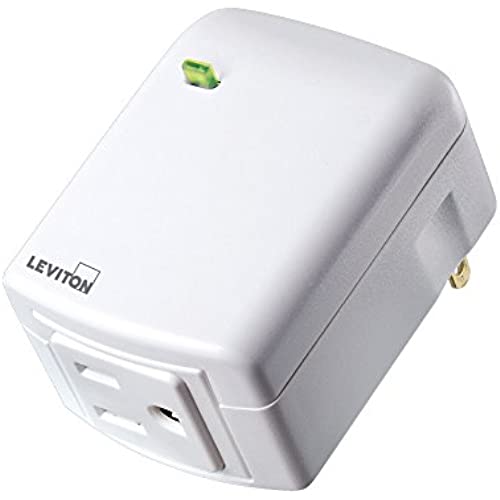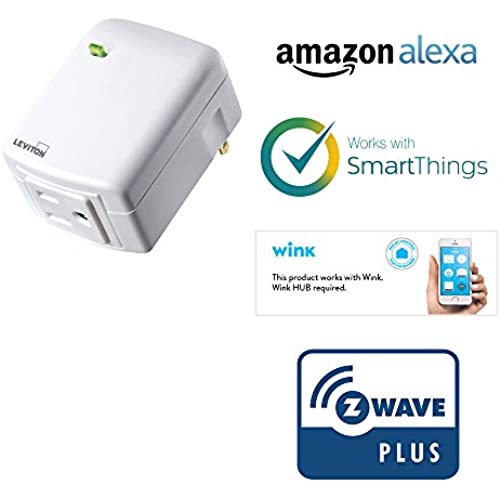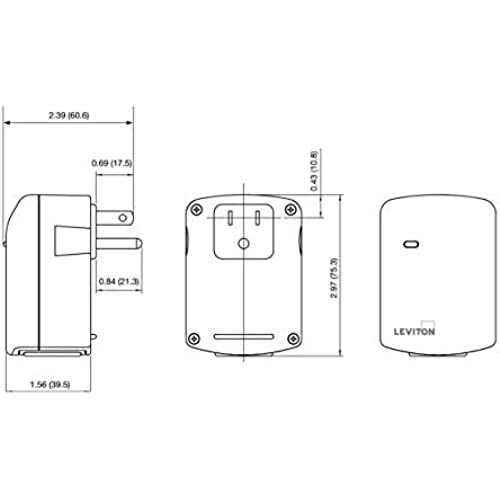


Leviton DZPA1-2BW Decora Smart Plug-in Outlet with Z-Wave Technology, White, Repeater/Range Extender
-

Robert B. Donohue
> 3 dayI filled our house with Leviton Smart switches and smart plugs all work great and are very easy to set up. Once the family learned the names of each everyone loves them. We had fun last Christmas with Alexa Routines turning on our Christmas lights setting them to music with one phrase. I start my day in my office activating my fans and light, and music with one phrase, has been fun and convenient. I set a couple of room to also auto off in an hour because the lights were always being left on but with voice control no big deal. Had a couple of issues in the beginning but phone support was great, they stuck with me until resolved.
-

JonF
> 3 dayRecently installed the new dimmer to control the lights outside my front door. We had 6 of the eco smart dimmable 60w equivalent candelabra bulbs installed and they wouldn’t dim even after setting the compatibility to LED. Eventually I purchased new 60w equivalent Phillips dimmable bulbs and after replacing all 6 I was able to dim the lights. I’ve read through both the Phillips and Leviton compatibly guides and near included this model switch. So if your lights are dimming it may be an issue with the bulb.
-

Juan
> 3 dayI bought mine used from Amazon Warehouse and it works just fine. It paired without any issues to my Vera Edge. The only complaint is the range is kind of lacking. If I dont position it just right where its located, the Edge will lose sight of it. This is an issue with a lot of my devices here in PR, though.
-

P.L
Greater than one weekJust order a replacement because could not make 1st item to be discovered by my Samsung Smartthings. After receiving the 2nd unit same problem. So call Leviton customer service to realized there is a step missing on instructions. Both units worked after following the customer service instructions. BTW they know there are wrong or incomplete instructions sent with item. I will list the steps so if you have any problems may be this can help you. 1- Plug the item in a working outlet 2- Press the button for 15 seconds to be sure unit is factory reset. After the light links red let go. 3- Press button for 7 seconds or until you see amber light blinking. 4- While amber light is blinking press button once more. If all went fine you should see a blinking green light. 5- Device is ready to be discover. Open your app and add the device.
-

S.Johnson
> 3 dayEXTREMELY disappointed. Ring will register the device and you can manually control the on/off for it, but you cannot setup schedules (supposedly you can if you pair Alexa with Ring, which I don’t want to do…I just want Ring standalone to handle my needs without Alexa listening in all the time). Returning mine! Will be getting Kasa HS103P3’s to just control simply. So sad Ring can’t schedule power outlets like every other competitor so I can leverage one solution. (this leviton smart plug is solid build though, so the product itself is good, just not as flexible to leverage in Ring and may have other limits with other hubs/systems)
-

kalvinr11
> 3 dayI have two of these and they work very well with my Wink Hub 2. Setting them up in Wink is easy and they pair quickly. The internal relay emits a fairly loud click when you activate the outlet. I like that there is a small button on the outside of the case for “manual” control. They even work through several walls and in my garage where my Christmas lights hook up. Now the lights come on before we get home and my son loves it.
-

AshertopiA
> 3 dayI swapped out three standard switches to these smart switches from Leviton. They are easy to hook up with very easy to understand instructions. Note that you need a neutral (white) wire. Once up and running, which took about 15 minutes, connecting to Alexa was very easy via Wink.
-

Martin
Greater than one weekGot this to control some kitchen lighting with our wink hub. Setup was incredibly easy. Installation was bought because the unit is really deep and sits almost all the way back in a standard electrical box. Packing the wiring and the switch in a box was nearly impossible, but its worth the effort. The switch paired perfectly with our Wink hub and works every time. You can control lighting with the switch itself or with the app on your phone. Seems to be well made and well designed. Cant attest to how it functions with other hubs, but with the Wink, we are happy.
-

Dopey
> 3 dayI have 2 Leviton switches and 11 Leviton Dimmers. 3 of the DZ6HD and 8 of the DZMX1. I just installed the DZ6HD and found that you cant configure it like the older dimmer switches. The older ones can be configured and fully customized thru the paddle itself. The advanced options on the DZ6HD such as Fade On Time, Fade Off Time and Preset Light Levels can not be programmed despite their instructions. Their instructions said they can be Configurable through the paddle as well as over the Z-Wave Network. However, the instructions dont tell you how to customize it through the paddle or how to do it over the Z-Wave network. I called their Technical Supoort and they told me that the instructions are wrong, you cant customize it through the paddles and there is nothing on the market that can customize those features at this time, not even their own app!. Why does this matter? For those that have these set on timers, schedules or link them to themes and have them set to dim, youll have to turn the dimmer up every time if you want full lighting. They will only go on as brigdht as the last setting. Also, if you like the ability to control how fast they fade on and off then youre out of luck in that regard also. I bought 3 of these units and cant return them. Im stuck with smart switches that are dumber than their previous version.
-

Relentless Researcher
Greater than one weekThis works great, once I got it properly installed. However, that took 3 days and about 7 phone calls to Leviton support. Thats mostly because I was doing a 3-way installation where one box has the load and line and the other box only has a 3-wire bundle (this is called a dead-end box). The instructions only cover a 3-way where one box has the load and the other box has the line. The diagram in the instructions also cost me hours of head-scratching- Im not an electrician, so maybe its my fault, but hopefully you can learn from my experience. Here are some tips and detailed instructions, based on my electrical setup. Maybe I can save you some time and frustration. 1. Put the connections in under the terminal plates. For some reason, their online video shows the method of wrapping each connection around the terminal screw. But getting the wires wrapped tightly was not always easy, and making changes was time consuming. Just stick the flat wire in under the plate and be done with it! 2. If, like me, you are not an electrician, use the wiring diagram for the single pole application for your dimmer and ignore the diagram for the dimmer in the 3-way. If you are looking at the front of your switch, you will see that your line black (hot/from power) goes to the black screw on the right top. The neutral (white) goes to the silver screw on the left top. And the load black (to the lights) goes to the red screw on the left bottom. If you compare the two wiring diagrams, youll see that the position of the YL/RED terminal appears to switch from the right to the left side of the switch. I thought this had something to do with the way the 3-way circuit worked. It doesnt. It has to do with some technical writer who wanted to draw a straight line from YL/RD to YL/RD. The customer support agent who finally helped me realize this critical mistake chastised me for not looking at the labels of each terminal. These labels are on a sticker on the back of the box, however, so if youve connected your ground, its really difficult to see the back of the box. 3. If you are installing a 3-way, make sure you get the DD00R-DLZ remote. DO NOT GET THE DD0SR. One Amazon page has a chart that says the SR is compatible. It is definitely not. 4. If you call customer support, realize not all agents are equally capable of helping you. One agent told me it was impossible to install this switch in a 3-way dead end setup. Luckily, I had already talked with 2 other agents who said it was possible, so I corrected him. He also said that I could leave out the line neutral, because it was unnecessary. Guess what? The line (power/from circuit breaker) neutral is absolutely necessary to complete the circuit. 5. In a 3-way dead-end setup, heres how you will have to connect the two switches. First, make sure you have a 3-wire bundle running between the two switches (this actually means 4 wires including the ground). Mine are black, white, and red, so I will refer to them using those colors, but as long as you have three wires and a ground, youre good to go. On the top right (Black terminal), I have the black line (power/ hot) under one side of the clamp and the Black Traveler that goes to box 2 under the other side of the clamp. Two wires- one terminal. Below that terminal, on the bottom right, I have the Red Traveler that goes to box 2 under the clamp of a silver screw (this is the YL/RD terminal). On the bottom left, on the red screw (RD terminal), I have the black load (goes to my lights). For the final terminal, on the top left (the WH terminal), I had to use a wire nut to clamp together the White/ Neutral line (from the power) with the White/ Neutral Traveler that goes to Box 2 AND a pigtail (a short piece of wire). The pigtail is then connected under one side of the WH clamp and the White/Neutral Load (goes to lights) is under the other side of the WH clamp. Two wires- one terminal. One agent told me I could pigtail all 4 wires together, but it was easier to just connect 2 wires to the terminal. 6. The other box was easy peasy, once I had Box 1 straightened out. The Black Traveler goes to top right BK terminal, the Red Traveler to the bottom right YL/RD terminal, and the White/ Neutral goes to the top left WH terminal.
